Destiny Warlock Helmet and Pepakura file

Status
Not open for further replies.
Hey bro awesome helmet build and the exact style I was looking for. I've printed out this pep file twice now and attempted the build but the file doesn't seem to have much in the way of direction so I've failed every time. This is my first pep build and was wondering if you had any pointers or could even send me a numerical matching system to help put it together? I know that's a lot to ask but I don't see myself getting this done without assistance. Thanks and stay epic!!

Hey mate,
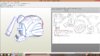
In Pep designer, go to your 2d menu and turn edge numbers on. Something like that. Can somebody help him? I'm away on business and have a different computer so can't see hte software. i know its in the 2d tab somewhere.... Something about edge numbers.

This is my third helmet, so I hear you. I point everybody towards @Cereal Kill3r and his videos. Subscribe on Youtube. Watch all of them. Pay attention. This dude did an INCREDIBLE job in creation of both his armor and these videos. I'm sure there are other techniques out there he didn't touch, but this level of effort is worthy of emulation.

 
Last edited by a moderator:
Wow that rurally helps a lot thanks for that, I used to work at an epoxy company so I figure I'll just use a scale for the mixes to make sure and avoid extra resin but that's a really good trick to mixing using the water. Thanks guys I'm attempting to match the tengu helm with this any other pointers much appreciated. Let's see how this goes.
 
Ghost Bear 027 Thanks for the tips, one more quick question. For the whole helmet piece, how much resin and bondo did you use? When you went to the store to buy stuff, what size bond did you buy?
 
Last edited by a moderator:
Ghost Bear 027 Thanks for the tips, one more quick question. For the whole helmet piece, how much resin and bondo did you use? When you went to the store to buy stuff, what size bond did you buy?
I used a gallon kit I bought. Also, I don't use Bondo exactly. I use some knock off brand. Mostly because I'm cheap. We have a place called Benny's here in Rhode Island that has something like "Car Max" brand or somesuch, and it's about half as much as bondo, and I swear both the paste and the resin put off about half as much vapor as the proper bondo version. The real stuff stings my eyes, and I ALWAYS wear my respirator with that stuff. Your lungs are worth the $30 respirator or mask.

But I used a gallon of the bondo over two separate builds, plus odds and ends for other projects. For me, it's easier to shave or sand out the shape I want than it is to build it exactly right. Easier to add more and cut it back to where i need it than continually add a little at a time. This doesn't apply to detailed areas of course, let the pepp do the work. Honestly though, I'd buy the smaller size for now and get the feel of it. I can't imagine you would use more than two, but go one at a time.

Also, for the details like lines, all done with a utility blade or with a very small set of files. Another idea I stole from a great mind (see video link above).

Little bites ;) Good luck and keep us posted. I'm really curious to see how fellow Guardians make their kit come out.
 
Last edited by a moderator:
Alright Ghost Bear 027 I just picked up the Bondo and put on a base layer of fiberglass resin only on the outside of the piece just to add some rigidity. Will make a Rondo mixture and put that on the inside, followed by applying a Bondo layer on the outside. I plan on sanding those parts down and then doing a Rondo glaze as you mentioned to smooth out any problem spots. Final sanding should wrap things up and I'll keep you guys posted on my progress. Much Aloha!
- Togo
 
Last edited by a moderator:
Ghost Bear 027 Quick question: I'm 75% done bondo/sanding. Is it fine that I use final finishing sandpaper at 400 grit? And also, how did you paint? Spray paint or something else?
 
Last edited by a moderator:
i used spray paint myself, but i paint a lot with acrylics too. you can get Brown Boots from krylon like i did for the back of the helmet, and just teh color match flat primer from krylon for the front. then use some lighter shades of grey and brown to add a nice weathing effect with dry brushing. it's surprising how easy it is to have it come out really nice.
 
Totally awesome helmet :)
Im currently running it right now in the game and its my favorite so far. I might have to try and build this one :)
 

Attachments

  • Warlock.jpg
    Warlock.jpg
    369.4 KB · Views: 4,200
Dude! this helmet is awesome! Just finished pepping it and there's so much room for customization. I should make a thread!
 
This is an awesome build and inspired me to do my first one. I'm doing a practice run on the pep as this is my first time doing it on this scale. Any tips on scaling? I've seen some scaling vids on how to measure but need some tips and hints on how to get that to translate to the printer. What size paper do you use? How do you get the file to print to the right size if using letter....etc. I think I figured out how to get the model to scale properly, now I just need help translating that to the printer. Doesn't seem to be a lot of print customization on the pep file. I'm using tamasoft's pep viewer.

Any help is appreciated! Once I get the pep done, I'll do an actual version on card stock and then will come back and bother you guys for build tips. Awesome site! Thanks!
 
@Ghost Bear 027

Thanks for a fantastic job on the warlock helmet. I ended up making my own out of this pep file and I like the results a lot!

10906318_10153080971503939_1720876403640888416_n.jpg

can't say it's the greatest photo, and the jaw didn't like to stay put or even go in the area it was supposed to be in, but I couldn't have built this without your pep file!

Much thanks :)
 
hey, i have printed out all the files and have just now relized that they dont have any numbers instructing me how to put them together... can you help me thanks :D :thumbsup @Ghost Bear 027
 
Last edited by a moderator:
Status
Not open for further replies.
Back
Top