Woohoo, double post!
So, finally an update. Quite a lot things happened since my last one. I should update more frequently, but I would describe myself as a lazy perfectionist. We will see how perfect this build turns out when I'm finished
")
. If I'm repeating what I already said, sorry, I don't remember every sentence of my further posts. But let's begin.
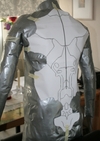
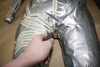
As I already said, the patterns are finished and I also transferred them onto paper. I used a special sewing-pattern-paper which is quite transparent. I cut pieces in the right size out of it (the grammar doesn't sound right, please correct me to help me improving my English skills) and taped them over my dummy. With a pencil I marked the angles and round edges and completed the shape later on my table with a ruler to get straight lines where needed.
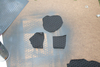
This didn't work in at every spot of my dummy, so I had to cut pieces out of it, for example between the legs.
Kinda strange moment...
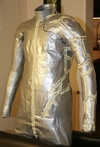
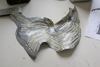
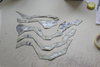
When I was finished with cutting out all the patterns, I taped them together again to see if they still fit to me and to each other. This step was necessary, because I had to make a few corrections here and there.
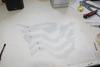
This is a picture of all the patterns taped together.
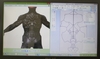
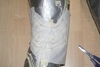
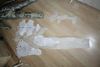
Applying the patterns to the fabric which is made out of 95% cotton and 5% spandex, was a lot of work. On the picture it looks a lot smaller than it is, I needed around two and a half meters.
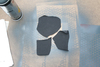
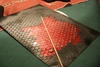
Now we're coming to a well known problem: the hex pattern.
I was inspired by someone who did the same at his Halo 4 undersuit. I cut myself a template and painted the pattern on the fabric, using an anthracite-grey, acrylic spray paint but any other dark grey will do it as well.
Before painting:
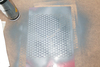
During painting:
Done:
One paint can later I had to clean the template, which was quite annoying, because it was blocked by too much paint.
I'm still busy painting the pattern and when I'm finished I will start sewing this thing together. I hope it works with these thousands of small pieces. I also need to buy another imitated leather-style fabric for the elbows, knees, thighs, etc. I'm planning to make the pads on the shoulder, hips, arms and legs out of EVA.
By the way; how much do you pay for EVA foam? In Germany it's quite expensive, just want to compare...
I'm also wondering if it's better to build the armor out of EVA (except the helmet and eventually the shoes) because the best patterns I know (which still have to be released to the public -.-) are for foam builds and also foam seems to be better for the Cortana-modified Mark VI suit with all it's edges and complex shapes (which I thimk could be added to foam more easily). I would say Pepakura is better for the normal Mark VI.
What would you guys say?
In general if you think I forgot something please tell me and any comments, advice and feedback are highly welcome.