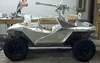
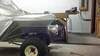
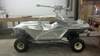
Making some fasts progress here. Any particular reason why you opted for a "weaponized" 'hog instead of a troop transport? It's one of my "pipe dream" projects to turn maybe a Jeep Liberty or something similar into a drivable TT Hog.
Making some fasts progress here. Any particular reason why you opted for a "weaponized" 'hog instead of a troop transport? It's one of my "pipe dream" projects to turn maybe a Jeep Liberty or something similar into a drivable TT Hog.
this is really cool, keep up the great work, I plan on doing something like this for my son (even smaller version lol) when i get back from deployment but outta composites, don't quite have your metal fab skills good sir lol
this is really cool, keep up the great work, I plan on doing something like this for my son (even smaller version lol) when i get back from deployment but outta composites, don't quite have your metal fab skills good sir lol
FIRST OFF: THANK YOU for your services! I look forward to your build please send me a message when you begin. Its fun to build but more valuable seeing the kids faces and the kids faces come out of grown men and women as well.
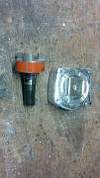
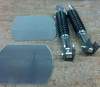
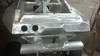
made a custom drive link. so I can now use any motor i choose. Button the motor in and now tech. i can put batteries to it and it should go. only right now it will throw all the power at once... i dont want that. I will be testing it sooner than later now.... i hope.
Have you ever thought of using a potentiometer or something similar attached to the gas pedal, so you get control of the amount of electricity delivered to the motor, effectively mimicking throttle?
Have you ever thought of using a potentiometer or something similar attached to the gas pedal, so you get control of the amount of electricity delivered to the motor, effectively mimicking throttle?
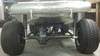
On your first page pictures, you gave us an idea of what the articulation of the suspension could potentially do (crazy btw!). Did it get limited much when you added the shocks?
And wicked build by the way! I can't wait to see the finished product.
On your first page pictures, you gave us an idea of what the articulation of the suspension could potentially do (crazy btw!). Did it get limited much when you added the shocks?
And wicked build by the way! I can't wait to see the finished product.
YES, I was so mad that the only shocks i could find have 6" of travel. 3" up 3" down. Stinks. I could always just install bump stop cans and let her rip.

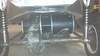
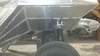
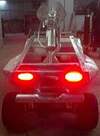
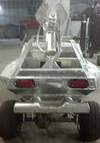
 i think a 4" aluminum bumper will handle the beating it will be getting.
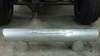
") but outta composites, don't quite have your metal fab skills good sir lol
but outta composites, don't quite have your metal fab skills good sir lol