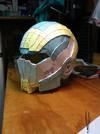
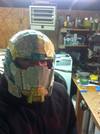
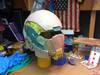
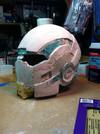
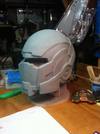
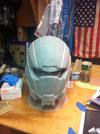
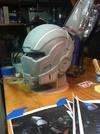
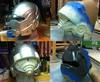
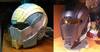
I'm updating this first post with a comparison shot of the helmet as it is currently with the pep when I first started it. I've seen a few folks do this and I think it lets people see what's going on quickly and then they can dive into the nitty gritty details...
Updated: 02/14/2014

Original post below
I've been interested in putting together a set of armor for a long time now and having found the 405th I've decided to finally give it a shot. The builds that you folks have done have been nothing short of astonishing and inspiring. If I can put some armor together that is a fraction as good as some of things I've seen I'll be pretty excited.
I've got a fair bit of experience building stuff but this will be my first time building something via pep. So I figure it makes sense to work out the kinks on some smaller stuff than a full set of armor. I've put together a couple of the high def hand plates to get a sense for how pep works and how resin goes. That went pretty smoothly. My end goal will be a set of Halo 4 armor but I'm going to run through the whole process on a less complicated piece: a helmet from Mass Effect - the N7 rebreather. I'm going to use this thread to document and trouble shoot the process.
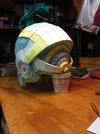
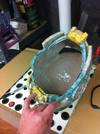
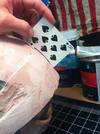
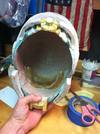
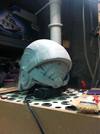
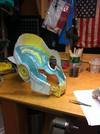
At this point, I think I've scaled the helmet appropriately. I added two inches to the height of my head to get a size for the helmet. Printed it off and began assembling it. I've got more than half of it together and the pic below was from yesterday...

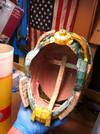
Its coming together pretty well - lots of detail in it. I'm hopeful that it will fit but I'm pretty sure I'm going to have to split it somewhere at the back to get my head into it. I'm starting to give some thought to where and how I'll accomplish that.
I expect to finish the pep soon and move into the resin process, hopefully life won't get in the way too much...
Thanks for checking out my first build!
Jester
Updated: 02/14/2014

Original post below
I've been interested in putting together a set of armor for a long time now and having found the 405th I've decided to finally give it a shot. The builds that you folks have done have been nothing short of astonishing and inspiring. If I can put some armor together that is a fraction as good as some of things I've seen I'll be pretty excited.
I've got a fair bit of experience building stuff but this will be my first time building something via pep. So I figure it makes sense to work out the kinks on some smaller stuff than a full set of armor. I've put together a couple of the high def hand plates to get a sense for how pep works and how resin goes. That went pretty smoothly. My end goal will be a set of Halo 4 armor but I'm going to run through the whole process on a less complicated piece: a helmet from Mass Effect - the N7 rebreather. I'm going to use this thread to document and trouble shoot the process.
At this point, I think I've scaled the helmet appropriately. I added two inches to the height of my head to get a size for the helmet. Printed it off and began assembling it. I've got more than half of it together and the pic below was from yesterday...

Its coming together pretty well - lots of detail in it. I'm hopeful that it will fit but I'm pretty sure I'm going to have to split it somewhere at the back to get my head into it. I'm starting to give some thought to where and how I'll accomplish that.
I expect to finish the pep soon and move into the resin process, hopefully life won't get in the way too much...
Thanks for checking out my first build!
Jester


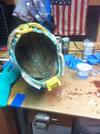
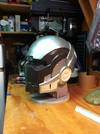
") I'm still trying to figure how I'm going to get this thing on. Hinging still seems like a great idea in theory but there are no real clean places to break it like on some of the iron man helmets I've seen. Perhaps I'll be able to remove some of the unseen parts on the bottom enough to get it to fit. A bit more research needed on this point... And then I'll figure out some kind of visor and of course LED's!
I'm still trying to figure how I'm going to get this thing on. Hinging still seems like a great idea in theory but there are no real clean places to break it like on some of the iron man helmets I've seen. Perhaps I'll be able to remove some of the unseen parts on the bottom enough to get it to fit. A bit more research needed on this point... And then I'll figure out some kind of visor and of course LED's!