3D Printed BR85HB SR Battle Rifle

Status
Not open for further replies.

Serin

Member
Hey peoples,

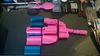
I've decided to really test this new printer I've acquired by printing out the entirety of the BR from Halo 4.
The original models come from a mix of WMHunterTLS's low res and high res models, and with the help of KingRahl I believe I've gotten them to a point where they may be printable.
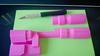
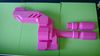
In this instance I've cut in the whole model in half so it can be either glued up later or moulded in halves later... Still haven't decided.

brbrbr_zpsa8fdbce5.jpg


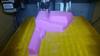
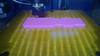
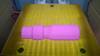
Staring with the barrel, printing in ABS plastic.

WP_20131117_001_zps9ec0bd05.jpg
WP_20131116_014_zps790f47e1.jpg

The file I'm using can be found here:
http://www.thingiverse.com/thing:174602
 

Attachments

  • brbrbr_zpsa8fdbce5.jpg
    brbrbr_zpsa8fdbce5.jpg
    19 KB · Views: 249
  • WP_20131117_001_zps9ec0bd05.jpg
    WP_20131117_001_zps9ec0bd05.jpg
    49.1 KB · Views: 237
  • WP_20131116_014_zps790f47e1.jpg
    WP_20131116_014_zps790f47e1.jpg
    47.9 KB · Views: 231
I think 3D printing is going to help a lot weapon wise, armor not so much. rah-66 has released some parts for an assault rifle to be built around a nerf gun for example. Do you plan on releasing these parts once youre sure they work or are you keeping it private?
 
I think 3D printing is going to help a lot weapon wise, armor not so much. rah-66 has released some parts for an assault rifle to be built around a nerf gun for example. Do you plan on releasing these parts once youre sure they work or are you keeping it private?

Indeed!
I think it may be useful for the smaller parts of the armour making process, the forearm sections for instance and helmets(like BigRedFrogs Chief bucket).
I do indeed plan on releasing the files after I've checked that they actually work, given the model was given out openly it'd be rather uncool to keep them private.
That said, I am planning on selling a few just to recoup the filament costs eventually.

Fantastic! I can hardly wait to see the finished product.

Neither can I! :D Thanks for the help btw!
 
Sorry for the double post...
Last print for the day/night.
Still working on my printers calibration, so there are a few little defects already showing up but I should be able to sand/fill them out once it's assembled.

WP_20131117_007_zpsf21f3051.jpg
WP_20131117_008_zps0a1d6295.jpg
 

Attachments

  • WP_20131117_008_zps0a1d6295.jpg
    WP_20131117_008_zps0a1d6295.jpg
    47.7 KB · Views: 231
  • WP_20131117_007_zpsf21f3051.jpg
    WP_20131117_007_zpsf21f3051.jpg
    39.8 KB · Views: 234
Probably close to 50 individual pieces after I've cut them all down to be sure they don't come unstuck from the bed :p
Guessing at least 2 rolls of filament worth in total.

Kind of annoyed that anything under .2 infill gives fairly crappy top layer results... I was liking the conservation of material I had going on!

Anyway,
Uj3qrkm.jpg
 

Attachments

  • Uj3qrkm.jpg
    Uj3qrkm.jpg
    497.6 KB · Views: 215
...Kind of annoyed that anything under .2 infill gives fairly crappy top layer results... I was liking the conservation of material I had going on!...

Try increasing the number of solid top layers, maybe somewhere from 3-5.
 
Try increasing the number of solid top layers, maybe somewhere from 3-5.

Yeah, I worked that out eventually :p
Thanks though, helpful to know that I'm not going (relatively) mad in my efforts to calibrate.

Thats great :) i want to do the same, but 3d printers are expensive :'(
How expensive is expensive?
My printer was about $800aud, and arguably one of the best designed open source printers, the Ordbot Hadron is under $2000 all in.
Totally worth saving if you're into the fiddling, grunt work and the ability to go off for coffee while the printer does all the work :p
 
It's still cheaper to buy a Dremel, a set of Xacto craft blades, a good hand-file set and a heat gun for ABS plate stock, but there's more R&D involved with any model you do using that method. The results are spectacular and incredibly durable though. Every method has its advantages. :D
 
Update time!
After killing the only sheet of Kapton tape I had, I found a sheet of glass and had to recalibrate...Again... Apologies for the slowness.
The 3 pieces on the bottom of this pic are the previous slices which were useless and poorly done, and the 3 above are the good ones partly glued up.
About 9/40 done pieces at this point...
uZyvllR.jpg


And here's a little clip of part number 10.

uZyvllR.jpg
 
Last edited by a moderator:
That's dependent on how much infill you set and how fast you can push the printer, in this case.. Not very.
The rigidity plays a fairly big part in how quick you can move the printhead without compromising accuracy.
The top right piece took about 2 hours to print.
 
wow... i want a printer, too...
but why did you do the round parts, like the barrel, not in a round shape? is that on purpose? or due to the printers (dis-)abilities?
with this printer, would it be possible to print without filling, like a self-supporting shell?
i'm jealous...
 
Get one! :D It's awesome being at the cutting edge of tech :D

It's just the model I'm using, nothing to do with the printer.
It was apparently made as a 'low-poly' version of a model that previously had about 2 million faces(which was all but impossible to work with).
So I plan on smoothing everything with a little sanding and an acetone vapor bath eventually, but not until the whole thing has been printed and assembled.

Printing overhang is a difficult thing to do without support, it can't print on nothing.
One could hollow out models and print with inner support material, but currently I don't think that'd be all that much better than the infill.
 
Update mkIII
Threw replacement kapton tape in bin, kept glass bed.
Still many hours of printing to go...

xIIawpH.jpg
 

Attachments

  • xIIawpH.jpg
    xIIawpH.jpg
    624.6 KB · Views: 227
Status
Not open for further replies.
Back
Top