Hey all, been a while since I posted a thread up here on the forums. Been busy with tons of other non-Halo props and costumes, but lately I've been upgrading my Reach suit. I've been desperately wanting to re-build the boots, for multiple reasons:
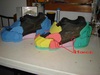
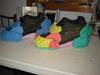
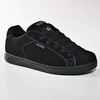
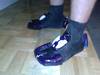
1. They were too bulky, IMO. Which is why I'm building them smaller, both with thinner foam and around a smaller shoe. (Some of you may recognize Vibram 5 fingers in the photos.)
2. They couldn't flex while I walked. They are absolutely stiff, and therefore walking was more awkward then I'd like it to be. (This point brings me to my quick tip)
3. First boots were not to my liking, but they were just that, my first ones. Now that I've got some practice, I'm sure I can make some I'm happy, and comfortable, wearing.
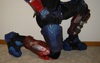
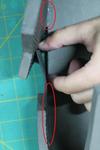
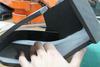
So here is my quick tip: through a series of photos, I hope I can show you how I built around the Reach style boot to allow for some flex while walking/kneeling.
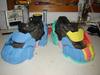
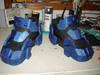
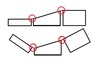
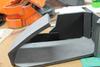
The areas circled in red are where I've glued the foam together.

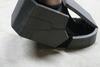
Inside View


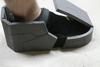
Outside View


1. They were too bulky, IMO. Which is why I'm building them smaller, both with thinner foam and around a smaller shoe. (Some of you may recognize Vibram 5 fingers in the photos.)
2. They couldn't flex while I walked. They are absolutely stiff, and therefore walking was more awkward then I'd like it to be. (This point brings me to my quick tip)
3. First boots were not to my liking, but they were just that, my first ones. Now that I've got some practice, I'm sure I can make some I'm happy, and comfortable, wearing.
So here is my quick tip: through a series of photos, I hope I can show you how I built around the Reach style boot to allow for some flex while walking/kneeling.
The areas circled in red are where I've glued the foam together.
Inside View
Outside View
")