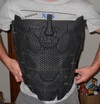
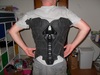
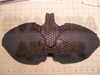
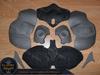
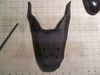
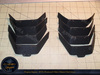
On the back it's definitely easier to see the rectangular "panel" borders from where the molds meet and recognize them as what they are, which does, in a way, slightly detract from the overall aesthetics. On the front, however, the only really noticeable border is on the left, and has more of a "battle damaged" look to it, like this guy took a knife in the side during combat. All in all, though, stunning results.