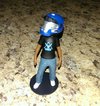
Spartan IV, I thought your avatar looked really similar to what I had sitting on my shelf, but there's no doubt you put your own twist on it and it turned out beautifully.
")
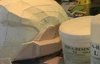
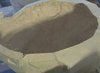
RYNO, so far its looking great, but along with what Spartan IV said, wouldn't it be easier to add detail now than post-molding? And plus, at that point you can make multiple copies of something that already has quite a bit of detail on it. Also, if you would like any extra references that aren't in the thread posted above, feel free to let me know.