You are using an out of date browser. It may not display this or other websites correctly.
You should upgrade or use an alternative browser.
You should upgrade or use an alternative browser.
Halo 4 Multiplayer Build: Will I finish this time?
- Thread starter Rheiner
- Start date
- Status
- Not open for further replies.
Back once again! This time I have more to update upon. I'm ditching the Soldier helmet for the Wetwork because of the coolness factor, just as a side note.
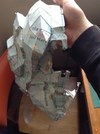
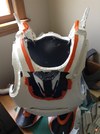
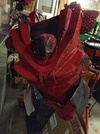
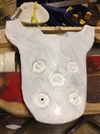
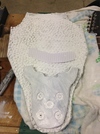
Selfie with the Oceanic chest on! I've done a lot to it, and even decided to seal it with some exterior white latex paint. It's been doing a great job, even though I have been layering it on:

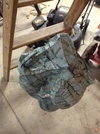
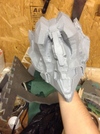
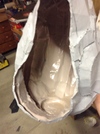
The back is coming along good:

I've used caulk like "foam-bondo" to help reshapen a side. It looks rough in the picture, but by the next update you should be able to see how much better it looks:


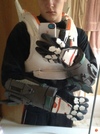
I couldn't resist taking a picture with mixed suit pieces:

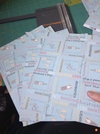
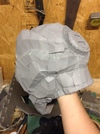
Also, I went to begin the Wetwork, and ran out of cardstock. Luckily, I have a scrap booking family friend who gets too much scrap booking supplies:

Let's just say, I'm going to have quite the romantic helmet!
Until next time!
Selfie with the Oceanic chest on! I've done a lot to it, and even decided to seal it with some exterior white latex paint. It's been doing a great job, even though I have been layering it on:
The back is coming along good:
I've used caulk like "foam-bondo" to help reshapen a side. It looks rough in the picture, but by the next update you should be able to see how much better it looks:
I couldn't resist taking a picture with mixed suit pieces:
Also, I went to begin the Wetwork, and ran out of cardstock. Luckily, I have a scrap booking family friend who gets too much scrap booking supplies:
Let's just say, I'm going to have quite the romantic helmet!
Until next time!
Attachments


After a lot of mouth pain from wisdom teeth coming in, exam reviews, and Mariokart 8, I'm finally getting in an update. I crafted up the shoulders, which I've already started prototyping up a paint job (couldn't resist!)

The chest is on it's final layer of touch up white paint, and I'll be doing the final touches on it. I'll get a pic up as soon as I can.
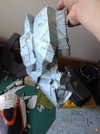
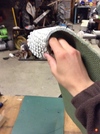
As far as the Wetwork pep, I'm at this point:

The file somehow got screwed up and was giving me flaps on both sides of some parts (around where 70 is, in case anyone wants to fix that.)
Hopefully I'll be back with some more paint progress! Until next time, I'm off to finish Reach!

The chest is on it's final layer of touch up white paint, and I'll be doing the final touches on it. I'll get a pic up as soon as I can.
As far as the Wetwork pep, I'm at this point:
The file somehow got screwed up and was giving me flaps on both sides of some parts (around where 70 is, in case anyone wants to fix that.)
Hopefully I'll be back with some more paint progress! Until next time, I'm off to finish Reach!
Attachments

UPDATES!
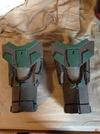
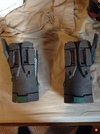
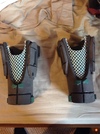
The shoulders got all finished now, with paint at least. They'll be mounted to the biceps/triceps when I finish those soon:

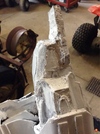
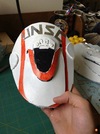
I haven't had much time to work on the helmet, but this is where that is:

Definitely one of the more challenging peps I've had to do, but I'm eager to see where it goes.
The chest is just looking fantastic:

And the backside:

I'm still working on getting it painted and everything, which is working out decently well.
I'll try to get more updates on as I work on stuff. Constructive criticism is appreciated! Rock on 405th!
The shoulders got all finished now, with paint at least. They'll be mounted to the biceps/triceps when I finish those soon:
I haven't had much time to work on the helmet, but this is where that is:
Definitely one of the more challenging peps I've had to do, but I'm eager to see where it goes.
The chest is just looking fantastic:
And the backside:
I'm still working on getting it painted and everything, which is working out decently well.
I'll try to get more updates on as I work on stuff. Constructive criticism is appreciated! Rock on 405th!
Attachments

gorgeous, really love the paint jobs over the plasti-dip. Looks fantastic so far!
Thanks! It means a lot. The paint jobs are one of the most difficult but most exciting part about building for me!
UPDATE:
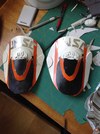
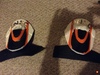
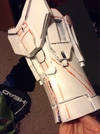
I made some serious progress, working sunrise to sunset on the forearm pieces... And let me tell you, I am very impressed with what I was able to pull off:
I'm very proud of my work on these, I even surprised myself! I've come to realize that cheating out on detail is cheating out your entire build, so unless it's really difficult, I'm going to give a bunch of details a shot!
But first, let me take a selfie:
That's it for this update! Working on some more stuff that will be coming soon.
Attachments
It's taking shape quite nicely. You can see a great improvement in your foam skills.
Looking very nice man! keep up the good work!")
-Ian
-Ian
Looking very nice man! keep up the good work!
-Ian
It's taking shape quite nicely. You can see a great improvement in your foam skills.
Thanks a lot guys, it keeps me going!
Speaking of which, I have a lot of progress to report from just today. Progress from both the white suit and the "long lost forgotten" red suit.
For starters, I mounted the white shoulders on a strap, which will wrap around my arm. I'll be attaching them together with elastic (doing that right this minute actually) and they'll expand, attaching around my biceps:
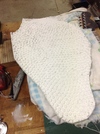
Next up, we have the foam for the undersuit on the white armor. The biggest flaw on the red suit was the stiffness of the undersuit, and so in order to create flexibility, I used a foam camping mat, about 1/3" thick:
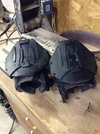
The Oceanic shoulders got plastidipped:
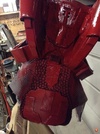
The red suit chest assembly got the paint treatment, and the spinal armor and butt plate got the finish:
The Wetwork helmet got resined:
Last Recruit forearm got painted:
And finally, I drew the lines for paint on the white forearms:
Long update! I can't wait to work more on them. I want to finish the red one by this week at the least, so let's see where I get with that. So long!
Attachments
-
 yzehe5a4.jpg327.3 KB · Views: 109
 -
 evumupah.jpg391.6 KB · Views: 98
 -
 naty3yzy.jpg323 KB · Views: 100
 -
 umebaze7.jpg334.3 KB · Views: 110
 -
 ma6urugu.jpg311.9 KB · Views: 131
 -
 e2are4eb.jpg307.9 KB · Views: 109
 -
 munymyve.jpg353.3 KB · Views: 113
 -
 7u2e3ara.jpg307.5 KB · Views: 107
 -
 3ere8uje.jpg297.2 KB · Views: 119
Update again, I did some more work on the undersuit, painting in the cracks and things like that:

I also did some work on the crotch plate, I tried to make it as identical to the other one as possible. Note it is still in the middle of painting:

And this is the assembly, with a template for the ab plate laid on as well:

I hardened the helmet (rondo method) and primed it:


That's it for today. Now to relax and play some Shovel Knight before I rest up for another day of hard work.
I also did some work on the crotch plate, I tried to make it as identical to the other one as possible. Note it is still in the middle of painting:
And this is the assembly, with a template for the ab plate laid on as well:
I hardened the helmet (rondo method) and primed it:
That's it for today. Now to relax and play some Shovel Knight before I rest up for another day of hard work.
Attachments
King of Gondor12
Member
Awesome job mate, can't wait to see it completed, I am not sure if it was just the camera but the paint on the chest piece looks a bit rough, keep up the good work!
Awesome job mate, can't wait to see it completed, I am not sure if it was just the camera but the paint on the chest piece looks a bit rough, keep up the good work!
Thanks! I need to touch up the white in some areas, as somehow the trash bag I used for masking got holes in it.
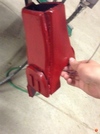
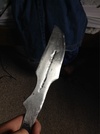
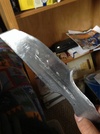
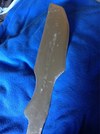
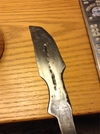
Update on a little side project:
I'm trying my hand at metalwork to try to create the Halo 4 assassination knife:
It's a little rough still, but I need to harden and temper it yet. I'll be working on that and updating on the helmets and suits soon.
Attachments
King of Gondor12
Member
I am curious, what tools did you use to make the knife, I am a blacksmith (whenever possible). Nice job, I would try to flesh it out a bit more, if you can try to get the edge of the blade more consistent.
I am curious, what tools did you use to make the knife, I am a blacksmith (whenever possible). Nice job, I would try to flesh it out a bit more, if you can try to get the edge of the blade more consistent.
To get the shape, I used a hack saw and a saws-all. I then used a carbide bit on the air compressor as well as a bench grinder to get the shape. Because I was doing most of this by hand, and being it was my first time ever doing metalwork, I wasn't expecting much out of it, but I'm surprised at the turnout.
I had to get really creative with tempering it as I have no forge, so thankfully we had quite a large bonfire on the 4th. I got to impress some of my cousins (who are into Lord of the Rings and medieval culture in general) with the whole process. That, in my opinion, made this worth it so far.
But yeah, I'm going to start cleaning it up, sanding it up, and sharpen it once I get the handle all made.
Small update on how it's coming along. I did a lot of undersuit stuff, as well as strapping. This is what it looks like right now:

I would have had more pictures, but I completely forgot as I was thinking up ways on how to combat paint cracks. The latex paint I thought would do well isn't exactly doing the best, but I can deal with it. Any suggestions? I want to avoid redoing stuff.
I would have had more pictures, but I completely forgot as I was thinking up ways on how to combat paint cracks. The latex paint I thought would do well isn't exactly doing the best, but I can deal with it. Any suggestions? I want to avoid redoing stuff.
Attachments
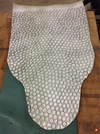
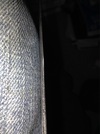
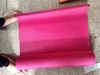
So I found some great undersuit material, and albeit it being pink, when covered with mesh and painted black, should do great for the sides!

At the store, these yoga mats cost about $30-35. I got this at a garage sale for 50¢. Steal? I think yes!
I'm working on 3 separate commissions right now, so progress is slow. I'll try to update properly as soon as I can.
At the store, these yoga mats cost about $30-35. I got this at a garage sale for 50¢. Steal? I think yes!
I'm working on 3 separate commissions right now, so progress is slow. I'll try to update properly as soon as I can.
Attachments
PSYCHO ARMY
New Member
great use of all your materials!
King of Gondor12
Member
Awesome job mate, super curious as to how the blade turned out, keep it up!
Awesome job mate, super curious as to how the blade turned out, keep it up!
I'm going to be finishing up the knife once I can get done with the helmet, which is coming to a close very quickly here. Stay tuned!
great use of all your materials!
Thanks! It means a lot!
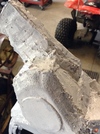
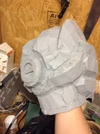
I have just a small update on how the helmet is coming. I'm almost done with bondo and shaping, just have to raise some areas, sand others, and fill small spots. Then she'll be ready for paint!
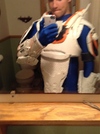
I finally found some of this stuff too (sorry about the snapchat picture, I had to show my friend):

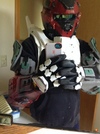
And I had to take a helmet selfie while I was at it, I'll try to get a whole armor shot soon:

Also, I was conversing with a friend and she brought up a very good point. Undersuit generally need to have texture to meld the suit together, and a morphsuit just doesn't have it. I'm thinking of making a "morphsuit" out of a set of black long johns, like I did before with my Mark VI build:

So I'm going to have to keep my eye open at Goodwill or online sales. Wish me luck, and suggestions would be appreciated!
- Status
- Not open for further replies.
Similar threads
- Replies
- 29
- Views
- 809
- Replies
- 27
- Views
- 1,410
Similar threads
- Replies
- 27
- Views
- 1,410