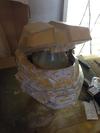
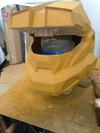
Still SOOOOOO much sanding left to do on the front and side sections.
im still knocking off the corners and sanding the resin'd model to get the finished shape rather than build up the shape with bondo... The biggest problem iv found with this is that the polyester resin doesn't soak into the tabs very well, when you sand the model you often break through to the tabs and expose a patch of paper :-(
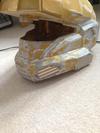
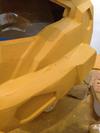
bondo doesn't stick very well to the paper so iv been roughing up the paper with sand paper and then spraying with filler primer. The spray paint seems to soak into the paper letting the sand it back nice a smooth.
big thanks to Drack and RobTC.... The model had some paper tabs exposed during the sanding where the resin hadn't soaked all the way through and these guys suggested a spot of superglue on the exposed paper... It works brilliantly
The parts to install the visor are on order and there is just a small amount of sanding to do round the back before I get busy with the paint so I thought I would take a quick break from sanding and add a few details...
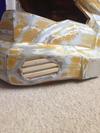
in the ref pictures I'm using the scout helmet has three stripes in the recess at the front, I went to a model shop last week to pick up some styrene box section to do this but the guy in the shop suggested balsa wood soaked in thin superglue.
wow great work clean and smooth just great gives my a lot of hope for mine just wondering how long did it take you to finish the pep' and what glue did you use,
thank so much for the positive feed back
I used wood glue for all the card work and it took about 8 hours to finish just the pep work.
iv spent hours here and there doing the resin and sanding over the past few weeks... Iv lost count how many hours sanding TBH but it's been a lot.
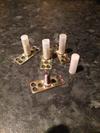
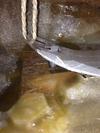
i got these in the post today so I should be able to fit my visor at the weekend
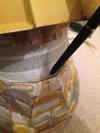
Quick blast of colour, more to test the paint iv chosen for my airbrush than anything else.... Still it's a welcome brake from the yellow primer if been flatting back for the past few weeks
^ correct... Once it's pulled in at the front it should be a good solid fit... If not I do have two more of the studs I can use towards the back if needed
all being well the visor should be trial fitted by Sunday night (cross's fingers)
Well, didn't get as much time as I wanted on the helmet today :-(
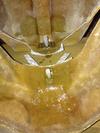
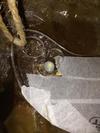
i got another layer of GRP over the visor mounts on the inside and test fitted the visor. It's not a bad fit, there is a gap at the front with just enough room to get the tip of a pen between the visor and the model so that shouldn't be to hard to fill
Im also going to need to use the spare mounts I have to pull the back of the visor flush against the helmet as I also have a small gap at the back
I would just cover the visor in tape. Apply a nice thick bead of bondo all around the inner lining (edge), then fasten the visor down and have it all squeeze out. Just make sure you don't start caving away or removing the visor until it's quite hard. Otherwise it would all get pulled away.
Thanks master builder
I was thinking roughly the same idea with the bondo. Iv very little experience with bondo, how easily does it crack or get damaged once it's fully cured?
and does adding resin (even a little bit) make it any stronger???
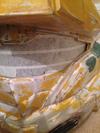
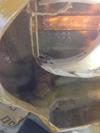
started glassing in the back visor mounts the visor is bolted in at the front and bent up out of the way to make sure the back mounts line up correctly
Thanks master builder
I was thinking roughly the same idea with the bondo. Iv very little experience with bondo, how easily does it crack or get damaged once it's fully cured?
and does adding resin (even a little bit) make it any stronger???
Bondo should be strong enough as is. It just doesn't really bond to the base very well until it's far into the curing process, but once it's cured, it will hold to the base almost as if it was one piece (with the last bondo layer).
So basically what I was trying to say is: don't start carving or scraping away any access bondo until it's harden good (like half an hour), otherwise you would have a good chance of pulling right off and ending up back at square one.
Bondo doesn't crack at all really, it's quite flexible, and it doesn't expand or contract.
I just used the same method on my EOD helmet and it worked great.
So ya, just apply, squeeze and fasten, let it harden a good bunch, then remove visor, clean and sand!
")