Halo 4 BR85HB SR (Pic heavy!) - First Major Project

Status
Not open for further replies.
Quick update because I appear to have gotten a whole bunch of pics today. Magazine so far is 2 days' work.

This took the entire first day (after adding the remaining dimensions):

20150108_193214728_iOS.jpg

This is my Monday afternoon, basically:

20150112_173343271_iOS.jpg

20150112_180546844_iOS.jpg

20150112_221230424_iOS.jpg

20150112_232356175_iOS.jpg

20150112_233214606_iOS.jpg

20150113_000140089_iOS.jpg

20150113_000155069_iOS.jpg

20150113_002131243_iOS.jpg

20150113_012938971_iOS.jpg

20150113_020959815_iOS.jpg

The sticker from the matboard. I'll make sure this is smoothed down:

20150113_021110824_iOS.jpg

In place, more or less:

20150113_021147234_iOS.jpg

Here's some measurements for @Arcanine. This is how much space is available in back. Much more space available in front of the magazine than I thought there'd be. If you don't do a moving charging lever, that whole chamber section becomes available for use as well.

20150113_021538889_iOS.jpg

It may be that a pair of large diameter ultra-low profile speakers will fit in each side of the magazine, but I dunno. We'll see. It's a seriously hefty stock on the BR85, that's for sure. I may mould the magazine in two parts, so that people can access the bottom of the main compartment to cut it open and use it for something.

Tomorrow I do the "lid" and the exposed round. There was much discussion over in the ammunition thread about what exactly constitutes a HB BR round, but in the end I'm sticking with the asset dimensions of 13x80mm. That leaves room in the magazine not for 36 rounds, but 13. Nice one, Bungie. :p

13rounds.jpg

All for now. Hopefully work begins on the stock itself by tomorrow afternoon. I'm starting to be thinking about ordering silicone! I'll do castings on demand, so purchasers, be aware: your order may take 3-4 weeks to arrive, since I have to order resin, wait on delivery, make the castings, then make up the shipping container and ship it out.

I just got an email from Digi-Key a few minutes ago, too. Switches have shipped, so hopefully they'll arrive by the end of the week, or maybe early next week.
 
\
Tomorrow I do the "lid" and the exposed round. There was much discussion over in the ammunition thread about what exactly constitutes a HB BR round, but in the end I'm sticking with the asset dimensions of 13x80mm. That leaves room in the magazine not for 36 rounds, but 13. Nice one, Bungie. :p

View attachment 7981


Nor would 32 rounds 7.62x51s fit into an AR (or 60 into the MA5B). Maybe of .22 long rifle, but that's about it. That's OK because no one really wants to haul around magazines holding 32 rounds of 7.62x51. All the modern weapons in that caliber run magazines of 20 or jump to belt fed.

Looks like great progress this weekend.

Redshirt

That was the general conclusion we came to over there too. I'm just sticking with the "true, unrealistic" version because that's what the model's built around and the point of propmaking is to make what it is, not what it shoulda/woulda/coulda been in the real world. Or all those Blizzard props would vanish pretty quick. :p. The whole BR85 in general isn't very realistic, geometry-wise. The barrel/chamber/bolt/receiver are all out of alignment, for a start.

Anyway, moving on, I came up with a rough diagram this morning on the back of the magazine dimensions of what the round should be, based on a combination of the very low poly/low texture res asset, and the BR55/MA5B rounds in The Art of Halo 3. I've amalgamated them into something that looks about right according to how it's supposed to perform, and now have to figure out how I'm going to lathe it without a lathe.

BR85HBSR_M634XHPSAP.jpg
 
Anyway, moving on, I came up with a rough diagram this morning on the back of the magazine dimensions of what the round should be, based on a combination of the very low poly/low texture res asset, and the BR55/MA5B rounds in The Art of Halo 3. I've amalgamated them into something that looks about right according to how it's supposed to perform, and now have to figure out how I'm going to lathe it without a lathe.

View attachment 8044


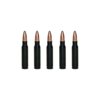
The Halo Encyclopedia lists and shows rounds that are pretty much the current 7.62 NATO round (7.62 x 51) or .308 Winchester cartridge. Just obtain an inert one of those or get your local gun shop to get you some dummy ammo (for classroom training).

$14.95 for 5 dummy .308 rounds from Brownells,com. Dummy rounds are missing the primer on the bottom so it's very apparent you don't possess live ammo.

l_669-308-005_2.jpg
Don't know if that helps or if you were really looking to make something. Good luck.

Redshirt
 
That is actually of interest, though not for this project since I knocked up a passable version of my diagram earlier in an hour or so. Dummy rounds could be useful for a variety of things though, not just prop magazines. Good call.

Mag's more or less done, bar some paint and a little smoothing, so it's update time!

20150113_175821276_iOS.jpg

Not something I plan on doing regularly, and I was careful to keep side loads as minimal as possible, but it did the job this time:

20150113_180043086_iOS.jpg

20150113_180849326_iOS.jpg

20150113_191155098_iOS.jpg

20150113_202445827_iOS.jpg

20150113_204408308_iOS.jpg

20150113_205502059_iOS.jpg

20150113_210112334_iOS.jpg

20150113_212751578_iOS.jpg

Oops, had a little sanding accident. Time for a rim graft:

20150113_215111799_iOS.jpg

Lookin' good:

20150113_223655249_iOS.jpg

Getting some Bondo on:

20150113_231019346_iOS.jpg

20150113_231104331_iOS.jpg

20150113_235918140_iOS.jpg

Knocked the holes in and made a little latch just freehanding the Dremel 1/8" router bit:

20150114_011215846_iOS.jpg

Done!

20150114_011400177_iOS.jpg

I'm hoping all those little nicks and dents look good with the paint on, since around the top I was planning on leaving the "physical wear" as-is. It may not look that good though, in which case I'll fill it. We'll see, I guess.

Mag well next, should be pretty straightforward, then it's time to figure out exactly how this crazy contraption can fit together! I think I'll start some paint tomorrow, too, so I'm not getting too behind on that score.
 
Not something I plan on doing regularly, and I was careful to keep side loads as minimal as possible, but it did the job this time:

View attachment 8061


View attachment 8064


Lookin' good:

That is great! I used my drill press as a lathe for my Splaser barrel. Mounted the aluminum outer barrel on a rubber sanding drum and started grinding grooves with files. I'd like to say that it didn't end in the barrel flying across the garage, but hey, I focus on the results. It worked! (eventually) No, drill presses really do not like side loads.

Great ingenuity and your dummy round looks the business.

Redshirt
 
I was actually going to suggest a drill!

Just use a nail in a board for your other end (don't know what you call it). But that would keep that piece from flying out, and it would keep the load off the drill/drill press.
 
I was actually going to suggest a drill!

Just use a nail in a board for your other end (don't know what you call it). But that would keep that piece from flying out, and it would keep the load off the drill/drill press.

If I do it again, I'll use my regular hand drill (I have a big DeWalt 10A 1/2" one) in a clamp- or possibly my bench grinder- and use your nail-in-a-board for the tailstock. Of course, at some point I'm going to build/buy an actual lathe, so it may not come up again, I don't know.

Cory Doctorow just tweeted a similar idea to mine for the safety mechanism. It's a "Rube Goldberg light switch":

B7Sr3cLCEAAjYsc.jpg large.jpg

Just take off the outer ring and cogs, and just have the central gear as the hub of the safety. USPS says my switches are out for delivery today, so I should be experimenting with that stuff by the weekend, if all goes to plan!

For this afternoon, I'm about to get started on the mag well and side scales. So close to completion! *bounces with excitement*
 
Cory Doctorow just tweeted a similar idea to mine for the safety mechanism. It's a "Rube Goldberg light switch":

View attachment 8083

haha, saw that on reddit the other day, good idea to put it to use.

This build keeps me coming back, always look forward to the pic dumps with thoughtful explanations :thumbsup

I think you've a lot of the community that's following this progress bouncing with excitement/anticipation, haha
 
My initial idea was slightly different, with only one lever, but I prefer that idea. It's more adjustable to the physical parts, though making a 20mm long version may be a little tricky.

Glad you're enjoying it. :D Hope all the lurkers are too, I doubt those 3800 views are just the 4-5 regulars. :p

Current status:

Much like the last part, measuring, error checking, remeasuring, reconciling errors, measuring adjacent physical parts, reconciling digital against physical measurements and then verifying total reconciliation seems to take up an entire day. I do however have the back and one side of the mag well cut out, so the rest should fall into place tonight.

20150114_230334381_iOS.jpg

Switches arrived! USPS First Class was crazy fast for a change, maybe there's a DigiKey shipping centre nearby. Anyway, I think I'm going with the middle two. For reference, that "C&K" labelled switch on the right is 8mm(11/32") long. They're pretty tiny, except that big power switch. I like that one's slightly longer travel and more positive "click", but it's pretty huge for mounting and I'd have a hard time actually attaching anything to it. It's really for injection moulded triggers. The smaller one, on the other hand, has a more subtle but equally tactile feel and is less noisy, and the outer step is what moves, leaving that whole indented column available to mount to. Perfect. The tiny one in the top left is literally just a limit switch, no use for this application at all, at least not the way I want to do it.

The slide switch, it's a toss-up between the two larger C&K ones. They're both the same, just have perpendicular mounts, so I have the option of mounting the PCB under the chamber either flat, sideways or vertical, whichever's convenient. The teeny tiny one in its little box seems a bit tiny and weak for this purpose, but I may use it as a selector switch for ambient/isolated audio, if I go that route.
 
Probably a lot of repetition here, since most of my time the last couple days has been tediously making sure that the mag well is mouldable and won't shred the silicone when I remove it. Still, it's looking mighty fine, so it's update time. I've been doing some painting too, so I may well do an HQ update in the next few days. :D

20150115_003305651_iOS.jpg

Matboard makes detailing so easy:

20150115_015659036_iOS.jpg

20150115_022346454_iOS.jpg

20150115_025531127_iOS.jpg

20150115_033447191_iOS.jpg

20150115_180851757_iOS.jpg

Difference between a scrollsaw and a bandsaw: I freehanded these straight lines on the bandsaw!

20150115_200227568_iOS.jpg

The actual "well" in place:

20150115_201056629_iOS.jpg

20150115_221828799_iOS.jpg

20150116_011212277_iOS.jpg

20150116_182108007_iOS.jpg

20150116_193629673_iOS.jpg

20150116_194842365_iOS.jpg

20150116_194906100_iOS.jpg

Those bevels were literally 5 hours of work this afternoon. Madness:

20150116_222530038_iOS.jpg

I can finally glue it on! It's been killing me:

20150116_223512035_iOS.jpg

Temp spreader of the right width = scraps stuck together:

20150116_224325676_iOS.jpg

20150116_224546907_iOS.jpg

Gotta kill that overhang and smooth out the whole inside:

20150117_001442695_iOS.jpg

Next I'll be attacking the inside with filler primer, which should help.

All for now. So close! :D Just trying not to rush and cut corners and screw something up that's superglued inside the structure and can't be fixed!
 
The mag well is going reasonably smoothly, if a little slowly. Working more on the scales around it now, and making sure they tesselate with the rest of the body. Some cutouts to do on what's there, I'm going to try to add some sort of dowelling or something for intersecting/gluing, and a bit of bevelling to add. Then it's really just the rear bumper and a bit of "internal" detail to add. Very close.

Then I just have to suck it up and hit "order" on a couple gallons of silicone. I think I'm planning on using Mold Star 15 and just box moulding it with some fairly tight tolerance (1/2-3/4" spacing) boxes. That or Rebound 25 with plaster bandage jacketing. Anyone with casting experience have any input there?

Ok, on with the show.

Using super glue to seal under filler primer works well for some spots:

20150117_200209198_iOS.jpg

Wet sanded:

20150117_210159754_iOS.jpg

Top cut out:

20150117_214947848_iOS.jpg

Now, since I haven't done a general overview in a while, and haven't got as far as shooting an HQ update yet, let's take a look around the whole thing:

20150117_222537692_iOS.jpg

20150117_222806452_iOS.jpg

20150117_222902956_iOS.jpg

20150117_222941226_iOS.jpg

20150119_152105080_iOS.jpg

20150119_152140869_iOS.jpg

20150119_152159641_iOS.jpg

20150119_152318407_iOS.jpg

20150119_152351024_iOS.jpg

20150119_152448576_iOS.jpg

Ridiculously excited right now, it's hard to keep working on it (weird?). I believe I'm still on track to accomplish what I set out to do, which is build the world's most accurate BR85HB prop replica. Or at least the world's most accurate scratch-built BR85, though I haven't seen a super accurate milled or 3D printed one.

Can't believe this thing has over 4000 views... Hope everyone else is enjoying the ride as much as I am.
 
I have to agree with you, this is the most accurate battle rifle I have seen in a while :)
It looks very awesome man!
 
I have to agree with you, this is the most accurate battle rifle I have seen in a while :)
It looks very awesome man!

Thanks man! :D

Update time, incredibly close to finishing the stock now. It's been a little slower going than I'd envisioned; a combination of tricky geometry to figure out, working to an even higher accuracy than previously, and a new whole different product design project that I can't talk about yet.

All that's left is grouting in the protruding details, drilling a couple screw holes, fixing the bevel above the circles, and sealing over the top of the mag well. Oh, and the details on the ejection port cover, which are pretty minor though. At least the remaining details can be summarised in a sentence. Onwards!

20150119_194316526_iOS.jpg

20150119_194901018_iOS.jpg

20150120_023310295_iOS.jpg

20150120_024330166_iOS.jpg

20150120_203934731_iOS.jpg

20150120_205436551_iOS.jpg

20150121_010555659_iOS.jpg

20150121_182305568_iOS.jpg

At this point I thought I was almost done. LOL

20150121_183950182_iOS.jpg

20150121_195644298_iOS.jpg

20150121_220321225_iOS.jpg

20150121_231204387_iOS.jpg

20150121_232402585_iOS.jpg

20150121_234947087_iOS.jpg

20150122_013059562_iOS.jpg

20150122_015132718_iOS.jpg

20150122_170829153_iOS.jpg

20150122_184905918_iOS.jpg

20150122_215652003_iOS.jpg

20150122_230224670_iOS.jpg

20150123_014643557_iOS.jpg

20150123_020545367_iOS.jpg

20150123_152315752_iOS.jpg

20150123_165609774_iOS.jpg

That's it for now, There's so little left to do that the last update will probably be split between this and the rear bumper.
 
Update time! I think this will be the second-to-last build update; the last one will consist of throwing together a dummy scope and adding in the remaining details, and probably also a rebuild of the rear section of the grip area where it mates with the stock. But at this point, the actual build is 98% complete! :eek

First up: Stock - Mag Well Area, Part 2:

20150123_193949738_iOS.jpg

This stock is serious business:

20150124_032146472_iOS.jpg

20150125_020333190_iOS.jpg

20150125_020339783_iOS.jpg

There was a slight gap between the stock and chamber, which was easily Bondo squished. This seam area generally needs more work though, I'm going to try to clean it up prior to casting if possible.

20150125_020436101_iOS.jpg

In case you were wondering between wet sanding and dry sanding, wet sanding is way shinier:

20150125_021229267_iOS.jpg

20150125_021236650_iOS.jpg

20150125_022028549_iOS.jpg

Looks like crap after spraying, I was quite disappointed, though I've since sanded it down and it looks much better.

20150126_170716117_iOS.jpg

Next, Stock - Upper Receiver Lid and Rear Bumper, Part 2:

This is some very tricky geometry, but once you wrap your head around it, converts to MDF stock quite nicely:

20150125_180512662_iOS.jpg

This came together in about 45 minutes. I've done a timelapse of it, but I haven't done the voiceover for it yet so I'll upload that later.

20150126_184621841_iOS.jpg

20150126_185845228_iOS.jpg

20150126_185902053_iOS.jpg

Both $22. One from Amazon, one from Home Depot. Guess which is which?

20150126_190304603_iOS.jpg

GoPros, defished in GoPro Studio, can get pretty good overhead shots, if any of you have one.

20150127_154718000_iOS_small.jpg

Cutouts and 1.2mm spacer/cover for the stock lid:

20150127_192916876_iOS.jpg

Friction fit rear plate:

20150127_203716535_iOS.jpg

20150127_203816646_iOS.jpg

20150127_220201958_iOS.jpg

Cutouts sealed up:

20150127_232529759_iOS.jpg

Smoothed out nicely:

20150127_232917072_iOS.jpg

Bumper glued to plate and lid:

20150127_233644951_iOS.jpg

DONE! (Sort of, still the above-mentioned final bits and pieces to work on)

done.jpg

This gun is no joke. It's a monster.
 
Looking great! It is a monster. Has the filler primer helped hiding the wood grain and MDF texture? I use it all the time on metal and fiberglass, but have not used it much on wood/wood products.

Redshirt
 
Looking great! It is a monster. Has the filler primer helped hiding the wood grain and MDF texture? I use it all the time on metal and fiberglass, but have not used it much on wood/wood products.

Redshirt

Thanks man! It's pretty thick, a good couple inches, and the stock is just huge. It has a serious presence in person that the photos just can't communicate. I think with a whole load of hacking it would actually be doable as an airsoft conversion, there's a huge amount of space in it compared to say, an M4 carbine AEG.

Filler primer has definitely been helping on the texture, for sure. The MDF still needs sanding smooth first, and then it needs a bit of light smoothing work with 220 or 320 after a couple coats, but once you've done that it looks the same as everything else. It's not so much use on the little dimples that Bondo gets, but I have a tube of Bondo spot putty on the way to fix those. I'm still intending to wet sand to 2000 grit, at least on the higher spots and major planes, hopefully that'll work out.

----

Planning on ordering the silicone in a few days (gonna make all the screw heads by just stabbing them into Monster Clay a few times and pouring in some spare Onyx resin, so I need those supplies prior to finishing), but I don't think it'll be ready for casting for another couple weeks. Still, that's mighty close relative to last October! And I think I'm still on schedule, I seem to recall saying mid-Feb for the start of mouldmaking and casting.

I do have another super awesome commission that may take some time away from this build here at the last, but I don't see it being a huge schedule changer. Maybe a week or two either way over the course of a month or so. No one's said they particularly require this for an early con like ECCC, so I'm taking my time to improve it as much as possible!
 
After a hard day's work, coming home to see this beauty almost fleshed-out is truly a pleasant wonder. I know I say it a lot, but I'm extremely impressed with your work at every stage.

Put one on hold for me. I think I've got a spare kidney I can use as a down-payment.
 
After a hard day's work, coming home to see this beauty almost fleshed-out is truly a pleasant wonder. I know I say it a lot, but I'm extremely impressed with your work at every stage.

Put one on hold for me. I think I've got a spare kidney I can use as a down-payment.

Thank you very much! As am I, to be honest. I'm good with my hands and have an eye for detail, but I haven't really done a whole lot with those skills and certainly have never embarked on a project of this magnitude. Seeing what I'm capable of is kinda surprising me as much as anyone else.

Ha! Kidney, left arm, first-born, I'm good. :p
 
Status
Not open for further replies.
Back
Top