realmasterchief
Jr Member
Evening 405th
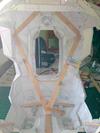
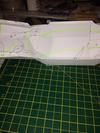
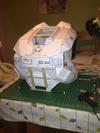
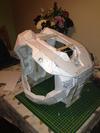
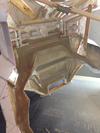
The scout helmet iv been working on is almost finished so as I add the final touches to that iv been working on a new project... The standard chest piece from Halo Reach.
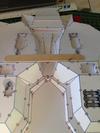
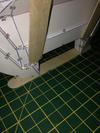
The plan is to make a mould of the finished piece as I need about 6 copies of it, so a lot of time has been spent getting the pep work as accurate as possible... In fact I spent almost half a day with the big lolly pop sticks and hot glue gun making sure the armour is totally squar and not distorted in any way.
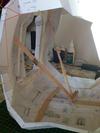
To make it a bit easier I made up smaller sub sections of the armour, and on the larger flat surfaces I added balsa wood batons soaked in superglue to the back in an effort to keep the flat pieces flat")
The sticks on the outside will be removed once the Rondo is done, I'll leave most the ones on the inside as I won't need to wear this piece.
Anyway... Pictures....


The scout helmet iv been working on is almost finished so as I add the final touches to that iv been working on a new project... The standard chest piece from Halo Reach.
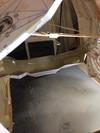
The plan is to make a mould of the finished piece as I need about 6 copies of it, so a lot of time has been spent getting the pep work as accurate as possible... In fact I spent almost half a day with the big lolly pop sticks and hot glue gun making sure the armour is totally squar and not distorted in any way.
To make it a bit easier I made up smaller sub sections of the armour, and on the larger flat surfaces I added balsa wood batons soaked in superglue to the back in an effort to keep the flat pieces flat
The sticks on the outside will be removed once the Rondo is done, I'll leave most the ones on the inside as I won't need to wear this piece.
Anyway... Pictures....