First Foam Build

Status
Not open for further replies.
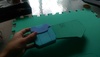
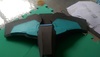
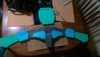
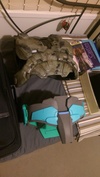
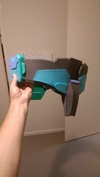
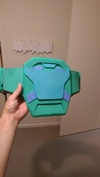
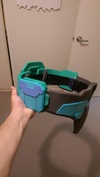
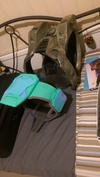
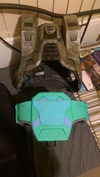
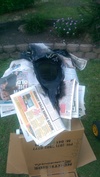
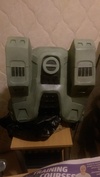
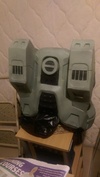
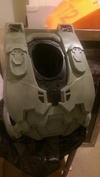
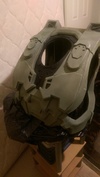
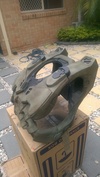
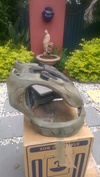
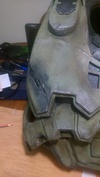
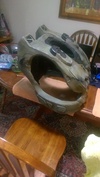
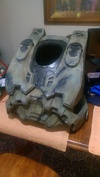
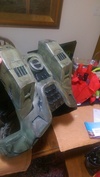
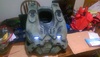
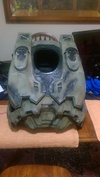
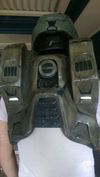
Okie doke, So the fun part, or the funner part has begun, PAINT yay. Ive applied a few coats of primer, plasti dip and now the base colors of a military green and black. Hopefully Ill have a bit more done and some weathering very shortly, maybe even by today. Ive decided too that, I might wait until I have finished most of the painting and that before I figure out some damage details, I was going to do it before paint however I couldnt make a clean decision on where I wanted it. Maybe once the finished picture is a little closer to completion Ill add some. Most likely just use my soldering iron to melt some damage marks in, and just repaint those areas and apply weathering and stuff.
IMAG2145_zps4vmiiue6.jpg
IMAG2150_zpsvleaweis.jpg
IMAG2149_zpswvhnwym0.jpg
IMAG2155_zps9p9m0zzz.jpg
IMAG2154_zpsunf8lzwg.jpg
 

Attachments

  • IMAG2145_zps4vmiiue6.jpg
    IMAG2145_zps4vmiiue6.jpg
    253.1 KB · Views: 219
  • IMAG2154_zpsunf8lzwg.jpg
    IMAG2154_zpsunf8lzwg.jpg
    144.9 KB · Views: 221
  • IMAG2155_zps9p9m0zzz.jpg
    IMAG2155_zps9p9m0zzz.jpg
    170.4 KB · Views: 229
  • IMAG2149_zpswvhnwym0.jpg
    IMAG2149_zpswvhnwym0.jpg
    164.6 KB · Views: 218
  • IMAG2150_zpsvleaweis.jpg
    IMAG2150_zpsvleaweis.jpg
    162.5 KB · Views: 224
OK, as promised I have now added all the weathering and damage details as of yesterday, The paint job came out better then I had hoped. I added about 3 layers of dirt and grime, by soaking a brush and paint with water and antiquing the surface, wiping it away and rubbing it in with a sponge, using slightly darker tones of brown and black as I went along. I then took my soldering Iron and melted in some damage effects, then painted over them and dry brushed some chrome scratching and edge wear and tear, over the top of this I added a light fourth layer of dirt and weathering effects just to take the shine off some of the chromed areas. Essentially the chest piece is done, I just need to add the rear lighting and possibly a cooling system. enjoy the pics. let me know what you guys think.
IMAG2167_zpspm92lkie.jpg
IMAG2168_zpsftcfwjg3.jpg
IMAG2173_zpstlnliz74.jpg
IMAG2172_zpsoix0ils5.jpg
IMAG2174_zpsdmhrlvlv.jpg
IMAG2175_zpsxhxev506.jpg
IMAG2183_zpsgo9nf6vy.jpg
IMAG2182_zps7ukljl4d.jpg
IMAG2177_zpsqssylccg.jpg
IMAG2178_zpsmg9ovth0.jpg
IMAG2184_zpsfmcoj9o2.jpg
 

Attachments

  • IMAG2167_zpspm92lkie.jpg
    IMAG2167_zpspm92lkie.jpg
    240.5 KB · Views: 223
  • IMAG2168_zpsftcfwjg3.jpg
    IMAG2168_zpsftcfwjg3.jpg
    260.7 KB · Views: 218
  • IMAG2182_zps7ukljl4d.jpg
    IMAG2182_zps7ukljl4d.jpg
    239.4 KB · Views: 247
  • IMAG2175_zpsxhxev506.jpg
    IMAG2175_zpsxhxev506.jpg
    212.7 KB · Views: 232
  • IMAG2172_zpsoix0ils5.jpg
    IMAG2172_zpsoix0ils5.jpg
    216.3 KB · Views: 215
  • IMAG2173_zpstlnliz74.jpg
    IMAG2173_zpstlnliz74.jpg
    204.7 KB · Views: 223
  • IMAG2183_zpsgo9nf6vy.jpg
    IMAG2183_zpsgo9nf6vy.jpg
    205.6 KB · Views: 203
  • IMAG2177_zpsqssylccg.jpg
    IMAG2177_zpsqssylccg.jpg
    231.8 KB · Views: 216
  • IMAG2174_zpsdmhrlvlv.jpg
    IMAG2174_zpsdmhrlvlv.jpg
    213.1 KB · Views: 223
  • IMAG2178_zpsmg9ovth0.jpg
    IMAG2178_zpsmg9ovth0.jpg
    222.2 KB · Views: 210
  • IMAG2184_zpsfmcoj9o2.jpg
    IMAG2184_zpsfmcoj9o2.jpg
    152.2 KB · Views: 227
Thanks man, much appreciated, the helmet doesn't really match at the moment, but I'm making a new one soon anyway. might make the rest of the suit first, haven't decided yet.
 
Wow, this is absolutely amazing. As someone who wants to make their 1st built this is great motivation, but kinda intimidating at the same time.
 
You know, I was convinced that going the Pepakura route was the only way I was going to get enough detail to be satisfied. You just laid that myth to rest with reckless efficiency. This looks absolutely fantastic! About how much would you say that you spent on the chest piece? Like, in comparison to Pepakura, resin, and fiberglass. What's the difference in cost to do it with foam? Also, you said you feel like it's moving faster with foam. Do you have any time comparisons, or is it just "feeling" faster?
 
First up, thanks for all the encouragement and comments. As far as time, trying to put aside not having money to put into this project at times but over all it took aproxematly the equivalent of 3 to 4 days for construction and paint and I still have materials and things left over so a rough cost would be about $25 to $30 Aus on the chest. Not including the tools I bought specifically to do this project. Then we would be looking at about 60/70. aposed to pepakura, it probably would have Been upwoods of 100 bucks just for the chest piece and around a week or two to complete, but with the average budget and time available, it would have taken me about a 2 months to do it the pep way.
 
IMAG3306_zpsjsgz5qtw.jpg
IMAG3304_zpsuvyegs9c.jpg
, I had the lighting done a few days ago now so I thought I would post some pics.
 

Attachments

  • IMAG3304_zpsuvyegs9c.jpg
    IMAG3304_zpsuvyegs9c.jpg
    65.5 KB · Views: 115
  • IMAG3306_zpsjsgz5qtw.jpg
    IMAG3306_zpsjsgz5qtw.jpg
    53.2 KB · Views: 138
Wow, this build is really coming out fantastically. I can't believe it's your first time using foam! Really are motivating me.

Love the weathering and paint job. The details are great and really clean. Can't wait it see more!
 
It looks very nice, I doubt my first build will go as well as yours...
 
Great weathering approach. In the video games, the color scheme on the Chief is usually the typical "military green" across the board. By adding slight variations and brown "grime" in the raised and flat areas, you've achieved a great effect. The drybrushing is perfectly subtle and asymmetrical. I am impressed with not only the paint scheme, but also with the dimension added in the construction of the chestpiece by adding foam panels. Big fan of that.

The only thing I would suggest is to be careful to keep the weathering to a reasonable limit. I've seen a few people say in different threads that there is "no such thing as too much weathering." Although creating that "battle-used" look is important for realism, too much added breakdown can often lose the authentic appearance most people marvel over. A meaningful approach to weathering and correct technique can make all the difference. You seem to do a great job of keeping the weathering to a realistic level.

I love the two gashes on the back of the chestpiece. The front may be a bit too "knocked up" for my preference, but great job nonetheless.

Seems like you figured out the hard way one of the most overlooked mistakes you see in builds...Paint all pieces at the same time! It makes it easier to stay consistent with the color scheme and prevents different weathering schemes from clashing.
 
Once again thank you for all the comments and constructive criticism. I would like to iron out the issue with the helmet not being the same colours and level of detail. The helmet is an old and separate project basically, the chest piece was the first piece of the new complete foam project. So the helmet although in this thread , is only for show, there will be a helmet made to match later in this thread. As far as damage goes, I wanted the look of the armor to reflect a bit of my personality and style of how I play the games, maybe a little rough around the edges but go hard, be a little risky and get in there and get the job done. :D. And thank you for being honest with preferences, I find it refreshing and helpful.
 
As far as damage goes, I wanted the look of the armor to reflect a bit of my personality and style of how I play the games, maybe a little rough around the edges but go hard, be a little risky and get in there and get the job done. :D. And thank you for being honest with preferences, I find it refreshing and helpful.

I hear that. The weathering may be a bit too much for my preferences, but at least the pattern is consistent. Too many times people like to go overboard with the weathering which often results in unrealistic and random wear patterns. I like the fact that the pattern on the front of the chest piece is consistent and actually makes sense. If you were to have those "scratches" in different directions, it would have certainly been tacky. However, the pattern you currently display is practical and adds to the realism. The color variation and "correct" weathering pattern is a welcome change from most builds. Too often I see great pepped out pieces only to be painted a solid color or perfectly scaled armor with battle damage taken beyond what is "normal." Seems you avoided these all to prevalent practices. Well done.
 
Ok guys and gals, I have made a start on the crotch piece/belt, 2 half days effort has already given me most of the main structure to this piece, THIS IS WHY FOAM IS AWESOME, so fast. anywho, I had to use green foam this time, as the hardware I go to was out of the dark grey and couldn't tell me when more was coming so I just grabbed the green, my thoughts are that its going to be painted anyway so no big deal. First off, I started by freehand sketching up some templates using tons of reference images. The next day I preceded to cut them out and make there foam counterparts.

This is my templates taped together as to test size and fit.
IMAG2286_zpsmui92bms.jpg
IMAG2288_zpsu5odyd3v.jpg
IMAG2289_zpsswtkcqvs.jpg
IMAG2292_zpsnif8r6q5.jpg
There will be more pieces that Ive not made templates for that I will have to add, Ive only done the main ones,I will do the rest as I go along or as I work them out. Oh and both of those pocket looking parts, are exactly that, Ive made them so I can stores my phone or cards of some sort, I will include a photo of them later.
 

Attachments

  • IMAG2286_zpsmui92bms.jpg
    IMAG2286_zpsmui92bms.jpg
    155.3 KB · Views: 124
  • IMAG2288_zpsu5odyd3v.jpg
    IMAG2288_zpsu5odyd3v.jpg
    157.9 KB · Views: 118
  • IMAG2289_zpsswtkcqvs.jpg
    IMAG2289_zpsswtkcqvs.jpg
    154 KB · Views: 130
  • IMAG2292_zpsnif8r6q5.jpg
    IMAG2292_zpsnif8r6q5.jpg
    202.6 KB · Views: 135
Looking great! I'm amazed at the quality for a first time foam builder to the point that I'm a bit envious.
 
Hi all. Thanks for the comments again, just a quick update. Most of the structure and bulk detail are done now, I would say it took me in total, a rough day and a half to get to this stage with this piece, I have been working on it for a few hours at a time after work. The more I make of the suit the more I want to make, just to see it all come together. So far the Belt/codpiece has been the easiest bit to make by far. today, I attached a clip and strapping to hold it all in place, similar to the bottom of the chest piece, gluing each piece to each other and then to the strapping to create the belt like function. Few more details then I believe this will be ready for sealing by the weekend.....Possibly. Thanks again guys for all the positivity, never in my wildest dreams did I think anyone would be envious of one of my projects, I have watched these forums for a few years, always being the envious one, so thanks a bunch.
IMAG2302_zps5hwspcrp.jpg
IMAG2303_zpslbc7cqc8.jpg
IMAG2304_zpssrzx5rzx.jpg
IMAG2297_zps5ys6s5hs.jpg
IMAG2306_zpsczqfs028.jpg
IMAG2307_zpski7cziob.jpg
IMAG2308_zpsioxuyowm.jpg
 

Attachments

  • IMAG2306_zpsczqfs028.jpg
    IMAG2306_zpsczqfs028.jpg
    223.8 KB · Views: 135
  • IMAG2297_zps5ys6s5hs.jpg
    IMAG2297_zps5ys6s5hs.jpg
    143.2 KB · Views: 120
  • IMAG2302_zps5hwspcrp.jpg
    IMAG2302_zps5hwspcrp.jpg
    137.9 KB · Views: 115
  • IMAG2304_zpssrzx5rzx.jpg
    IMAG2304_zpssrzx5rzx.jpg
    129.5 KB · Views: 124
  • IMAG2303_zpslbc7cqc8.jpg
    IMAG2303_zpslbc7cqc8.jpg
    176.4 KB · Views: 117
  • IMAG2308_zpsioxuyowm.jpg
    IMAG2308_zpsioxuyowm.jpg
    207.5 KB · Views: 123
  • IMAG2307_zpski7cziob.jpg
    IMAG2307_zpski7cziob.jpg
    203.8 KB · Views: 130
Status
Not open for further replies.
Back
Top