- Member DIN
- S137
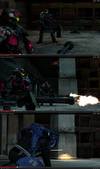
So, I have recently started a new build and it has been awhile since I have actually made a build thread or taken photos of my progress so here we go. This suit is a current 'Work In Progress'


Progress - Suit 1 - Frowny
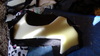
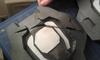
Helmet - Needs weathering and padding
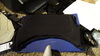
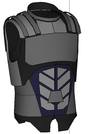
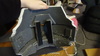
Torso Underarmor - Needs detailing pieces
Chest - Weathering
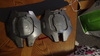
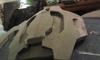
Shoulder Left - weathering needed
Shoulder Right - Paint and attachment needed
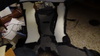
Forearms - Need primer and paint
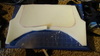
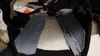
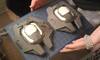
Kidney Plates - Primer and paint
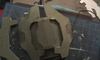
Hip Plates - Need weathering and velcro reinforcement
Butt plate - Done
COD piece - Needs Weathering
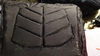
Thighs - Need weathering and attachment piece
Shins - Needs velcro
Progress - Suit 2 - Smiley
Helmet - Needs weathering and padding, Commander attachment glued on
Torso Underarmor - Needs soft extenders for the belly wrap and velcro
Chest - Needs Attachment pieces
Ab plate - Needs attachment pieces
Shoulder Left - needs primer and paint
Shoulder Right - Make a new one
Forearms - Need to print and cut out of foam
Kidney Plates - Need paint and weathering
Hip Plates - Need paint and weathering
Butt plate - reinforce zipper
COD piece - Weathering
Thighs - Need to size and print out
Shins - Need primer and paint
The hip plates are the UA/Multi threat attachment shoulder pieces. http://www.405th.com/miscellaneous-...-943-halo-reach-ua-multi-threat-shoulder.html


The shoulder piece is is the security shoulder http://www.405th.com/mjolnir-powere...d-248-halo-reach-security-right-shoulder.html

I went through and glued Velcro onto the inside of shoulder piece that attached to the neoprene shoulder support straps.

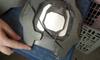
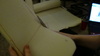
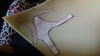
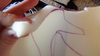
I am making the torso out of squishy cushion foam. We decided to use this method after being shown the ODST torso that was made by Our good friend, LostViking Props. Mal-055 modeled and unfolded the torso file. After printing the pieces out we traced and cut them out of the squishy foam. Black spandex cut out and wrapped around each piece and held on with hot glue on the edges. Each fabric wrapped piece is hot glued together.


Well, that is all of the progress that I will post for tonight. I will continue within the week... If I get time...
Progress - Suit 1 - Frowny
Helmet - Needs weathering and padding
Torso Underarmor - Needs detailing pieces
Chest - Weathering
Shoulder Left - weathering needed
Shoulder Right - Paint and attachment needed
Forearms - Need primer and paint
Kidney Plates - Primer and paint
Hip Plates - Need weathering and velcro reinforcement
Butt plate - Done
COD piece - Needs Weathering
Thighs - Need weathering and attachment piece
Shins - Needs velcro
Progress - Suit 2 - Smiley
Helmet - Needs weathering and padding, Commander attachment glued on
Torso Underarmor - Needs soft extenders for the belly wrap and velcro
Chest - Needs Attachment pieces
Ab plate - Needs attachment pieces
Shoulder Left - needs primer and paint
Shoulder Right - Make a new one
Forearms - Need to print and cut out of foam
Kidney Plates - Need paint and weathering
Hip Plates - Need paint and weathering
Butt plate - reinforce zipper
COD piece - Weathering
Thighs - Need to size and print out
Shins - Need primer and paint
The hip plates are the UA/Multi threat attachment shoulder pieces. http://www.405th.com/miscellaneous-...-943-halo-reach-ua-multi-threat-shoulder.html
The shoulder piece is is the security shoulder http://www.405th.com/mjolnir-powere...d-248-halo-reach-security-right-shoulder.html
I went through and glued Velcro onto the inside of shoulder piece that attached to the neoprene shoulder support straps.
I am making the torso out of squishy cushion foam. We decided to use this method after being shown the ODST torso that was made by Our good friend, LostViking Props. Mal-055 modeled and unfolded the torso file. After printing the pieces out we traced and cut them out of the squishy foam. Black spandex cut out and wrapped around each piece and held on with hot glue on the edges. Each fabric wrapped piece is hot glued together.
Well, that is all of the progress that I will post for tonight. I will continue within the week... If I get time...
Attachments
-
 11112952_10155309414645062_4535502477404328501_o_zps4e1xuv7a.jpg60.6 KB · Views: 401
 -
 11146265_10155309414955062_5400078676497653984_n_zpsyxfrc0rj.jpg56.6 KB · Views: 305
 -
 1268809_10202365550532290_1677836288_o_zpss5ts6pg5.jpg66.3 KB · Views: 195
 -
 DSC00179_zpsrk0cmhfi.jpg212.9 KB · Views: 363
 -
 1888920_10202365552372336_2051846880_o_zpsdl5ti59k.jpg67.3 KB · Views: 168
 -
 1292998_10202365552492339_1366924629_o_zpsee6fbaxy.jpg58.7 KB · Views: 192
 -
 1655818_10202365552252333_740893679_o_zpsnvm6i6m3.jpg68.2 KB · Views: 176
 -
 1795979_10202365550492289_1896647346_o_zpsdbtv74ah.jpg64.6 KB · Views: 182
 -
 DSC00073_zpslhpl3x8w.jpg160 KB · Views: 334
 -
 DSC00210_zpszwzsgmfk.jpg158.6 KB · Views: 346
 -
 DSC00211_zpsx8awe6h7.jpg174.7 KB · Views: 223
 -
 11094679_10155320282700062_1898929591901203241_n_zpsl1w2inwn.jpg32.8 KB · Views: 190
 -
 DSC00176_zps2hvlrcea.jpg213.5 KB · Views: 333
 -
 DSC00175_zpsnxfsqlpg.jpg176.2 KB · Views: 350