Agent Washington Build - Halo 3 Mk VI

Status
Not open for further replies.

Starrmont

Member
I really like Agent Washington because, despite being the least skilled member of his squad, he always does his best and never gives up.

Build Goals:

Pepakura helmet, everything else will be foam.

Agent_Washington.jpg

Armor:
Helmet: forward-facing lights (repurposed flashlights, maybe?), vent fans
Untitled.png

Torso will be split into pieces. The first piece will be securely strapped onto the body, the other piece will attach to the first piece with buckles and magnets.

Example of torso designs(worship my MS Paint skillz):

yikAgp6bT.jpg

Extra Feature Prioritization:

Level 0 Features (Essentials; Cannot be without):
Armor, strapping, basic undersuit, vent fans

Level 1 Features (Extras; want, but can live without):
Armor and helmet LED/christmas string lighting, custom undersuit

Level 2 Features (Final touches; things to add the extra bang):
Built-in speakers, mechanical locks

Current progress:


IMG_1533.JPGIMG_1544.JPG

Armor:
Pepakura:
Helmet: Pepped, hardened, glassed, rondoed, visor cut out, begun bondo.
Foam:
Torso:
Cod:
Thighs:
Shins: 2 legs stenciled, 1 cut, and assembled.
Boots:
Biceps:
Forearms:
Hands:

Undersuit:
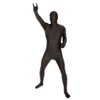
Base: Black morphsuit
Details TBD.

And yes, I totally stole my formatting from Carpathia. I like how he did it. Sue me. :p
 
All files edited for foam by Demolition
Grab all the files here:
http://www.mediafire.com/download/f8kcm6vb8lf737d/Halo+Mark+VI+Foam+Files.rar
Torso Progress

File Info
Modeled by: Robogenesis


Still nothing but a dream. A digital dream.

halochest.jpg

Codpiece Progress
File Info
Modeled by: Robogenesis


Still nothing but a dream. A digital dream.

halocod.jpg

Thigh Progress
File Info
Modeled by: crackhead09


Still nothing but a dream. A digital dream.

halothigh.jpg

halochest.jpg


halocod.jpg


halothigh.jpg
 
Last edited by a moderator:
All files edited for foam by Demolition
Shin Progress

File Info
Modeled by: crackhead09


IMG_1541.JPGIMG_1542.JPGIMG_1544.JPG

Boot Progress
File Info
2-piece version
Modeled by: Robogenesis


markVIBoot.jpg

Hand Progress
File Info
Modeled by: Robogenesis


halohandplate.jpg

markVIBoot.jpg


halohandplate.jpg


IMG_1541.JPG


IMG_1542.JPG


IMG_1544.JPG
 
Last edited by a moderator:
All files edited for foam by Demolition
Forearm Progress

File Info
Modeled by: Robogenesis

haloforearm.jpg

Bicep Progress
File Info
Modeled by: Robogenesis

halobicep.jpg

Undersuit/Other Bits
Morphsuit:
This'll be chopped up, covered up, and probably replaced eventually.
black_1.jpg
Neck seal:
I'm using the Blue Realm pattern for the neck seal pattern, found here:
http://www.bluerealmstudios.com/2009/09/02/chief-underwear/

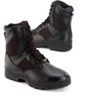
Boots:
Something like this. Whatever I can find locally.
0087754800534_500X500.jpg

Gloves:
IMG_1547.JPG

black_1.jpg


0087754800534_500X500.jpg


haloforearm.jpg


halobicep.jpg


IMG_1547.JPG
 
Last edited by a moderator:
I would move helmet fans from Level 2 to Level 0. Without them your visor will fog all up and visibility will be an issue. The build looks great so far - nice job on the helmet sizing.
 
Okay! Got my dremel, cleaned up my mistakes, and finished all the fiberglass on the inside (In total, I used exactly 1 sheet of fiberglass cloth. Luck...or skill?). I decided not to post a pic, as there's not much to see, but I'm just about to begin the bondo work on the outside! My only question is, should I cut the lens out before or after bondo?
 
In a bit of a YOLO moment, I decided to go ahead and rondo the interior, which I hadn't originally planned. I decided it would give me a cleaner surface, and make it easier to eventually install padding.

View attachment 12036

I also got started with the bondo, and lemme tell ya, it's a pain. This is the very first time I've ever worked with the stuff. I'm working on the cranium of the helmet first. One of my coats of bondo didn't have enough hardener mixed in, so now it's just a tough gummy layer that can't be sanded and I've had to scrape most of it off with a razor. The rest has been okay, and I've just been sanding like a madman. It's very smooth to the touch, but there's entirely too much paper exposed, so I'll have to re-apply and continue the madness.

View attachment 12037

As as a break from sanding, I went ahead and cut out the visor with my Dremel. I had to make two passes, as the tool couldn't get the right angle on the precise edge of the area, cutting out the main chunk of the piece, then going over it again to clean up the edges. I hit the edges with a sanding sponge, and they are quite smooth now. However, on the left side of the helmet, there's a portion of Pepakura that didn't bond with the fiberglass, and is now exposed paper. I'm trying to decide the best way to deal with that bit.

Before cleaning edges:
View attachment 12038

After cleaning edges:
View attachment 12039

A fierce Spartan rises:
View attachment 12040
 
Looking great so far! I always think it's awesome to see someone doing an RvB suit. Can't wait to see the finished product :thumbsup
 
All right, so I finished the first shin using the files as is, but the pieces aren't perfectly symmetrical, so it caused some problems. I'm going to print the rest of the pieces and assemble the next shin as originally intended. Hopefully, that'll make things easier for the left leg. Also, hopefully my hot glue work gets better with practice, because it sucks as it is. :p
attachment.jpg
attachment.jpg
attachment.jpg
 
WASHINGTON!!! You did a great job putting all of those pieces on a single sheet of EVA foam.
 
Status
Not open for further replies.
Back
Top