You are using an out of date browser. It may not display this or other websites correctly.
You should upgrade or use an alternative browser.
You should upgrade or use an alternative browser.
Afrousjojo's ODST armor
- Thread starter Afrousjojo
- Start date
- Status
- Not open for further replies.
I'm interested in seeing how your visor turns out. Just as a consideration, have you looked into vacuum forming? The process of vacuum forming can create really good looking visors. Either way, I hope you have great results with your visor and build. It's looking pretty good!
Amazing build. Keep it up. I can't wait to see it completed.
Wow! so much peaople answered on this thread! I really want to thank you all for the support!
aaaaaaaNNNNNDDDD HEY GUYS!!
time for an update!
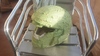
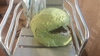
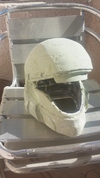
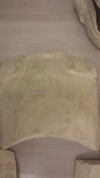
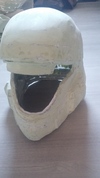
i've finished to apply mastic on the helmet!
it means that (for now) i've finished the mastic work! wouhouu!! *croud is yelling*
here is the helmet:


next step, but not the least...SANDING!!
aaaaaaaNNNNNDDDD HEY GUYS!!
time for an update!
i've finished to apply mastic on the helmet!
it means that (for now) i've finished the mastic work! wouhouu!! *croud is yelling*
here is the helmet:


next step, but not the least...SANDING!!
if you want i can send you the file i've used to do the patron.This is looking great! Can't wait to see how that flag turns out - might even have to make my own.
i've looking for it, and for now i don't have the tools (and the skill) to do it properly. More, and sadly, the mold i've done to create my visor with vacuum forming was destroyed, and i have to do it again...I'm interested in seeing how your visor turns out. Just as a consideration, have you looked into vacuum forming? The process of vacuum forming can create really good looking visors. Either way, I hope you have great results with your visor and build. It's looking pretty good!
Me too XDAmazing build. Keep it up. I can't wait to see it completed.
Attachments
wow that work is coming along nicely, the PEP work was spot on and its nice to see the whole process for PEP and not just the Paper then skip straight to after sanding looks awsome!
Looks like it will be a fun time sanding! haha It's cool to see pepakura ODST's around!
Wow! so much peaople answered on this thread! I really want to thank you all for the support!
if you want i can send you the file i've used to do the patron.
I would be fine with that, haha.
I would be fine with that, haha.
okay, just PM me you e-mail adress and i'll send it to you ^^
Unless we can attach files on pms...I'll check it
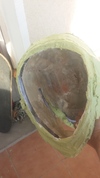
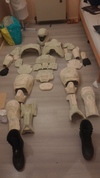
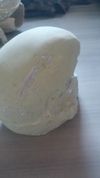
eyh guys, small update.
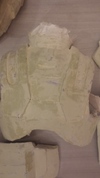
First day of sanding, 6hours later, i'm very tired.
here is a closer look at what we (with a frend) have done so far. This is just the helmet, and it's far from the end.
but we've made the major part.And i'm glad it turns so well.

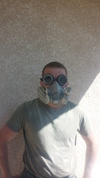
and always well protected! even if there is dust EVERYWHERE!!!

(the shirt is green normaly)
First day of sanding, 6hours later, i'm very tired.
here is a closer look at what we (with a frend) have done so far. This is just the helmet, and it's far from the end.
but we've made the major part.And i'm glad it turns so well.

and always well protected! even if there is dust EVERYWHERE!!!

(the shirt is green normaly)
Attachments
Loving this build! It's showing a lot of promise, can't wait to see it finished. C'est magnifique (if that's howyou say it)!
Loving this build! It's showing a lot of promise, can't wait to see it finished. C'est magnifique (if that's howyou say it)!
merci! (thanks!)
Eyh guys! update time!
i didnt' do all the stuff i've planned this week end, i wanted to finish the sanding..
BUT
i've finished the major part of that!!
I only have to smooth it with sanding paper! (i think it is how it is called)
this is what it looks so far!


next step! finishing the sanding and painting!!!
Deadline is approaching T_T
Attachments
-
 20150927_201505_zpsmn3cqoh2.jpg382.4 KB · Views: 166
 -
 20150927_201514_zpsygdjof1i.jpg419.2 KB · Views: 160
 -
 20150927_201433_zps0ovya96q.jpg550.9 KB · Views: 157
 -
 20150927_201500_zpstcsxnkob.jpg387.4 KB · Views: 217
 -
 20150927_201453_zpsvoxwejz0.jpg392.1 KB · Views: 174
 -
 20150927_201447_zpshcxbduz5.jpg369.1 KB · Views: 149
 -
 20150927_201440_zpshugas3oq.jpg537.8 KB · Views: 168
 -
 20150927_201407_zpsfwszs9l8.jpg445.1 KB · Views: 147
 -
 20150927_201416_zpsfnc4pf0v.jpg433.1 KB · Views: 150
 -
 20150927_201425_zpslvq8tu21.jpg475 KB · Views: 146
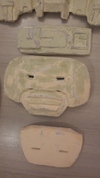
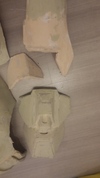
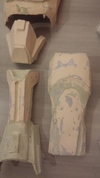
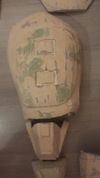
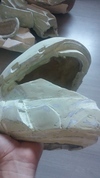
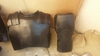
eyh guys small update!
i'm progressing well on the sanding!
here is some pics of before/after for the rib plates

and the helmet!


i don't have the skills to do better, but i'm sure it will turn very well with the painting!
i'm progressing well on the sanding!
here is some pics of before/after for the rib plates

and the helmet!


i don't have the skills to do better, but i'm sure it will turn very well with the painting!
Attachments
Sanding is looking nice and smooth! Nice work!
Sanding is looking nice and smooth! Nice work!
thanks!
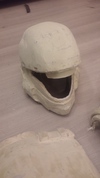
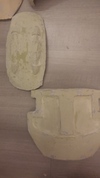
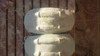
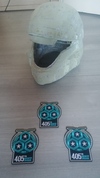
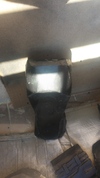
eyh guys! wassup?? guess what? I'VE FINISHED THE SANDING PART!! HELL YEAH!!!
here is just a shoot i've make before applying the undercoat

I'm tired, i'm stressed (brace yourself, deadline is coming) BUT I DON'T CARE! I'm proud of what I've done so far!
next step, undercoat!
here is just a shoot i've make before applying the undercoat

I'm tired, i'm stressed (brace yourself, deadline is coming) BUT I DON'T CARE! I'm proud of what I've done so far!
next step, undercoat!
Attachments
Eyh guys!
Time for a small update!
I've started to paint the stuff, unfortunately, i don't have enough paint to do all the stuff ><
I have to buy more...
here is what i've done so far!


tommorow i'll start to sew!
Time for a small update!
I've started to paint the stuff, unfortunately, i don't have enough paint to do all the stuff ><
I have to buy more...
here is what i've done so far!


tommorow i'll start to sew!
Attachments
-
 20151003_175225_zpsabnjsh9i.jpg579.9 KB · Views: 165
 -
 20151003_175208_zpsyqxk5qxh.jpg630.6 KB · Views: 153
 -
 20151003_175204_zps5t7dxkng.jpg176.8 KB · Views: 145
 -
 20151003_175218_zps9xlq8xrt.jpg208.4 KB · Views: 152
 -
 20151003_175221_zpszytnr8mi.jpg715.3 KB · Views: 152
 -
 20151003_175214_zpsc6kgwpgb.jpg217.7 KB · Views: 151
 -
 20151003_175211_zpshw27otvl.jpg671.8 KB · Views: 149
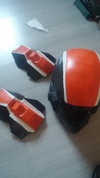
EYH GUYS!!!
Big update today!
I've finished the painting!
YEAAAAH!!!
and almost finished to sew all the straps, it will be done this week end.
here are some pics!!
this is the helmet and the shoulders. I've decided to try something new, Because this odst is from the 203 rd SAR (search and rescue,) and i've thought it would be cool like this ^^

here is some "camo paint"

how i've fixed the arm armor, it will need some foam inside

and the legs, it will need foam too ^^


next step, finishing to sew, and put foam inside!
and do the visor too ><
Attachments

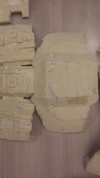
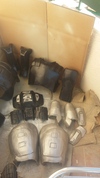
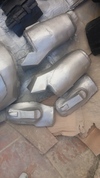
Eyh guys!
Another big updtate!
The armor is almost finished!!!!
all I need to do is to put the stickers, like the med ref, the regiment logo, the nickname, ect ect, and create the visor!
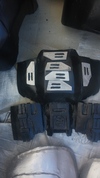
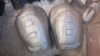
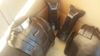
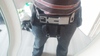
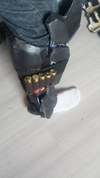
here is a closer look to the armor parts:
here is all the belt parts
$
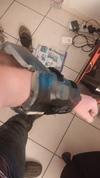
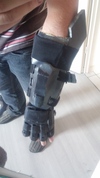
the gauntlets

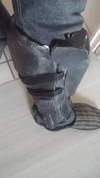
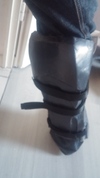
the shin, with ammo

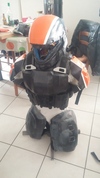
and meet Manu, the dummy, he wears my armor so i can have pics. He's nice

Soon guys, soon!!!
Another big updtate!
The armor is almost finished!!!!
all I need to do is to put the stickers, like the med ref, the regiment logo, the nickname, ect ect, and create the visor!
here is a closer look to the armor parts:
here is all the belt parts
$

the gauntlets

the shin, with ammo

and meet Manu, the dummy, he wears my armor so i can have pics. He's nice

Soon guys, soon!!!
Attachments
- Status
- Not open for further replies.