Halo 4 Recon Build - Renraku

Status
Not open for further replies.

Renraku

Active Member
Hello, Everyone

I have created this thread to share my build and to educate or help others with their builds. This is my second build, my first was a Halo Reach armor build where I built two suits at the same time. This is my Halo 4 Recon build where again I built two suits at the same time, one for my daughter and one for me. I am a computer game artist that creates 3D art for games and other forms of entertainment. So with that background I used my skill sets to create 3D models of every parts of my armor I was planning on building. From the helmet to the boots I made 3D models with the goal of making it pepakura and foam friendly. I will post all my build but first let me show you the 3D models and what I started out with. The blue is half inch foam , the yellow is 1/4 inch foam and the green parts are 3D printed.

recon_3d.jpg recon_helmet_01.jpg
 
I could've saved you a little hassle, Spartan. Check the file below.

Otherwise, stunning work! I'm impressed!
 

Attachments

  • Recon H5.zip
    2 MB · Views: 329
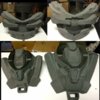
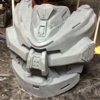
Here is the front and back chest pcs for both my daughter and I, the first image is just the foam. The second image is with the 3D parts added. I did almost all back cutting on this to avoid seams. I also only used Barge contact cement to attach the parts together. I then used hot glue to re-enforce the back seams for added strength. The last image is after sealing the foam with Epsilon, sanding then priming the entire chest front and back.

IMG_1337.JPGIMG_1387.JPGIMG_1429.JPG


Let me know if anyone has any questions.

Renraku
 
Have been having a lot of trouble finding Halo 4 recon helmets on the 405th. I was looking for halo 5 recon helmets but I understand that the game just came out. Anyways I was just wondering were you got the plans for the helmet. I was wondering because this is such a good build and I cant find any files for a recon. If you have any suggestions or maybe a website I could go to please reply.
Sincerely, Charles
 
This is looking great so far! The added 3D parts really add to the look. I am watching with eagerness.
 
This looks really good.
Did you make the files you used to make the chest plates so they would be very foam friendly?
Also i was wondering what kind of 3d printer did you use to get those nice 3d parts?
 
Hello, guys

Sorry I have posted any new photos in a while but I was waiting for the website to send me updates that people were actually looking at it. :)

Here is shot of my chest piece finished from all angles. I used a heat gun to seal the foam then applied Epsilon to coat it. I followed that up with sanding and then painting. The second image is of both armor sets with most of them painted and ready for strapping and fitting.

chest_colored.jpg armor_pcs_recon.jpg

- - - Updated - - -

Helmets painted up and ready for Visor fitting and padding. I used real hex bolt screws on the helmets with some epoxy to hold them in.
erikashelmet.jpg daveshelmet.jpg
 
That...is...awesome! I'm not sure what epsilon is but after seeing it in use; I'm definitely doing some research on the stuff. Everything looks superb!
 
Did you make the files you used to make the chest plates so they would be very foam friendly?
Yes I first model my armor in 3D S Max and I make it as foam friendly as I can then export them to pepakura. I still have to make adjustments with my card stock templates after printing them, especially for the radius. For example my thighs I match the height I want but the radius I always have to add more to to accommodate my leg thickness. same with the chest you want to first nail the width of your shoulders so from the front it looks right then add or reduce the amount to accommodate how thick you are .

Also i was wondering what kind of 3d printer did you use to get those nice 3d parts?
I own a TAZ 5 from Lulzbot, excellent customer service with little problems I see other printers have. There is a learning curve but its worth it. Also helps I 3D model for a living so I can model anything I need.
 
Last edited by a moderator:
Here is the shot of the Shins and boots. The boots are coral dive boots, meaning they basically have bottoms like a pair of tennis shoes but the tops are flexible neoprene material. I did not harden these parts of the boot simply because it would wear better being flexible and I didnt want it to crack. The shins are hardened with Epsilon and sanded smooth before painting. The decals like the arrows and the orange stripes were created simply using painters tape.

Test fit to see how everything goes together with the helmet on. This image is old as I have since completed the armor but want to document the build for everyone to see. Let me know if you have any questions and I will continue to post build images.

boot.jpg IMG_1515.JPG
 
Dive boys are a great idea! Send like some thing you can modify well that doubles as part of the undersuit. Were they expensive?
 
Hello, everyone

The first image is of the model I created of the Recon Helmet. I plan on eventually printing and casting this the one I am wearing was created by a good friend "Walter Marlin" of mine in Stony Props.

Since I had to build two suits at once thought I would share the images of my daughters armor as it progressed. She picked out her own colors, ill post up some con photos of the finished suits soon.

recon_helmet_01.jpg chest_backs_done.jpg chest_front_done.jpg
 
Amazing! ;_;
Damn good work!
I really like the blue one... but the use of orange and gray... Visually striking.
 
Man, this looks so good! Would love to see more pics! Congrats on the finished armor! I see use of BMP props neck/under suit. Is the rest of the under parts being used? Also, did you use a reverse 3d printed mold of cod area?
 
Man, this looks so good! Would love to see more pics! Congrats on the finished armor! I see use of BMP props neck/under suit. Is the rest of the under parts being used? Also, did you use a reverse 3d printed mold of cod area?
The cod piece and other sections I created with custom molds and Black dragon skin silicon. I will eventually sell the under suit sections as a kit with instructions on attaching it to the under suit.

image1_sml.jpg


IMG_2873_sml.jpg
 
Status
Not open for further replies.
Back
Top