Re: Female GEN2 SCOUT Armor (Palmer) Build [+ more]
Darn right we want to see your improvements. Looking forward to when you get time to post it.
I think I'll post it on weekend.
")
Those visors look amazing! I really like the cracked one but can imagine how difficult it would be to see out of. Will be watching for the tut because I need one of those in my life. Great job so far!
Thanks
To be honest it isn't that difficult or that bad... not as difficult as you imagine. You can see through pretty good.
Hey
Marawuff, hope your feeling better. . We're getting hit w/ the cold weather as well here on the east coast. Expatiating snow at any moment..........wait for it.......no.....No snow yet. Dam those weathermen and meteorologist. Could use a day off from work.
Build looks fantastic!! One question: Is/was it the angle that you took the pic from or is the left shoulder a bit further out than the right? The chest piece looks to be centered w/ the helmet but the shoulders look a bit off. It could also be that the chest armor is twisted the wrong way on the mannequin. Looks great!!! Can't wait to see the finished product. Keep warm Mar!!!
Thanks! I wasn't feeling that bad. I was just bit sick... and due that I constantly went to the basement - I couldn't get better, so I left it be for some time.
Wow! I really feel for you.
It's warmer here now, which is great actually... I hope you'll have some nicer weather soon.
Oh, the picture wasn't done 100% straigt.
It was done a little from the side, also it's just on the mannequin and helmet isn't looking straight forward. xD Just quick photo. I actually put the chest on the manequin to harden it from the outside so it will retain the shape more or less.
It looks really great I love the hex on the visor.
Thank you.
I think the separate visor tutorial thread is a great idea, but don't forget to link to it from this thread so I don't miss it!!
Of course, will post it here in my thread and the separate.
Your thread has always been a hit, it's only when you deprive us from updates we start to riot.. I mean, get concerned for your well being
Sorry to hear you got touched by the cold. Hope it warms up for you soon!
Hah, and I always wonder why, especially when I take a break I come back and BAAAM so many replies. O.O
Nah, it wasn't that bad, I just had to take a break to get healthy - when I was going down to the basement to the cold... couldn't really get better.
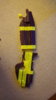
looking really good so far! what exactly did you use for the hex piece on the finger? it looks like rubber, but i can't tell what it came from/how you made it. what is your secret!?!?!
Thank you!
Oh, the hex piece on the trigger finger?
It was actually very easy. ^^

What you're seeing here is about 2mm foam as underbase, on top of it I glued the mesh that is used inside backpacks, etc. and the outerline is hotglue. xD
- - - Updated - - -
Darn right we want to see your improvements. Looking forward to when you get time to post it.
I think I'll post it on weekend.
Those visors look amazing! I really like the cracked one but can imagine how difficult it would be to see out of. Will be watching for the tut because I need one of those in my life. Great job so far!
Thanks
To be honest it isn't that difficult or that bad... not as difficult as you imagine. You can see through pretty good.
Hey
Marawuff, hope your feeling better. . We're getting hit w/ the cold weather as well here on the east coast. Expatiating snow at any moment..........wait for it.......no.....No snow yet. Dam those weathermen and meteorologist. Could use a day off from work.
Build looks fantastic!! One question: Is/was it the angle that you took the pic from or is the left shoulder a bit further out than the right? The chest piece looks to be centered w/ the helmet but the shoulders look a bit off. It could also be that the chest armor is twisted the wrong way on the mannequin. Looks great!!! Can't wait to see the finished product. Keep warm Mar!!!
Thanks! I wasn't feeling that bad. I was just bit sick... and due that I constantly went to the basement - I couldn't get better, so I left it be for some time.
Wow! I really feel for you.
It's warmer here now, which is great actually... I hope you'll have some nicer weather soon.
Oh, the picture wasn't done 100% straigt.
It was done a little from the side, also it's just on the mannequin and helmet isn't looking straight forward. xD Just quick photo. I actually put the chest on the manequin to harden it from the outside so it will retain the shape more or less.
It looks really great I love the hex on the visor.
Thank you.
I think the separate visor tutorial thread is a great idea, but don't forget to link to it from this thread so I don't miss it!!
Of course, will post it here in my thread and the separate.
Your thread has always been a hit, it's only when you deprive us from updates we start to riot.. I mean, get concerned for your well being
Sorry to hear you got touched by the cold. Hope it warms up for you soon!
Hah, and I always wonder why, especially when I take a break I come back and BAAAM so many replies. O.O
Nah, it wasn't that bad, I just had to take a break to get healthy - when I was going down to the basement to the cold... couldn't really get better.
looking really good so far! what exactly did you use for the hex piece on the finger? it looks like rubber, but i can't tell what it came from/how you made it. what is your secret!?!?!
Thank you!
Oh, the hex piece on the trigger finger?
It was actually very easy. ^^
What you're seeing here is about 2mm foam as underbase, on top of it I glued the mesh that is used inside backpacks, etc. and the outerline is hot glue. The foam was white so I painted it, so it looks bit like a camouflage - didn't want flat. xD