Great work! Everything looks pretty clean, and you seem to have it a lot of the details! Cant wait to see it dipped and painted. Defeinatly subbing
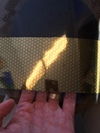
When I saw that visor hex pattern, I almost jumped off my bed and ran to print some off, but then realized that I only have an ink jet printer xD
However I had an epiffany (An idea for all non fancy-English versed peeps out there)
What if you could print on some of that clear 'paper' stuff used for slides, then sprayed over it a time or two with clear spraypaint?
I have had experience with the slide paper with some of my 4-H presentations, and know it works well, though it tends to scratch and be a tad bit tacky. a quick coat of clear spraypaint should fix that though.
This is for sure something I must try.
Fingers crossed, I might not need a laser printer! :3
Anyway, I look forward to the next update with anticipation. Good luck!