You are using an out of date browser. It may not display this or other websites correctly.
You should upgrade or use an alternative browser.
You should upgrade or use an alternative browser.
Centurion Build
- Thread starter Dirtdives2424
- Start date
- Status
- Not open for further replies.
- Member DIN
- S2424
you and me both!!Sounds like you had a great time! I can't wait to see those pictures!
- Member DIN
- S2424
Update time:
Had a nice long holiday weekend......2 weekends actually and got some things done. Printed out my 7th attempt of my helmet....(I wonder what the record is?)........and scored the fold lines so that is all ready to be assembled but I have other things that were on the front burner so to speak.


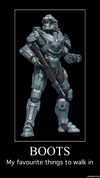
I got me some BOOTS!!!!! Ok they are more like shoes.....but that is what it said on the templates file folder......"Boots"...That's what It said and that is what I'm sticking too!!!....Any way....I had a hard time building my test piece.....I just wasn't feeling it so I took some of the template pieces and a clean pic of the Centurion suit and did a semi-free hand design. I first took an old pair of holiday shoes......very comfortable shoes, could wear them for hours so I'm not worried about hurting my feet.....traced out the soul on EVA and glued them down. Then made a paper template based off the pep file and pieced together the left boot front. Once I had that I used some Foam-Fu to make the right front which in hind-sight, I should have redone the left before I glued it down because it looks much better than the other......plasta dip to the rescue......The back was easy......paper wrapped around the back of the shoe, mark off the brim and end point at the front of the heel and went back to the picture for the look of the cut and any detailing. After reviewing the pic I did notice that the front has an opening right at the top of the foot which I will cut out later and close up from the inside. Now to cover up the shiny leather portion showing on the sides and very top by the heel, I glued some black craft foam, tuck it under each edge and glued it to the edge of the soul and the bottom piece of the EVA. The front top portion that is sticking up allows me free motion to walk almost as I normally would, it's just the detail pieces of those wings that keep hitting together......I know that down the line, repainting and/or replacement pieces will be needed. Tie them up and tuck the laces under the craft foam and ready for plasta dip and paint........
W/ my successful pep/free-hand combo of my boots, I though what else could I do w/ the time I had last night......2 hrs or so......I already had the forearm test piece printed out (which I again wasn't "Feeling It"), so I cut out 2 sections of it and went to town on some EVA and came up w/ the basic shape of the Centurion forearm:


Now that I have my pep/free-hand templates, I can make the other side and then just detail the hell out of them....I have a lot of detailing to do on these babies. Craft foam and EVA.......oh and yes, I even had a moment to get the elbow in........") . I needed the glove to keep the foam from sliding around but once Its all done, it will be attached to the undersuit.....velcro or buckles....I haven't decided yet. But the basic shape is exactly how I need it to be. Getten there.....I'm getten there!!!!!!
. I needed the glove to keep the foam from sliding around but once Its all done, it will be attached to the undersuit.....velcro or buckles....I haven't decided yet. But the basic shape is exactly how I need it to be. Getten there.....I'm getten there!!!!!!
Had a nice long holiday weekend......2 weekends actually and got some things done. Printed out my 7th attempt of my helmet....(I wonder what the record is?)........and scored the fold lines so that is all ready to be assembled but I have other things that were on the front burner so to speak.
I got me some BOOTS!!!!! Ok they are more like shoes.....but that is what it said on the templates file folder......"Boots"...That's what It said and that is what I'm sticking too!!!....Any way....I had a hard time building my test piece.....I just wasn't feeling it so I took some of the template pieces and a clean pic of the Centurion suit and did a semi-free hand design. I first took an old pair of holiday shoes......very comfortable shoes, could wear them for hours so I'm not worried about hurting my feet.....traced out the soul on EVA and glued them down. Then made a paper template based off the pep file and pieced together the left boot front. Once I had that I used some Foam-Fu to make the right front which in hind-sight, I should have redone the left before I glued it down because it looks much better than the other......plasta dip to the rescue......The back was easy......paper wrapped around the back of the shoe, mark off the brim and end point at the front of the heel and went back to the picture for the look of the cut and any detailing. After reviewing the pic I did notice that the front has an opening right at the top of the foot which I will cut out later and close up from the inside. Now to cover up the shiny leather portion showing on the sides and very top by the heel, I glued some black craft foam, tuck it under each edge and glued it to the edge of the soul and the bottom piece of the EVA. The front top portion that is sticking up allows me free motion to walk almost as I normally would, it's just the detail pieces of those wings that keep hitting together......I know that down the line, repainting and/or replacement pieces will be needed. Tie them up and tuck the laces under the craft foam and ready for plasta dip and paint........
W/ my successful pep/free-hand combo of my boots, I though what else could I do w/ the time I had last night......2 hrs or so......I already had the forearm test piece printed out (which I again wasn't "Feeling It"), so I cut out 2 sections of it and went to town on some EVA and came up w/ the basic shape of the Centurion forearm:
Now that I have my pep/free-hand templates, I can make the other side and then just detail the hell out of them....I have a lot of detailing to do on these babies. Craft foam and EVA.......oh and yes, I even had a moment to get the elbow in........
. I needed the glove to keep the foam from sliding around but once Its all done, it will be attached to the undersuit.....velcro or buckles....I haven't decided yet. But the basic shape is exactly how I need it to be. Getten there.....I'm getten there!!!!!!
- Member DIN
- S2424
Ok I tried to top your picture.........but Google keeps coming up w/ inappropriate things for foam FU......so I'l just LOL from yours........
Definitely like the foam fu pic, lol! Thumbs up to the boots, excellent work!
- Member DIN
- S2424
Jme, Thanks. Once again you're stealing my thunder. You're Foam-Fu pic is trumping my boots. It get's top billing and my boots are just the warm up act.......ON MY THREAD NO LESS.......no justice I's tells ya......ain't no justice.......:cry
SavedbyGraceG12, thank you. Some one like me at least........:$!
SavedbyGraceG12, thank you. Some one like me at least........:$!

- Member DIN
- S2424

Thanks guys..........love you too........:unsure


- Member DIN
- S2424
- Member DIN
- S2424
Quick mid week update:
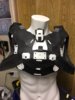
Got in some more detail work on the chest in.

The more I detail it, the better and closer to what I'm looking to make comes out. Just a little bit more work on the back and lights and this guy will be ready for final dip and paint.
On to my forearms.


 Basic shape is done and fits nicely.
Now the game rendition of the Centurion armor has these "cut" lines in certain areas....I could probably make those out of craft foam but I want to indent them not build them up. So I took a b/o engraver.....small bit head.....and just carved out what I needed. In Pic #3 you can see it. 2 vertical lines along the sides and 1 across the middle of that piece below the elbow. Clean cuts and once dipped and painted, will keep that look nicely. Now that I know that this can be done, I can "cut" out some more of the details in the overall suit. More details and craft foam to go and then will be on to the shins and thighs. Oh yeah.........helmet #7.........:facepalm. Bad Dirtdives.......bad.
Got in some more detail work on the chest in.
The more I detail it, the better and closer to what I'm looking to make comes out. Just a little bit more work on the back and lights and this guy will be ready for final dip and paint.
On to my forearms.
Basic shape is done and fits nicely. Now the game rendition of the Centurion armor has these "cut" lines in certain areas....I could probably make those out of craft foam but I want to indent them not build them up. So I took a b/o engraver.....small bit head.....and just carved out what I needed. In Pic #3 you can see it. 2 vertical lines along the sides and 1 across the middle of that piece below the elbow. Clean cuts and once dipped and painted, will keep that look nicely. Now that I know that this can be done, I can "cut" out some more of the details in the overall suit. More details and craft foam to go and then will be on to the shins and thighs. Oh yeah.........helmet #7.........:facepalm. Bad Dirtdives.......bad.
Attachments
- Member DIN
- S128
Wow, that chest has really come along! Nice work DD. Good idea with cutting the material out. The more depth you can give the armor the better it will be imo. Best of luck on the helmet. If you need any help just shoot me a message.
- Member DIN
- S2424
Thanks Duke......after 6 fails, I will definitely hit you up for some help.
Wow this is looking amazing!!! the Torso Details are coming out great, cant wait to see more.
- Status
- Not open for further replies.
Similar threads
- Replies
- 1
- Views
- 288