Centurion Build

Status
Not open for further replies.
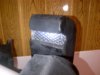
Bit of bad news though.....my helmet is a soggy mess. After I put in the last layer of fiberglass.......it stayed very soft and pliable. I can push on the side of the helmet and it caves in.......Not sure what I did wrong. Have to try something. Would heat fix that or just melt the resin? At least I don't have the pressure of a time frame any more. NY Comicon is next week and I've decided that the suit will be staying home unfinished. Worse case scenario....I redo the helmet.......It's the 4th or 5th try so why not a 6th?.......

Did you fiberglass the foam then? Or have I just misunderstood the whole thing?
 
Sorry, misread the message.......no, I glassed the helmet but it still remained soft to the touch......4 days later......(Thought you were referring to my glove issue).....so heating it to make it pliable is not the issue. I need for it to harden....
 
Turn the glove inside out or feel inside to see if there is fabric. If so, remove the existing plate and attach your plate directly to the fabric glove.

This is what I did and it worked like a charm. It was fabric under the existing plate and the glue to hold the new plate soaks right into it.

And glad the back surgery worked out!


"I don't know what is weirder - that you're fighting a stuffed animal, or that you seem to be losing." - Suzie
 
Hmm..

So, there are a few ways to fix this if you don't want to restart your entire helmet (Which may be he better way to go...), but here are some sources to read through.

In the case of Epoxy resin:
1. It will eventually overtime harden itself, but that could take a short time, or a long time depending on the amount of hardener that was used, surface conditions, atmospheric conditions, etc.
2. You scrape it all off, and reapply a newly mixed batch with optimal conditions because Epoxy resin is so danged picky...
http://forum.woodenboat.com/archive/index.php/t-9390.html

In the case of Polyester resin:
The ways to fix it are similar to epoxy, but you can apparently add layers on top with a mix with more hardener (although it sounds like you need to do this repeatedly), and sand off till tacky then repeat. Or you can stick some heat at it. Is it cold where your helmet is? Maybe try putting it in the sun, or apply some heat to it, and see if it stiffens up. Otherwise, you may have to take it off again and reapply new resin and glass...
http://continuouswave.com/ubb/Forum3/HTML/005696.html

Hope this helps, and you're able to get it solved! (or build a new one :p)
 
Huh? Fiberglassed the helmet and 4 days later it was still SOFT? O_O
Did you forget to add any kind of hardener?
Unless it would be freezing, it should cure in 1 an hour. o_O

This idea above or just add another layer of resin on top, this time with more hardener.
 
This idea above or just add another layer of resin on top, this time with more hardener.

The only issue with that, is if the layer you apply doesn't have a solid place to adhere to, it will just remain soft and the layer underneath won't cure. So even if the outer layer DID harden well, the minute he applied any pressure to that area (ie. bondoing, sanding, filing, dropping, etc.) It would bust up, or reveal the jelly stuff yet again. BUT there is a chance that with the absence of air, that inner layer may polymerize.

So Dirt, if you're leaning more towards making a new lid, why not try brushing some well mixed resin overtop, and see if in a few days, that thing hardens up the jelly?

I mean, IF it doesn't cure and if it's a small area inside.
If it's huge thing, especially outside, well then hardening is a must.
 
I mean, IF it doesn't cure and if it's a small area inside.
If it's huge thing, especially outside, well then hardening is a must.

Agreed lol.

...I just realized that I suggested the same thing as you in my last post... Get original Roman :rolleyes
 
Guys, thank you all for the advise. Seeing as how I was not going to make it to NYCC w/ the full suit this year, I'm not opposed to starting the helmet over and correcting some previous mistakes I made. I did rush it and I am not 100% sure of my resin to harder ratio although it did work on 2 other helmets.....not sure why this time it didn't. My issue w/ the gloves has been dealt w/. I removed the stitches from the original glove armor and attached the new HALO hand plate to it.....all good. It was all fabric underneath and attached nice and firmly.

Update:

Chest piece took on some new equipment this past weekend.......

IMG-20161001-01502.jpg LIGHTS!!!!!

Originally I was going to build something that I could slip into the front of the booster pack tops so it would shine forward.......but I wanted a bit more access and ease of turning on and off. After about and hour of staring at my flashlights.....I thought "Hey, these might be long enough".......So, I cut a hole in to the back of the booster and wedged the whole flashlight inside, facing the opening. The back end will stick out a bit but that is fine. I can incorporate that in to the look of the suit itself. I can turn them on and off w/o having to "disassemble" anything. Press of a button on the back of the booster and lights are on. Best of all, the back end twists off allowing me to change the batteries. I then took some plexi ceiling tile diffuser pieces and fashioned it to the opening of the booster fronts. and they look dam good. I do need to filter in some gold and that is going to be the trim coloring.........just a bit of the visor tint as soon as it is delivered. I'll get some close up pics of the back and diffuser pieces for tomorrow. Just rushed out of the house this morning......Alarm didn't go off.

And looking at the pic I have of Fred in the Centurion armor.....I have a ton of detail pieces to cut and put on.........but now that I don't really have a deadline......I'm taking my sweet time. That is another reason why I'm not too upset about the helmet. It will get done..........eventually.
 
The lights look great!


"I don't know what is weirder - that you're fighting a stuffed animal, or that you seem to be losing." - Suzie
 
Ok, As promised, lets take a look at those lights a bit closer....

IMG-20161007-01505.jpg Here is the back view. Please ignore the flashlight straps. They are there just in case the lights get pushed in too far....then I'll never get them out as the boosters are closed cells adn I would have to cut it open to get them. That center piece will also have lights in it.

IMG-20161007-01507.jpgIMG-20161007-01508.jpg All I did was trace a hole from the diameter of the light, cut it out w/ the hot knife and push the light in. It will eventually be glued in place but I will still have access to the batteries and the on/off switch. I'm just concerned if I glue and plasta dip it now, will I have a hard time opening it to change batteries when needed. Not worried about the switch, as that is rubber as well so the turning on/off will not be effected.

IMG-20161007-01511.jpg The light cover is this cheap thin plexi used to diffuse light from a ceiling fixture. It breaks easily after being scored and is also easy to trim down w/ clippers and sander (for those small adjustments to fit)

IMG-20161007-01510.jpg And presto, light cover. Looks great and it really tones down the lights intensity. I'm still waiting on my delivery of the gold color tint for my visor....for the helmet I have to redo....again....but lets light this bad boy up!!!!

IMG-20161007-01513.jpg Sweet.......

And a quick shot at the gloves :IMG-20161007-01514.jpg Still needs a little work but looks cool. That is the color by the way. It's a bit flat but once I have the finishing/sealing spray on, it will give it a bit of shine.

Well that's all for now. Have a good weekend all. I'll be out of town for a few days for my holiday but will be back ASAP and back in the shop to continue.
 

Attachments

  • IMG-20161007-01512.jpg
    IMG-20161007-01512.jpg
    1 MB · Views: 253
Thanks Duke!! too bad it can't work for the helmet visor.....it has the right look but you can't see through it.
 
Oh my god, what a great idea for the light cover!

If I didn't have half of mine installed..,


"I don't know what is weirder - that you're fighting a stuffed animal, or that you seem to be losing." - Suzie
 
Oh my god, what a great idea for the light cover!

If I didn't have half of mine installed..,

Thanks Jme. It just hit me....Like how you came up w/ a very simple and inexpensive visor!!!! just tinkering away. You could always put a piece over your existing light coves.....just a though.
 
  • Like
Reactions: Jme
Thanks Jme. It just hit me....Like how you came up w/ a very simple and inexpensive visor!!!! just tinkering away. You could always put a piece over your existing light coves.....just a though.

I am going to keep it in mind for the future but think I will stick with what I have now. I have used an old Blueray CD cover cut to size and sanded on the inside. I started installing the lights this weekend (I didn't get finished as it was Thanksgiving here and there was a Lot of Baseball to watch - Go Jays Go) and will take a picture of how it looks tonight.

How was NYCC?


"I don't know what is weirder - that you're fighting a stuffed animal, or that you seem to be losing." - Suzie
 
Thank you CommanderPalmer Staff Deputy Sir/Mam! You started out as Mara......Now look at you!!! They grow up so quickly...........sniff....sniff......


Using a full flashlight cuts down on build time for rewiring and placement, for battery changing......ect, ect, ect......and it will just be incorporated into the look of the suit. I wish the rest of my suit build would be so easy. But it's getting there. And just to promote you and your suit even more......it is AMAZING!!! FANTASTIC!!!! You should have just competed in that contest as is (at the time of competition), I bet you still would have won!
 
Last edited by a moderator:
  • Like
Reactions: Jme
How was NYCC?


"I don't know what is weirder - that you're fighting a stuffed animal, or that you seem to be losing." - Suzie

It was INSANE!!!!!!! We walked around a lot. Got there around 10 and stayed till about 3.....kiddies had enough for their 1st time. We spotted 2 MCs is store bought costumes and they were really wowed by what I build......Little did they know.......About the time we were walking out, somebody started calling for Little Master Chief.....about 6-7 HALOers were taking pictures and called us over. At this moment my son forgot all of his fatigue and was like ......"what?, we're leaving now?......didn't we just get here? Now I'm sorry to the guys because I forgot their names.....I was a bit foggy and fatigued myself but 2-3 of them are 405thers but I didn't recognize their call sign nor did I spot them in the Colonial roster......My daughter has about 300 pictures she took that day and I'm still waiting for her to get me those. But here is a treat: An up coming movie poster for 2017:

1567-5822-UB5DVF.jpg yes it's on it's side purposely. The movie title gets cut off if I leave it upright. That me by the way, cowering behind my son.......Now that's a keeper of a pic.
 
Status
Not open for further replies.
Back
Top