First Build: Spartan Emile and Spartan Kat

Status
Not open for further replies.

vivalablake89

Active Member
Hey Guys,

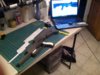
New recruit here not so new to the building scene, but figured I'd share and get more involved in the 405th. So I started this Spartan Emile build about 2 months ago when a friend of mine approached me about doing a noble team group build, how could turn such an awesome offer down, anyways I kicked off right away by looking at different threads and posts made on this site, and you guys helped tremendously in this build All of the files I used are from L3XBLU3RIV3R's reach thread. Everything you see is foam except for the helmet, that is a Sean Bradley ODST Dutch Kit I bought off him a year ago. Anyways I know I should've taken more progress shots along the way but I've had my head too into the build and totally forgot to really snap any. Though there is still a lot to be done and I am also building my wife's Spartan Kat build so I will remind myself constantly to keep taking pics ;). Anyways I had my photographer friend take some awesome shots of what I have so far, remember this is my first Spartan build and I will make upgrades eventually.

810_3892-L.jpg810_3894-L.jpg810_3897-L.jpg810_3910-L.jpg810_3913-L.jpg

As you can see there is a lot of work to be done, first and foremost I have to fix the biceps and attach some straps there and also need to add multiple attachment like the grenades and Kuruki Blade ect...
The 2 most important things that need to be completed are the helmet and the under suit. I will be posting later on some progress shots of the abs I am currently working on. Well I figured I share and if anyone has any questions feel free to ask, keep your eyes peeled for more to come.
 
I totally Forgot to mention before I will be adding electronics and lights... I also forgot to mention some of the materials I used, sorry about total newb. I sealed the foam in plastidip and I used dynaflex 230 to seal any big cracks by the way weldwoods contact cement is my preferred choice for assembling the foam, I've had bad experiences with hot glue. I tried some Epsilon on the forearm pieces and the stuff is actually pretty great, thinking about investing in more. All paint you see is acrylic and hand painted (sponge brushes are my best friend), and I coated everything in Rustuleom clear coat protective enamel.

Also here is some shots of the abs, another file I got form L3X's thread, it was actually pretty decent didn't have to resize or anything, had to draw my own template for the console box that sits on it and the spine is still in progress, I'm waiting on a new mannequin to come in the mail so that I can put correct placement on those pieces, also it will help me greatly figuring out pieces for the under suit.

photo 1.JPGphoto 2.JPGphoto 3.JPGphoto 4.JPG

Also so I can move pretty well in that I only coated it with black plastidip so it is still flexible the only painting I did was on the console and the little silver scratches in the appropriate areas.
 
Holy crap dude. Way to hit it out of the park on your first build!

Really impressive work.

Really great photography too!


"I don't know what's weirder, that you're fighting a stuffed animal, or that you seem to be losing" - Suzie
 
Great job. Got a hell of an Emile working there
 
So this past week I've been stuck with a summer cold, which is the worst. and I still managed to go to work :wacko anyways during the time I usually build I've been trying to sleep this thing off so not too much progress, but I started building my wife's Mark V torso for her Kat and its super tiny, but surprisingly it fits I'll have to take some pics tonight and post tomorrow but for now I thought I share some actual stuff in progress since I haven't really posted any progress pics. Started on the V2 Gauntlets unfold by L3XBLU3RIV3R its the upgraded version of the prior gauntlets I had made for my Emile so going to assemble this week and see how it comes out. have it all mapped out just need to cut and assemble.

photo.JPG
 
So I managed to actually find some progress shots of my armor during the build process, I thought I deleted them to make room on my phone but after actually cleaning out my phone last night I came across them. Anyways figured I share especially the gauntlets I used Epsilon on, it was quite a learning experience for me and I had a blast getting to test the stuff.
photo 1.JPGphoto 2.JPGphoto 4.JPG

Most of the Pieces I used on there are scratch made, the actual file I used I can't quite recall but it was one of the earlier models posted in the reach area of the archives, I was actually very pleased with them at first. But I think I should do the V2 just to see how it comes out. As you can see after I put 2 layers of the epsilon on I coated it with filler primer, and sanded had to repeat this method twice but in the end it came out super smooth, there where a couple on pros and cons to this. First off this was the smoothest flattest surface I have ever achieved with foam so that was a big pro second pro was that I was able to sand it down to that smoothness which can not be done with plastidip. Though there is always a con, unlike plastidip the amount of stress you can put on this will leave some cracks in it, while epsilon may seem strong it will crack with a certain amount of pressure or bend so make sure you only apply this stuff on to more stationary parts of the armor such as handplates shins and gauntlets, I wouldn't recommend putting it on cod pieces or chest and thighs which take a beating after awhile. Over all great product I think I may try again and layer about 3 coats this time to see if that makes any difference in the integrity of the shell.

And here some other progress shots of my armor, I still haven't taken pics of my wife's torso :facepalm I seriously need to learn when to step away from work and snap a photo or 2 haha.... Old habits die hard.
photo 3.JPGphoto 1 (1).JPGphoto 2 (1).JPGphoto 3 (1).JPGphoto 5.JPG

I always get giddy as a school girl when my workshop is scattered with raw unpainted foam armor in my work shop, it means its time to get to paint for hours one of my favorite parts! And also I get to test fit everything.
photo 4 (1).JPGphoto 5 (1).JPG
I think test fitting my first pair of legs was my favorite part, I've never made a pair of foam boots or shoes, so it was a big step for me ( no pun intended ;)).
So there is all the pics I could dig up on my stuff, more is soon too come with upgrades and the Kat build.
 
Okay so I know I've been terrible with the updates but as promised here are some shots of the building process for my wife's torso
photo 2.JPGphoto 3.JPGphoto 1.JPG

I used the female one from L3X's thread who ever scaled must be just as small as my wife because it was the perfect size. Over the weekend I had some time to dremel detail and put filler on it and coated it with plastidip. I usually have everything assembled first and do everything on a step by step process but I really wanted test some paints and mix some colors to get the right blue on it. Also that I am a big fan of the paint job on Kats armor.

photo 1 (1).JPGphoto 2 (1).JPG

Anyways hoping to put on the Blue tonight and get the Minor painted details on, with more pics to follow tomorrow no decals or electronics just yet. Just wanted to get an Idea of how I'm going to tackle the rest of this project. Also before I even get started on anymore parts for her, I still have to go back and redo my forearms and Thighs, the last ones where to big and the forearms I think I can do better.
Until tomorrow.
 
Okay so the last 2 night I went a little over board, what initially was supposed to turn into just a base coat to find out whether I liked the color for Kat turned into me painting and detailing and hand painting decals. Anyways the outcome was good I ended up liking the color after 3 coats so I think I will stick with Craftsmart's Neon Blue Acrylic paint I still need to coat this in a clear coat and give it a black wash, But I really just want to start getting other parts assembled. So for next month or 2 I'm just going to be focusing on getting this put together, got to stop procrastinating that and I still need to assemble Emile's attachments. Ill probably start with the cod and legs then work up to the arms, so stay tuned more fun stuff to come. Let me know what you guys think of the paintjob, honestly I wish I had better lighting in my apartment and that I was a professional photographer but we all have skill set and that's not mine ;)...
photo 1.JPGphoto 4.JPGphoto 5.JPGphoto 1 (1).JPGphoto 3.JPG
 
Sorry for the delay in this project, was on vacation and trying to take my time on this project. Hopefully my patience pays off, anyways I have a few updates today. Been working around the clock on the knife or kuiruki Blade that Emile has on his security shoulder. I also remade the thighs so they are not so bulky, they we're a little bigger than expected I don't think you can tell in photos but up close you can see that there is way too much space between my suit and armor. I have some pics of the blade but wont post anything on the thighs until I have them painted.
photo 1.JPGphoto 2.JPGphoto 3.JPG

I used the Pepakura Files in the Database and made it from 2mm craft foam sheet using a 3m adhesive spray to piece together. I've already gave it 3 coats of PVA glue and plan on coating in 3 coats of smooth-on 65 D mixture to harden it. I think I will be using that method for all my foam pieces from here on out, Later on this afternoon I post Pics of the M45 tactical Shotgun I am working on (all made from foam).
 

Attachments

  • photo 4.JPG
    photo 4.JPG
    143.3 KB · Views: 272
quick update: Trying to get better at taking progress shots, so far here is all the progress photos I've taken along the way of the M45 Shotgun I've been working on. All foam with PVC pipes for the barrels , its about 3 sheets of 1/2 inch foam stacked together and it holds up pretty well for foam. It will be much harder once I coat it in the PVA glue and 65D. I used a couple of different methods for making this build for the stacked foam I used blueprints and reference photos and the layers of 2mm and 6mm craft foam used for details were created from pepakura files and reference photos. Obviously there is a lot more that needs to be done with added details that I will be working on throughout the week, Hoping to have this and the knife complete for NYCC next month. So keep your eyes peeled.
photo 4.JPGphoto 5.JPGphoto 1 (1).JPGphoto 2 (1).JPGphoto 3 (1).JPGphoto 4 (1).JPGphoto 5 (1).JPG
 
So this Weekend I finished assembly of the shotgun, I need to get an updated photo all I have is the completed rail on this one. Hoping to have this done by NYCC in 4 weeks time so this will sort of be rushed, but I'll try to keep my hand steady haha.
photo 1.JPG
And I was finally able to get my EL panels and the DC inverter 3v battery box installed in the torso, wasn't to complicated, had break out the sodering kit after I had cut the panels. It worked out great though the lights are bright enough and not as blinding as LED so I was really happy about that, want to get a better battery box though that will connect to all 3 lights in the torso, right now I have 3 battery boxes in the chest and it would be a lot easier having one button to push instead of 3
photo 2.JPG
 
Looking great. That shotgun is fantastic!

The lights turned out really well. I am starting to get ready to break out my new soldering iron. I am wondering what you used for a panel cover for the lights?


"I don't know what's weirder, that you're fighting a stuffed animal, or that you seem to be losing" - Suzie
 
Hey Jme, thanks man and no Panel covers are necessary they are EL panels that you can cut to size and not nearly as bright and blinding as LED's haha. I found mine on Ebay for about $3 a pop from china, the only soldering you need to do is when you cut the panels you need to solder the sides and close them up again. They also state that you could seal them up again with Hot Glue but I wanted to be on the safe side and close them up completely before turning them on again lol. If you are using LED's I suggest using an old Blue Ray disc Box as your panel cover for them, they are easy to cut and shape and are the perfect transparent blue for Spartan lights. I just wanted to try something different with EL's and was very satisfied with the results, and it was much easier mounting. Hope that helps ;)
 
Blue ray cases are a great idea!

I have all of the supplies for doing LEDs (love Chinese eBay) and was struggling with what to use for the covers. I'll give this a go for sure, those boxes should be pretty easy to cut.


"I don't know what's weirder, that you're fighting a stuffed animal, or that you seem to be losing" - Suzie
 
Best of luck JME, also as far as cutting the blue ray boxes I would use a exacto blade or stencil cutter last time I went in with a scissor and it cracked along the way, rendering it useless, I'm thinking it was a cheaper box because I acquired it out of the bargain bin haha but better to be on the safe side. best of luck
 
Status
Not open for further replies.
Back
Top