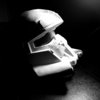
Hey everyone!
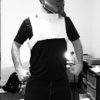
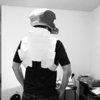
I’ve reached the point where my EOD helmet thread no longer encompasses all the work I’m getting done, so this will be the place where I document my progress on the entire custom build.
Here’s the breakdown:
Helmet
Reach EOD - In progress
Shoulders
H4 EOD - In progress
Gauntlets
H4 Recruit - In progress
Handplates
H4 Recruit -
Torso
H4 EOD -
Cod/Buttplate
H4 Recruit -
Thighs
H4 Recruit -
Shins
H4 Recruit -
Boots
H4 Recruit -
Undersuit
H4 -
Progress table:

I had today off work, so I made the most of it before I leave town for Thanksgiving.
First off, I’ve got the cutting process for the Cameo 3 down to a science. I was able to mark/cut one entire gauntlet in 40 minutes. Yep, I timed myself. That same gauntlet cut by hand would have required hours of time and painful fingers by the end. Not anymore!
Since I’m not spending all that time on cutting, I’ve gotten a lot better at assembly. In the future I will document and share specific tips I have discovered, but for now here’s the most helpful I have used today.
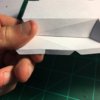
Long tabs can be sliced into shorter sections to make them easier to glue. I use super glue gel and it can be a hassle making sure the edges are aligned when the tab is really long, so I snapped a closeup:
My first attempt at sizing the gauntlet was hysterical. It was huge. This is the size comparison, with the smaller gauntlet being my second attempt that actually fits correctly.
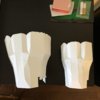
I had the same problem with the first shoulder I assembled. (I'm starting to notice a pattern.) Slowly, I am getting the smaller one put together. They’re pretty simple, so I don’t have to refer to the pepakura viewer at all while building, but looking at the first one does help speed things up.
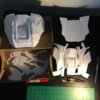
I wondered how much of the floor would be covered by the pages I cut out today. This isn’t even all of them, I threw a bunch away before I did this.

When I got into the handplate pep file, I knew right away I am going to make it out of foam. It is far too simple to make with cardstock, so I created a template by removing all the tabs and 1mm raised edges from the original. Then I exported the DXF file and opened it with Silhouette, where I created 2 versions - one for the sketch pen and the other for the blade. Here’s the resulting template cut out and laid onto 3mm craft foam.
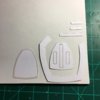
I pinned it all down...
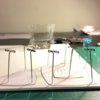
...and traced all the edges. Note the extra pin marks. I used them to create reference points for the foam layers.
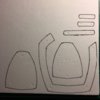
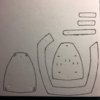
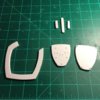
Then a little slicing and dicing.
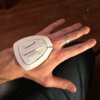
Some glue and a size test. Looks good! This is just a mockup, I’ll be putting a lot more care into the actual assembly, but I wanted to try my hand at some foaming! (See what I did there? Handplate, foam… :facepalm)
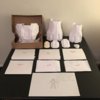
Lastly, a table full of my day’s work. I created sleeves of parts ready for assembly, and the sketch is a rough list of measurements I’m using to size the pep files. The extra bicep and tricep assemblies are either failed size tests or pieces I just screwed up one way or another.
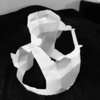
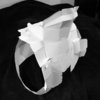
It’s tough because I have to size the shoulder separately from the bicep/tricep pieces. When I got the bicep the correct size, I assumed the shoulder would be fine, but that just didn’t happen. That’s how I ended up with the giant EOD shoulder, haha. You should have seen my face when I finished putting that thing together. It’s practically the size of my helmet. Anyway, I plan on being very productive over the holidays, so keep your eyes open. Cheers!
I’ve reached the point where my EOD helmet thread no longer encompasses all the work I’m getting done, so this will be the place where I document my progress on the entire custom build.
Here’s the breakdown:
Helmet
Reach EOD - In progress
Shoulders
H4 EOD - In progress
Gauntlets
H4 Recruit - In progress
Handplates
H4 Recruit -
Torso
H4 EOD -
Cod/Buttplate
H4 Recruit -
Thighs
H4 Recruit -
Shins
H4 Recruit -
Boots
H4 Recruit -
Undersuit
H4 -
Progress table:
I had today off work, so I made the most of it before I leave town for Thanksgiving.
First off, I’ve got the cutting process for the Cameo 3 down to a science. I was able to mark/cut one entire gauntlet in 40 minutes. Yep, I timed myself. That same gauntlet cut by hand would have required hours of time and painful fingers by the end. Not anymore!
Since I’m not spending all that time on cutting, I’ve gotten a lot better at assembly. In the future I will document and share specific tips I have discovered, but for now here’s the most helpful I have used today.
Long tabs can be sliced into shorter sections to make them easier to glue. I use super glue gel and it can be a hassle making sure the edges are aligned when the tab is really long, so I snapped a closeup:

My first attempt at sizing the gauntlet was hysterical. It was huge. This is the size comparison, with the smaller gauntlet being my second attempt that actually fits correctly.

I had the same problem with the first shoulder I assembled. (I'm starting to notice a pattern.) Slowly, I am getting the smaller one put together. They’re pretty simple, so I don’t have to refer to the pepakura viewer at all while building, but looking at the first one does help speed things up.

I wondered how much of the floor would be covered by the pages I cut out today. This isn’t even all of them, I threw a bunch away before I did this.

When I got into the handplate pep file, I knew right away I am going to make it out of foam. It is far too simple to make with cardstock, so I created a template by removing all the tabs and 1mm raised edges from the original. Then I exported the DXF file and opened it with Silhouette, where I created 2 versions - one for the sketch pen and the other for the blade. Here’s the resulting template cut out and laid onto 3mm craft foam.

I pinned it all down...

...and traced all the edges. Note the extra pin marks. I used them to create reference points for the foam layers.


Then a little slicing and dicing.

Some glue and a size test. Looks good! This is just a mockup, I’ll be putting a lot more care into the actual assembly, but I wanted to try my hand at some foaming! (See what I did there? Handplate, foam… :facepalm)

Lastly, a table full of my day’s work. I created sleeves of parts ready for assembly, and the sketch is a rough list of measurements I’m using to size the pep files. The extra bicep and tricep assemblies are either failed size tests or pieces I just screwed up one way or another.

It’s tough because I have to size the shoulder separately from the bicep/tricep pieces. When I got the bicep the correct size, I assumed the shoulder would be fine, but that just didn’t happen. That’s how I ended up with the giant EOD shoulder, haha. You should have seen my face when I finished putting that thing together. It’s practically the size of my helmet. Anyway, I plan on being very productive over the holidays, so keep your eyes open. Cheers!
Last edited:


