1st build masterchief 3d halo 4 + undersuit

405caveman

New Member
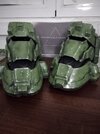
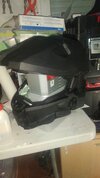
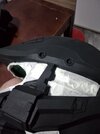
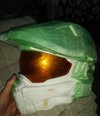
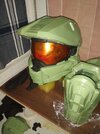
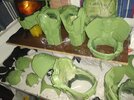
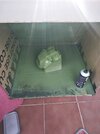
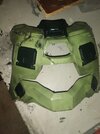
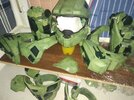
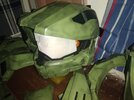
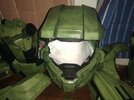
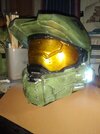
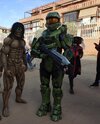
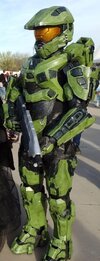
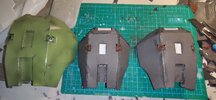
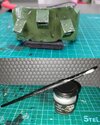
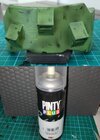
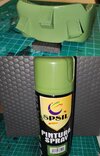
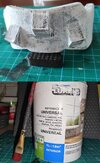
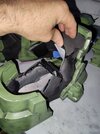
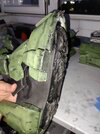
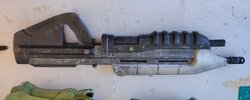
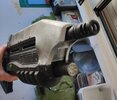
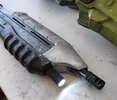
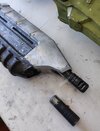
Hello everyone from Spain, the first thing to thank Halo 4/5 master chief armor high poly 3d printeble for you! For his design and his perfect work I have been printing the Master Chief's armor in 3d for more than a year, my printer is an anycubic mega x, it is my first job in 3d and it has not been easy, I already have almost everything printed and I am starting to paint the pieces, thanks for all the advice, tutorials and other help from the great creators here, I hope to be up to the task.

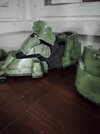
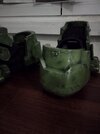
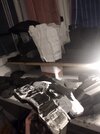
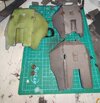
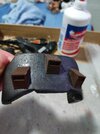
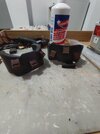
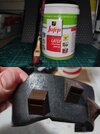
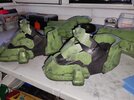
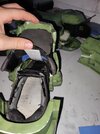
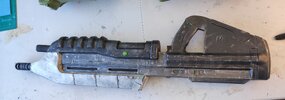
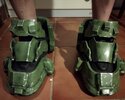
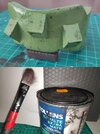
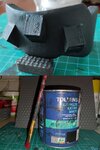
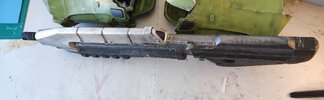
I have finished the boots and here they are I hope you like them

Tank you

translated by Google
 

Attachments

  • IMG_20211216_194932.jpg
    IMG_20211216_194932.jpg
    4.4 MB · Views: 243
  • IMG_20211216_195124.jpg
    IMG_20211216_195124.jpg
    2.7 MB · Views: 258
  • IMG_20211216_194042.jpg
    IMG_20211216_194042.jpg
    4.6 MB · Views: 224
  • IMG_20211216_194504.jpg
    IMG_20211216_194504.jpg
    4.1 MB · Views: 256
Hello, I have had to change my work system to move faster or at least try.
First I finished sanding all the printed parts, I gave the primer to all the parts and a coat of matte black paint to all the parts, I have prepared the helmet and now I only have to paint everything except the clear rifle in green
 

Attachments

  • IMG_20220216_210842.jpg
    IMG_20220216_210842.jpg
    3.5 MB · Views: 147
  • IMG-20220209-WA0016.jpeg
    IMG-20220209-WA0016.jpeg
    1.1 MB · Views: 139
  • IMG_20220216_210830.jpg
    IMG_20220216_210830.jpg
    3.2 MB · Views: 135
  • IMG_20220215_210331.jpg
    IMG_20220215_210331.jpg
    3.3 MB · Views: 159
  • IMG_20220131_215651.jpg
    IMG_20220131_215651.jpg
    3.4 MB · Views: 139
Hello, Thank you very much for the support, I have finished the helmet and I have little left to paint the rest of the armor, unfortunately until after April 3 there will be no more progress, I am late and in a month I have a local convention of Cosplay, later I will upload the rest of the photos and how I thermoformed the visor and how I painted it, thanks and see you soon
 

Attachments

  • IMG_20220227_214701.jpg
    IMG_20220227_214701.jpg
    4.2 MB · Views: 110
  • IMG_20220224_171525.jpg
    IMG_20220224_171525.jpg
    4.4 MB · Views: 100
Hello, I finished the local comic con, thank this great community, if I have been able to make this great suit it has been thanks to all the information here, thank you very much, soon I will publish more information about the rest of the suit and the improvements that I will make at
 

Attachments

  • IMG_20220403_234114.jpg
    IMG_20220403_234114.jpg
    584.5 KB · Views: 159
  • IMG_20220403_233446.jpg
    IMG_20220403_233446.jpg
    326.8 KB · Views: 190
  • IMG-20220402-WA0039.jpg
    IMG-20220402-WA0039.jpg
    440.1 KB · Views: 172
Hola, ya estamos de vuelta, despues de pasar un infierno con la movilidad de mi traje me he puesto a hacer unas modificaciones, le he hecho la parte superior del pie y la rodilla en espuma y las he subido un poco mas pequenas, le he hecho el cuerpo en foam y detalles impresos en 3D, espero un resultado
 

Attachments

  • IMG_20220505_202413.jpg
    IMG_20220505_202413.jpg
    1.2 MB · Views: 74
  • IMG_20220511_214309.jpg
    IMG_20220511_214309.jpg
    7.9 MB · Views: 76
  • IMG_20220511_214402.jpg
    IMG_20220511_214402.jpg
    2.8 MB · Views: 89
  • IMG_20220512_102736.jpg
    IMG_20220512_102736.jpg
    1.4 MB · Views: 79
Hello again, today I teach you in a small tutorial without words, how I paint my armor, in case it helps someone, thanks
 

Attachments

  • IMG_20220517_231624.jpg
    IMG_20220517_231624.jpg
    1.8 MB · Views: 90
  • IMG_20220517_231650.jpg
    IMG_20220517_231650.jpg
    1.5 MB · Views: 88
  • IMG_20220517_231915.jpg
    IMG_20220517_231915.jpg
    1.7 MB · Views: 88
  • IMG_20220517_224253.jpg
    IMG_20220517_224253.jpg
    3.2 MB · Views: 91
  • IMG_20220517_231721.jpg
    IMG_20220517_231721.jpg
    1.6 MB · Views: 89
  • IMG_20220517_231843.jpg
    IMG_20220517_231843.jpg
    1.7 MB · Views: 87
  • IMG_20220517_231811.jpg
    IMG_20220517_231811.jpg
    1.8 MB · Views: 85
  • IMG_20220517_223707.jpg
    IMG_20220517_223707.jpg
    3.1 MB · Views: 94
Hello, today I show you how I sand the joints of the 3d pieces, this is my system, it is not the best but it is the one that makes less dust, so I try to reduce the need to use bondo, I hope it helps you, thanks
 
Hello, I have made the part of the inner ankle suit again, it is made of thermoformed Foam with a hexagonal pattern, which I shape myself with a mold that I printed in 3d with PLA glued to a board, I use 5mm gray Foam and then I paint it with black spray and give it some chrome reflections with a brush, I glue the pieces to an elastic band with hot glue and close with velcro, I have tried to make it look like the visual references, I have not done the entire ankle why there is no space betwee
IMG_20220609_231454.jpg
IMG_20220609_233454.jpg
n the armor and my body, I hope you like it, I remember that this has been translated by Google
IMG_20220609_223451.jpg
IMG_20220609_223502.jpg
IMG_20220609_234111.jpg
IMG_20220609_231234.jpg
IMG_20220609_225019.jpg
the new and the old
IMG_20220609_232118.jpg


hello again, I have put the new upper pieces of the boots made in Foam and with a smaller size than the original 3d printed ones, to try to gain mobility, I have also removed some velcro that held the upper pieces and now they are loose, I hope with this gain more movement, thanks
 

Attachments

  • IMG_20220719_215152.jpg
    IMG_20220719_215152.jpg
    6 MB · Views: 76
  • IMG_20220719_215416.jpg
    IMG_20220719_215416.jpg
    5.6 MB · Views: 66
  • IMG_20220719_215426.jpg
    IMG_20220719_215426.jpg
    5.6 MB · Views: 61
  • IMG_20220719_220505.jpg
    IMG_20220719_220505.jpg
    5.5 MB · Views: 65
  • IMG_20220719_221400.jpg
    IMG_20220719_221400.jpg
    5.7 MB · Views: 69
Hello, I have also modified my 3d printed rifle.
IMG_20220720_190918.jpg
IMG_20220720_190844.jpg
I have changed the meter that was a sticker for a light meter, I have to say that electricity is not my forte and I always used small flashlights to solve the problem, in this case cut out the counter and printed a new counter frame and digital counter template
IMG_20220626_203102.jpg
, after dremeling out the battery hole, I popped in a mini bike light
IMG_20220720_190054.jpg
, and put a little button on the right hand side, and the cover with a piece of blue tinted methacrylate, looks pretty good even in the sun
IMG_20220720_190749.jpg
, thanks
 

Attachments

  • IMG_20220720_190500.jpg
    IMG_20220720_190500.jpg
    2.4 MB · Views: 55
  • IMG_20220720_190544.jpg
    IMG_20220720_190544.jpg
    2.1 MB · Views: 60
  • IMG_20220720_190619.jpg
    IMG_20220720_190619.jpg
    2.7 MB · Views: 57
  • IMG_20220720_190648.jpg
    IMG_20220720_190648.jpg
    1.5 MB · Views: 62
  • IMG_20220720_190720.jpg
    IMG_20220720_190720.jpg
    2.7 MB · Views: 55
  • IMG_20220720_190817.jpg
    IMG_20220720_190817.jpg
    2.9 MB · Views: 55
This thread is more than 9 months old.

Your message may be considered spam for the following reasons:

  1. This thread hasn't been active in some time. A new post in this thread might not contribute constructively to this discussion after so long.
If you wish to reply despite these issues, check the box below before replying.
Be aware that malicious compliance may result in more severe penalties.
Back
Top