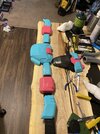
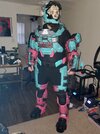
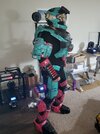
2nd Build: Spartan III (Completed)

Status
Not open for further replies.
All of it glorious man! That haunted helmet though. Ooooooo. I really wanna make one for Halloween and dang does that looks sick. The armor is looking just as fantastic as well.
Thanks! currently working on painting my left shoulder (operator) got the collar finished. I'm really excited for this whole build and with every piece I finish I just get more and more excited!

If you did want to make the helmet, NerdForgeDesigns on Etsy is where I got his files for printing
 
That haunted pilot helmet looks so clean!! where did you get the files for it?
If you did want to make the helmet, NerdForgeDesigns on Etsy is where I got his files for printing
^Just above your post ;) PokProps

Oh my lord, the helmet turned out beyond amazing. I can't say enough good things about it!
Thanks! I appreciate it! I'm really happy with how it's come out, I'm waiting for the weather to warm up just a little more and I can start cranking on pieces again! Next up will most likely be the visor for the helmet since that is the last piece of the helmet to make! Then on to calves and boots
 
Thanks! I appreciate it! I'm really happy with how it's come out, I'm waiting for the weather to warm up just a little more and I can start cranking on pieces again! Next up will most likely be the visor for the helmet since that is the last piece of the helmet to make! Then on to calves and boots
I’m really looking forward to the completed thing. This is probably one of the best helmets I’ve seen! The detail of the skull is fantastic.
 
I’m really looking forward to the completed thing. This is probably one of the best helmets I’ve seen! The detail of the skull is fantastic.
Thanks! Yeah weathering is my absolute favorite thing to do for armor in general, so weathering a skull was super fun for me! it came to life so quickly and I was so pleased with it!
 
It genuinely looks like a dirty weathered skull! With the visor on, it’s gonna look as if it were real!
The visor is gonna be a lot of fun too, I'm going to paint the edges so it looks nice and grimey all around the skull too ;) it's gonna look sweeet! Still wishy-washy on if I want to dye the visor much/at all so I'm gonna go ahead and make a couple to test with
 
The visor is gonna be a lot of fun too, I'm going to paint the edges so it looks nice and grimey all around the skull too ;) it's gonna look sweeet! Still wishy-washy on if I want to dye the visor much/at all so I'm gonna go ahead and make a couple to test with
Dyeing looked to be a good option, I also saw there is a paint to create a two way like mirror effect, but I’m still new to this, so I’m gonna watch and learn haha
 
WOOOOOOOOOOOOOOOOOOOOOOOOOOO

Been a hot minute since I've updated this thread, and that is on me. My bad. BUT MAN IT"S GONNA BE A BIG UPDATE

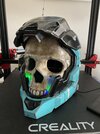
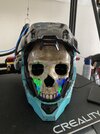
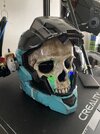
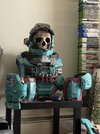
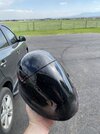
So last I updated, the helmet was painted and near completion, it still sits in the same position, but now with ~LEDs~ so thats cool
IMG_1508.JPGIMG_1510.JPGIMG_1511.JPG

I have yet to make the visor just because I haven't been able to sand the busk and smooth out the printed layers and get it to a vacuum former.

LEGS were next, I worked on the knee sheath that gives the back details and I love them, so I wanted to make the legs next. (Still deciding on what knees I want to go with, I'm thinking Para, but might go grenadier)
IMG_1555.JPGIMG_1556.JPGIMG_1592.JPGIMG_1593.JPGIMG_1777.JPG

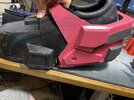
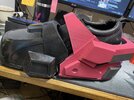
The shoulders were next after this, seeing that the helmet chest and legs were near completion
IMG_1774.JPG Sorry this is the only pic I have of the shoulders at the moment

As of this moment right now I have everything except the belt, forearms, and undersuit finished.
My game plan is to get the forearms completed next, since I want to do the belt last And then start designing the undersuit to work around all the components. The goal is to make it as if it were a 3/4 wetsuit or jumpsuit. I had originally planned on making an upholstery foam waist and thighs, but after assembling one and trying movement out, It just wasn't going to last long.

The plan now is to get a zentai body morph suit and add onto it. The shoulders will get some buffing up to fill in the biceps since they came out a little large for me. I'll also adhere some fabric onto the shoulders to make the undersuit look realistic. Then add on the knee and elbow gaskets as well as build up a torso 'tube' that will attach to the suit.

At the moment this is all theoretical so it's subject to change, but I have ideas in place and plan on trying them out at some point. I just started a new job, working 4 days a week so I'll have a little time off to still dedicate to building and fabricating this armor!

I have also been working on plenty of side projects and posted quite a few onto the discord but figured I should share here as well!
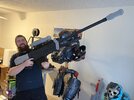
IMG_1751.JPGIMG_1753.JPGIMG_1666.JPGIMG_1646.JPGIMG_1645.JPG

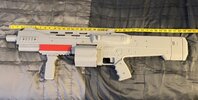
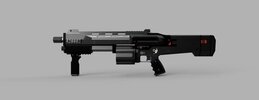
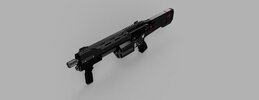
I modeled and printed the Bulldog Shotgun and the S7 Sniper rifle that were debuted in the Hali: Infinite trailers, this was mostly a good excuse for me to start getting more comfortable with Fusion 360 and I'm pretty happy with the work I did on them and might even carry one around at the next con I go to lol

I'll try to post an update when I make progress on the forearms, maybe do a pre and post weathering update and show how I do my weathering for them!
Thanks all!
 
That is quite the update! I love the sniper and can't wait to see it finished up.
 
Are the boots also from NerdForge?
Yes, these boots are included in the full armor files I downloaded from NerdForge


Bröther we require the B O O T breakdown (For the stilts portion)
Bröther, the boots are here, fret not.

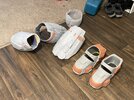
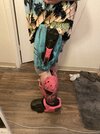
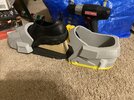
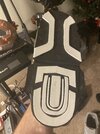
I used MDF mostly because that's what I had on hand. glued 2 pieces of 3/4" together in the shape of a wedge and called it good. Once the glue was set I sanded them so they were nice and flat on the faces and then pre drilled some holes for the screws to sink into. The actual bottom of the entire boot is made from a piece of 10mm EVA foam and a few strips cut into the boot pattern from 2mm foam. I plan on coating the bottom in leak seal along with the toe of the boot (thanks for that tip Turbo!)
IMG_1402.JPG IMG_1406.JPG
I just used 1 1/2" wood screws I had laying around and sunk those in through the shoe to the block, making sure to add some washers so the screws wouldn't just rip through the bottom of the shoe as I walked.
IMG_1786.JPG IMG_1787.JPG
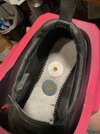
I was able to hide the screws beneath the insole and i can't even feel them when I walk so I think that will be fine for walking about con floor.

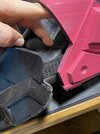
The Toe and the Heel were kept as separate pieces because I knew walking around I would want to have some motion for the toe if I kneel or step on uneven surfaces. It's not perfect but it does okay. I ended up using some stretchable nylon straps and cut them to about 3"
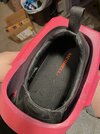
Using my soldering Iron I burned a hole into the plastic inside the shoe and the strap and slipped a rivet through the strap and into the boot on both the toe and the heel. This lets the toe stay sucked in nice and tight to the heel but allows for motion while walking naturally.

IMG_1780.JPG IMG_1778.JPGIMG_1779.JPG
I wish I had better pictures of the inside, but sadly I've glued the inside shoe into place now and can't pull it apart as easily without possibly damaging something.
 
You are truly a gentleman and a scholar kind sir. I will definitely be coming back to this when getting some more boot ideas on my next build (and maybe integrate it into my current spartan build)
 
OH MAN
(reviving thread because it's my own build thread and i'm able to get around to updating)
It's been a hot minute since I've updated this build thread, i mean...3 months?!

I've recently started a new job working for a practical effects company here in denver and we've been full throttle on a new project, so a lot of my free time was taken up working 2 jobs 7 days a week. And now I'm happy to say I've left my old job to pursue this special effects job full time! We're making some really sweet stuff, and it looks like we've got a few projects already lined up after this one wraps!

Anyways, back to the armor.

So we got the boots added last time, worked on some weathering techniques for those as I am wanting to apply a mud wash after the whole armor is built to really add to it!

I've gotten the Visor Buck printed and cleaned up and ready for a pull, and in fact a partnering shop I'm working with is assembling their old vacuum former and they asked if I wanted to use it! So I'll be getting that pulled soon!

IMG_1958.JPG

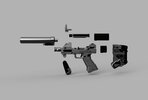
Got a model made of the Halo 5 SMG with silencer and extended stock attachments, I believe I shared the base model with the 405th free armor index, and the silenced version is up for sale on my etsy page!

IMG_1919.jpg

And for the armor itself, I was able to get the belt assembled on an actual combat belt I picked up from a military surplus store!

IMG_2013.JPG

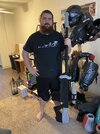
And I was able to get a full first attempt suit up to see how everything is looking!
IMG_2015 (1).JPGIMG_2014 (1).JPG

sorry for the pics being potato quality, but for just a first attempt at a suit up I thought it looked alright!

I did buy a chest harness off of amazon for like $20 it's advertised as a....specialty harness, BUT it has amazing placement and attachment points that I'll be able to utilize for rigging all the armor pieces! I've also spoken with ODCA about getting his seamstress to sew up a Reach Under-suit for me, and I'm looking forward to seeing how it comes out!

The next big goal for now is getting the visor pulled and fitted to the helmet. Then the next will be figuring out how the chest harness will rig to the belt, thighs, shins, and biceps (which I'm already working on planning out)

We are getting closer every day, and I cannot wait to have this full build completed. I'll be sure to try and get some updates as soon as I make some good progress, Thanks!!
 
2 MONTHS!? I haven't updated for 2 MONTHS!?!?!?!

Well let's catch up!

Work has been very busy lately, and I haven't had all the time or energy I'd like to, to put into the suit. However, I have made some great progress none-the-less.

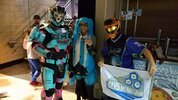
In August I was able to take the suit out to the Colorado Springs Comic Con for a test run! It's a smaller con, but it gave me an idea of what I need to work on still on the suit. We had a few failures, and a few successes that I'll touch on in a moment. But first, pics!
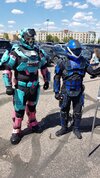
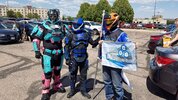
20210828_131313.jpg20210828_131318.jpg20210828_134823.jpg

Wins!:
The suit looked pretty great for an initial 'test drive' and it got lots of awesome reactions from folks at the con! Overall I was very pleased with how it went.
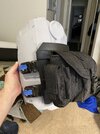
The night before the con I was trying to figure out how I was going to keep my biceps in place and was considering velcro, but I did have a sneaky Idea up my sleeve. I'd bought a cheap leather chest harness off amazon that is not for cosplay purposes.... BUT it had perfect sections made for holding straps and other harness attachments on! O-Rings and leather straps with clips to add or remove sections as needed turned out to be a perfect tool!

I ended up drilling a few holes into the inside of the chest piece and riveted the straps into the shoulders of the chest piece which let a leather strap (Connected at an O-ring right on my shoulder) hang down my bicep perfectly! I drilled 2 more holes into the bicep and riveted the bicep to that hanging piece of leather and everything sit exactly how I wanted it to! The only thing one might see is a "V" of leather leading to the bicep, but being that it is black like my current undersuit, it's not even noticable.

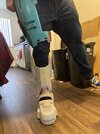
I made the Thighs attach in a similar way, but left room for adjustment by adding extra length of nylon and buckles that attach to my belt! This lets the thighs hang right off the belt and I can pull them up or down depending on how I want it all to sit!


Failures (And those are important!):
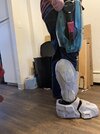
Early on that day (Like as we were walking up to the front doors) The platforms in my boots started to give out. It was a concern I had from the beginning, but I thought it might survive if I ignored it..... yeah right. Anyways. The screws that I used to attach the shoe I wear to an MDF wedge inside the boot housing pulled out of the MDF wedge and quickly started to stab into my foot which wasn't as bad as it sounds, but needed some addressing as time went on.

The boot Coverings that sit on top of the boot and serve.......I dunno what purpose they really serve, but they look cool I guess?
I riveted them in place as well, 2 connection points that I thought might allow it to pivot back and forth as I walk. Sadly, they pulled out very early on in the convention and so I had to have a handler help me and carry them around for me after they popped out.

So what's next?:
Starting with the belt, I liked the little system I made for the thighs to attach to the belt, but as I walked around the con, I quickly realized that slowly they pulled my belt down which in turn made my thighs sit lower and lower. So I plan on getting some black Suspenders and attaching them to the belt just to help keep them up more reliably and prevent the awkward spartan adjust before pics.

The Boots, I'm going to rip these guys apart and come up with a new system. Angus314 and I have been talking and have come up with some good ideas that we can't wait to share with the community. We're hoping to produce a "one size fits most" solution and we'll give an update on its own thread in the future I'm sure.
Basically I plan on just making the wedge part of the shoe I wear within the boot which more or less will just act like big ol clonkin boots I just add the shell of the reach boot onto, and that's that.


The only true 'final' thing I still have to do for this suit is vacuum form a visor, I have wiring in the helmet that will let me connect a fan to it and blow fresh air over the visor I add in, but I'm waiting to finish that out once I have a few visors lying around.

Thanks for sticking with me through that whole booklet of info, and thanks for being an awesome community in general! :D

I'l pop another update in here when I make more progress again.

TLDR: COOL SUIT GO OKAY! FIX UP, BE BETTER! YEAH
 
Status
Not open for further replies.
Back
Top