Build 2 - MK-VI gen-3. With some silver timeline influence

SgtSaint

Active Member
So this will be a version 2 of my first suit build. To recap: The first version was pretty decent but a size big. I basically built an XL suit for an L body.
A few things I want to take into account for build no.2 that I learned from build no.1
  • Scale better. Size it for freedom of movement.
  • Build from the boots upward.
  • Pre-plan the LEDs, cooling and other electronics.
  • Swapping the color scheme to be more dark. (swapping silver & gunmetal)
  • Scratch built under suit
  • Steady build, not nothing for weeks then a 30 day mad dash before a convention.
    • This also means more planning and time for the painting chipping and distressing effects.
 

Attachments

  • Punch_List_00-PreArmor.jpg
    Punch_List_00-PreArmor.jpg
    904.8 KB · Views: 131
  • Punch_List_01-SpartanArmor.jpg
    Punch_List_01-SpartanArmor.jpg
    436.3 KB · Views: 118
Accountability - if only to myself.
Step 0 of building a new armor is upgrading the Spartan _in_ the suit.
Joined the gym as working out at home is not as productive as it used to be.
Built a tracking sheet for food and workouts. Nobody cares to see it, but just the act of doing it make me think twice about everything and that's usually enough to put down the chocolate or think twice about skipping a workout.
WorkoutTracking.jpg
 
I looked through your other thread to make sure, but I didn't see any full suit up photos? You got any from the con or anything?
 
I looked through your other thread to make sure, but I didn't see any full suit up photos? You got any from the con or anything?
The 405th AU Google Drive now has backups of photos from the last couple conventions, as a collected repository.
We've had some conversations about this - the official drive is for members only so access to the general public isn't given out.
So I'm using my private Google Drive to grant public access to a single folder so all the public and other members can share convention photos in one place. Then I copy those to the official drive. Basically it makes a 405th member be the firewall between public and private access.


405th official
1682315882987.png

This is the **AU Regiment** drive, so I don't know if you can reach it not being an AU Reg. member.

My drive for public sharing
2023-04-24_16-06-00.png


With that out of the way... Here's a few full suit shots from the version I'm replacing. I guess it does add context to _this_ thread to know what colors are being swapped and what 'one size too big' looks like. These are all Brisbane AU "Supanova" convention NOV2022.

1667645256520.png


2022-11-05_20-14-41.png

2022-11-05_20-19-16.png

2022-11-05_20-05-09.png
 
Last edited:
191 Days to convention.
Working on the Spartan in the armor as much as on the armor itself.

This morning was...
Legs. 10reps/set, 3sets/round, 3 rounds
Then added 10mins of rowing machine to the end.
Bowl of Kellogg's Nutrigrain cereal
O.J.
Feed the dogs
Start the daily grind.
Espresso grind that is: Gotta have my Frappuccino!
 
191 Days to convention.
Working on the Spartan _in_ the armor as much as the armor itself.

This morning was...
Legs. 10reps/set, 3sets/round, 3 rounds
Then added 10mins of rowing machine to the end.
Bowl of Kellogg's Nutrigrain cereal
O.J.
Feed the dogs
Start the daily grind.
Espresso grind that is: Gotta have my Frappuccino!
 
Deciding between a couple new body suits.
Over time I'll sew on to these to upgrade them. But they are at least a start.
They're vastly different weights so might become a summer and a winter version.

This one is a heavier material, good quality, but ships out of Bulgary so it was a few weeks.
image.png


This one is an out of production (as far as I know) Robocop morph suit that can be found on the grey markets of Etsy, facebook market place etc. if you look around and aren't in a hurry. I found this size large in the UK for something like 20 pound and 10 in shipping or something like that.
Undersuit_Robocop.png


Considering that once armor is covering 70% of this, I need to really only look at the abs, lower back, elbows and knees. For that, I think I like the Robocop better, for its segmented panels in the abs and back. The top one is nice for the darker colors being a little more 'in theme'.

I guess I just have to see how they each look when the new armor is done.
 
Let's talk boots.

I've said it before and I'll say it again (probably 100 times by the end of the year because it keeps coming up)...
> Build from the the ground, up
That means boots, then shins since they ride on the boots, then thighs so you can see if any of those parts cause conflict and joint lock up. They are all dependent on each other. They are also below eye-line, weathered the most and looked at the least. So do all your learning while you work upward to the center peices of your armor: The chest and helmet. Those two you do last after all your skills are as good as they are going to get from doing legs, then arms, then back. Chest and helmet are what everyone studies on those 50 photos a day that get taken at conventions and we all post on line.

So boots... Apparently this is a thing because I keep getting asked about it on the 405th Discord channel lately. My approach is no better than anyone elses. If your approach works for you, and my approach works for me then we are both winners. A lot will also depend on the concept behind your boots and the build technique of your armor.

My build technique is 3d printed. The boots I'm building are from this MK-VI/Gen3 files set by ArmoryOfCaminus.
The boot armor fully encapsulates the real boot.
I'm using zip up work boots to go inside the armor boot. I did try sneakers in the armor and it was a big mistake. The soft sides provided no protection against the hard armor pressing into the foot. I don't recommend it.
BootsByNike.jpg


So... without further adue...

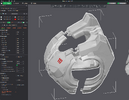
1. Scaling, the lazy man's way
Make sure my avatar is accurate-ish. Grab a workboot.stl file off the internet and scale the boot to match the length and width of the sole of my real workboots. Then put it on the avatar. Now put the armor on the avatar and pull those scaling handles until it fits the work boot.
1684314272768.png

Send the files to my favorite print farm (Starbase3d.etsy.com) and tell them the scale I want. Have them print the armor in a solid material, and the soles in a squishy rubber-like TPU. Because while I might be a rough-tough Spartan, I want to be able to walk for 12 hours at a convention and not have my feet screaming in pain. [Full disclosure, I am Starbase3d, so that's why its my favorite print farm]

2. Sand and clean up and paint
Nothing any different here than every other bit of 3d printed armor. Sand, prime, repeat until happy.

340766314_934227267780919_5983854027686764018_n.jpg

3. Assemble
Apparently this what I do different than a lot of folks. Maybe that's because the armor is complete and not like some I've seen where the armor is just a set of hard spats and your real boot sole is what you're walking on. Anyway... I take the armor boot parts and connect them from toe to heal with a strip of seat belt webbing. Just lay out the parts, tighten them up to each other like they are one shoe, and connect them by gluing and screwing the webbing to the armor on the inside. The webbing becomes a living hinge.
340596644_616803946634357_6624235950117756895_n.jpg

340704069_195423416609737_6953660595549083175_n.jpg


4. Finished result
Then I just shove my big work boot in. Don't use a steel toe because it won't squeeze through the center/arch bit. A zipper-side boot is nice and easy to slide a foot into then just zip it.
Slip the bottom of the shin/calf over the top of the work boot to hold up the shin and keep it all cohesive.
Snag_105b186c.png


IMG_5553.JPG
 
Duct Tap Torso - Part 1
Nothing new about making a duct tape dummy so you can work on yourself while making a costume. If you hit up YouTube for it there's videso going back 8 years. After watching several here's a collection of tips gathered one here, and one there.
Some people wrapped the subject in kitchen wrap or aluminum foil then they duct tapped them. I didn't see the point. We all have old t-shirts that can be considered sacrificial, plus its one more element of woven structure when it comes time to fill the dummy and not have the tape split. So in my case, my helper taped directly to the shirt then cut the shirt off me.
  1. Extra long sacrificial t-shirt gives you a torso that covers all the way down past the belt and cod piece.
  2. A balaclava will let you extend up above the shirt neckline so you can plan making a neck piece.
  3. Medical emergency shears help make the cutting-off process easy and safe.
  4. Two colors of duct tape make it easier to see layer 1 and layer 2.
  5. Tape the hems (shirt cuff, neck and sleeves), then the rest of the body.
  6. Horizontal layer 1, vertical layer 2.
  7. Sharpie some alignment marks where you are going to cut so you can put it back together again.
  8. Mark body elements like spine, collar bones, tail bone, navel for later reference
  9. A couple brooms or ski poles so the subject can keep their arms up {for a couple hours} goes a long way for their comfort.
  10. Plan ahead for when you backfill the dummy you will put a PVC pipe core down the center and horizontally out the arms. This will give connection points later.
In part 2, I intend to do the internal pipe and filler. I've got a couple tweaks of my own planned on this proven technique for making your own body double.

Snag_ec4223b.png
PXL_20230528_044955093.jpg
PXL_20230528_040143775.jpg
PXL_20230528_044950297.MP.jpg
 
I'm planning on making this year's Brisbane event. By then I'm hoping to have my odst suit assessed and deployed, and I can't wait to meet all u other Halo cosplayers in person . I'll be counting downs the days.
 
Sizing the new chest armor.
2023-06-09_19-26-27.jpg


Orange is the new one. Red is the old one that's too big. Its a subtle but definite difference, but most obvious at the ribs. Its about 4cm narrower, and a better set of files that doesn't flare out in the arm hole. Between reduced size and more natural body geometry this should give me more range of motion in the arms.

NewChest.gif

Scaling done in Windows 3D builder.
Files bought from:
ArmoryOfCaminus.etsy.com

Printing sourced to:
Starbase3d.etsy.com

#halocosplay #3dprintedarmor #armorcosplay #spartancosplay #halocosplayers
 
Can I ask where you how you connect your chest plate together (See attached)? I have the Galactic Armory Master Chief files, and I am suspicious that the clasp that the 3d Model has won't hold up to use. Is it strong enough by itself or did you rely on additional clasps? If so could you share with me your wisdom!!! Cause if I do need additional clasps I like adding to the 3D model slots for the straps to synch to.
 

Attachments

  • 2023-06-22.png
    2023-06-22.png
    517.3 KB · Views: 76
The 405th AU Google Drive now has backups of photos from the last couple conventions, as a collected repository.
We've had some conversations about this - the official drive is for members only so access to the general public isn't given out.
So I'm using my private Google Drive to grant public access to a single folder so all the public and other members can share convention photos in one place. Then I copy those to the official drive. Basically it makes a 405th member be the firewall between public and private access.

405th official
View attachment 330647
This is the **AU Regiment** drive, so I don't know if you can reach it not being an AU Reg. member.

My drive for public sharing
View attachment 330652

With that out of the way... Here's a few full suit shots from the version I'm replacing. I guess it does add context to _this_ thread to know what colors are being swapped and what 'one size too big' looks like. These are all Brisbane AU "Supanova" convention NOV2022.

View attachment 330648


View attachment 330650
View attachment 330649
View attachment 330651
View attachment 330653
Could I please be given access to that directory?
 
Could I please be given access to that directory?
You'll have to reach upward through your chain of command for that. Access was granted to me to carry out the discussed plan, but I can't grant access to others. - I have no authority.
FYI: Despite a great deal of discussion to create the plan and iron out the details, the plan to use my personal drive as a firewall between the public access and the 405th-on cloud space was scraped. I was told:
There are people in leadership roles who's job it is to handle things like creating public notices of events, direct people where to upload things and generally maintain those photo archives.
So its in those hands now. I don't know who you has specifically. Just reach upward through your CoC.


how you connect your chest plate together
Velcro - I did a post for that on my Instagram.
Its 2"/50mm velcro at the 4 points where chest & back meet.

I have the Galactic Armory Master Chief files
I used those same files for my first build.
No attempt was made to make the faux clips that are modeled in actual function.
 
Last edited:
From AliExpress for about AU$10 or something silly like that. I just searched "gold mirrored motorcycle visor"
This was going to be my fallback, plan B for a visor in case I didn't do a good job of dye and mirror.
But... It doesn't have the geometry of a purpose made Spartan helmet visor. But hard to say 'no' to it.Hmmm... Maybe magnet system it in to the helmet so I can change when I want to? Hmmmm...
#halocosplay #halo #405thcostuming
Snag_18a76e9.png
Snag_18ab384.png
Snag_18ae68b.png
 

Your message may be considered spam for the following reasons:

If you wish to reply despite these issues, check the box below before replying.
Be aware that malicious compliance may result in more severe penalties.
Back
Top