- Member DIN
- S128
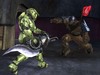
Welcome to my build thread! This is my first suit, but I have completed a few other peps before. I try to record the steps that I take for each stage of the process, but they are not 100% my ideas. I have learned everything I know from reading build threads on the 405th. Some of the tips and techniques I have developed, but again I thank former builds for paving the way.
Scroll down, there is lots of information in this first post and helpful links in my second post.
Current Stage: FINISHED! (and still working on it. :/ )
.jpg")
Helmet: Commando/Carter Concept Varient by Crimmson
Chest: Collar/Grenadier/Jorge (without neck guard) by L3X BLU3R1V3R
R. Shoulder: ODST by Kirrou
L. Shoulder: Commando by @BMcClain
Bicep: Standard Mk. V by ForgedReclaimer
Forearm: Standard Mk. V by ErMaC
Arm Attachment: UA/Bracer by Ral Partha
Cod: Standard Mk V. by Roadwarrior
Thighs: Standard Mk. V by ForgedReclaimer
Thigh Attachment: UA/NxRA Tactical Hardcase by SJSUSPARTAN
Shins/Knees: Standard Mk.V with increased FJ Para knee by @BMcClain
Handplates: Standard Mk V (foam glove) by WandererTJ
Boots: Standard Mk V by @fat-hi555
Weapons: Seperate Thread
Color Scheme:
Primary: White (with battle damaged)
Secondary: Light blue
Emblems and Accents: Red/Orange and Black
Lights: Blue
Visor: Blue Mirror
Bio:
B-128: Zan (Pernicious Duke) || Spartan-III || Beta Company: Shield Team || Petty Officer Third Class || Washington
Name: Thorak, Zan
Service Number: B-128
Birthplace: Draco III
DOB: December 28, 2530
Rank: Petty Officer 3rd Class
Armor: MJOLNIR MK V variants White/Light Blue
Emblem: Saw and Shield
Gender: Male
Weight: 218 lbs.
Height: 5' 11" (6' 3" in armor)
Hair Color: Brown
Eye Color: Blue
Preferred Weapon: M45 Tactical Shotgun
Taken by the Spartan III Program in 2537 as part of Beta Company at the age of 7. First deployed by Senior Chief Petty Officer Franklin Mendez on 27 June 2045 to the human colony Verent along with 3 other Spartans of Beta Company designated as Shield Team. All Spartans were outfitted with MJOLNIR and sent as a "non-combat" team to aid the people of this outlying colony. Their true purpose, only later discovered and sadly never utilized, was to set up an extraction point for Beta Company should Operation: TORPEDO need it. Shield Team was heavily equipped with defensive armor and gear.
During their weeks on Verent, Shield Team received numerous reports of Covenant invasions all throughout human-controlled space and were not happy to be waiting around as a relief effort. Shortly after Operation: TORPEDO was deemed a success, Shield Team learned that there were no Beta Company survivors and no one would be coming to Verent. Now hotheaded, the team's leader Zan learned that his home world, Draco III, was currently under Covenant control. They abandoned their post and joined up with the Spartan-IIs on Draco III in the retaliation attack. With no human civilian survivors and no Covenant forces remaining, the mission was again considered a "success." Tired of the UNSC's ideas of "acceptable loss," Shield Team decided to take more preemptive measures. After going AWOL, their last known destination was into Covenant-controlled space.
Spartan B-128's last known whereabouts are still unconfirmed and his armor, along with the rest of Shield Team have never been recovered.
Time Spent: (conservative est. 450 hours)
Scaling – 3 hr
Pepping – 149 hr
Hardening – 34 hr
Shaping – 128 hr
Painting – 35 hr
Rigging – 65.25 hr
Electronics - 16 hr
Consumable Materials Used:
Body Suit $22
Motorcycle Shirt Armor $45
Motorcycle Leg Armor $40
Used Military Boots $40
Shoe heel Lift - 2.5" $12
Tactical Belt $12
Load Bearing Suspenders $12
110lb Cardstock - 210 pages $15
Glue Stick - 94 sticks $10
Xacto knife blades - 34 blades $5
Popsicle Sticks, Tongue Depressors, Binder Clips (from Dollar Store) - 40 $4
Fiberglassing (Laminating) Resin w/catalyst - 198oz $100
Plastic Cups - 316 (most were for Bondo @ $0.05ea) $35
Respirator - 2 $11
Paintbrushes - 39 $15
Sharpie/Magic Marker - 2 $2
Gloves - 350 pair (I don't like to get too dirty) $50
Fiberglass Cloth - 21 sq feet $20
Acetone - 83oz $15
Paper towel - 2 roll $5
Bondo (Body Filler w/cream hardener) - 412oz $80
Putty Knives (spreaders) 4" - 10 $5
9" x 11" Sandpaper - 3@60, 1@120 $4
5" Sanding Discs- 31@120g, 19@60g $14
Oscillating Discs - 4@40, 22@60g, 50@120g $25
Oscillating Backing Pad - 2 $8
4 1/2" Sanding Roll by yard - 16@320g 1@120g $20
Spot Putty - 7 tubes $40
Rustoleum grey primer - 3 can $12
Rustoleum silver gloss - 1 can $6
Rustoleum White Matte - 2 can $8
Rustoleum Orange Satin - 2 can $8
Rustoleum Black Satin - 1 can $6
Rustoleum Flat Clear Coat - 4 can $16
Craft Acrylic Black Paint - 2 tube $3
Painter's tape - 2 rolls $10
Paintbrushes - 1 small, 3 foam
Vaseline- 1/3 jar $2
Craft Acrylic Brown Paint - 1 tube $2
Sanding Sponge - 6 @ 1000 grit $12
Water slide paper- 3 sheets $6
.020" PETG Plastic - 3 sheets $5
Air Dry Clay - 3lb $3
On/off switch - 7 $6
9v connectors - 8 $5
12v fans - 1 $9
Wire and shrink wrap $5
5mm White LED with metal holders - 19 $3
Krylon Looking Glass Silver spray paint - 1 $15
Krazy Glue .5 tube - 1 $10
Epoxy Putty - 2 tubes $12
1" Nylon Webbing - 4 yards $8
Lighter - 1 $2
1" Buckles - 11 $8
1" Adjustable webbing slides - 2
Nut, Bolts, Washers, Lock Washers, Hinge - lots $75
Nylon spacers - 8 $4
Vinyl - 1.5 yards $15
.020 x 18" Plastic - 1.5 yards $15
Magnets - 2 rare earth $3
Sugryu - 2 pouches $6
Loctite Gel - 2 tubes $8
Guerilla Glue - 1 tube $5
Velcro Hook&Loop - 2 ft x 2" $4
EVA floor mat - 1sq foot $1
Box cutter knives - 2 $1
Over spending due to last minute panic purchases $40
Trash bags med and lrg- 8
Shirt - 2
Jacket- 1
Pants- 1
Pajamas - 2 (yup, I got lazy)
Work Shoes - 1
Rags- 5
Now 1055 may seem like a lot, but spread out over two years wasn't bad, start saving now!
Tools Used:
Pepakura Designer 3 (Free Version, for printing)
ArmorSmith (Paid Version, for scaling)
Xacto Knife Set $17
Self Healing Cutting board $10
Pens (1 blue, 1 black)
Low Temp mini Hot Glue Gun $8
Rasp File
Fine Files and File cleaning brush
5" Orbital Sander
Dremel MultiPro 395 (cut off, grinding and sanding attachments)
Sonicraft Oscillating Tool
Compressed air (for quick cleaning)
Painting Stand (home made)
Vacuum Form Table (home made for visor)
Soldering gun
Heat Gun (for visor and foam and paint)
Drill Index (1/16" to 1/2" by 64ths)
Tweezers
Box Cutter
Future Purchases:
Patches/Stickers 405th 2/$5
Scroll down, there is lots of information in this first post and helpful links in my second post.
Current Stage: FINISHED! (and still working on it. :/ )
Helmet: Commando/Carter Concept Varient by Crimmson
Chest: Collar/Grenadier/Jorge (without neck guard) by L3X BLU3R1V3R
R. Shoulder: ODST by Kirrou
L. Shoulder: Commando by @BMcClain
Bicep: Standard Mk. V by ForgedReclaimer
Forearm: Standard Mk. V by ErMaC
Arm Attachment: UA/Bracer by Ral Partha
Cod: Standard Mk V. by Roadwarrior
Thighs: Standard Mk. V by ForgedReclaimer
Thigh Attachment: UA/NxRA Tactical Hardcase by SJSUSPARTAN
Shins/Knees: Standard Mk.V with increased FJ Para knee by @BMcClain
Handplates: Standard Mk V (foam glove) by WandererTJ
Boots: Standard Mk V by @fat-hi555
Weapons: Seperate Thread
Color Scheme:
Primary: White (with battle damaged)
Secondary: Light blue
Emblems and Accents: Red/Orange and Black
Lights: Blue
Visor: Blue Mirror
Bio:
B-128: Zan (Pernicious Duke) || Spartan-III || Beta Company: Shield Team || Petty Officer Third Class || Washington
Name: Thorak, Zan
Service Number: B-128
Birthplace: Draco III
DOB: December 28, 2530
Rank: Petty Officer 3rd Class
Armor: MJOLNIR MK V variants White/Light Blue
Emblem: Saw and Shield
Gender: Male
Weight: 218 lbs.
Height: 5' 11" (6' 3" in armor)
Hair Color: Brown
Eye Color: Blue
Preferred Weapon: M45 Tactical Shotgun
Taken by the Spartan III Program in 2537 as part of Beta Company at the age of 7. First deployed by Senior Chief Petty Officer Franklin Mendez on 27 June 2045 to the human colony Verent along with 3 other Spartans of Beta Company designated as Shield Team. All Spartans were outfitted with MJOLNIR and sent as a "non-combat" team to aid the people of this outlying colony. Their true purpose, only later discovered and sadly never utilized, was to set up an extraction point for Beta Company should Operation: TORPEDO need it. Shield Team was heavily equipped with defensive armor and gear.
During their weeks on Verent, Shield Team received numerous reports of Covenant invasions all throughout human-controlled space and were not happy to be waiting around as a relief effort. Shortly after Operation: TORPEDO was deemed a success, Shield Team learned that there were no Beta Company survivors and no one would be coming to Verent. Now hotheaded, the team's leader Zan learned that his home world, Draco III, was currently under Covenant control. They abandoned their post and joined up with the Spartan-IIs on Draco III in the retaliation attack. With no human civilian survivors and no Covenant forces remaining, the mission was again considered a "success." Tired of the UNSC's ideas of "acceptable loss," Shield Team decided to take more preemptive measures. After going AWOL, their last known destination was into Covenant-controlled space.
Spartan B-128's last known whereabouts are still unconfirmed and his armor, along with the rest of Shield Team have never been recovered.
Time Spent: (conservative est. 450 hours)
Scaling – 3 hr
Pepping – 149 hr
Hardening – 34 hr
Shaping – 128 hr
Painting – 35 hr
Rigging – 65.25 hr
Electronics - 16 hr
Consumable Materials Used:
Body Suit $22
Motorcycle Shirt Armor $45
Motorcycle Leg Armor $40
Used Military Boots $40
Shoe heel Lift - 2.5" $12
Tactical Belt $12
Load Bearing Suspenders $12
110lb Cardstock - 210 pages $15
Glue Stick - 94 sticks $10
Xacto knife blades - 34 blades $5
Popsicle Sticks, Tongue Depressors, Binder Clips (from Dollar Store) - 40 $4
Fiberglassing (Laminating) Resin w/catalyst - 198oz $100
Plastic Cups - 316 (most were for Bondo @ $0.05ea) $35
Respirator - 2 $11
Paintbrushes - 39 $15
Sharpie/Magic Marker - 2 $2
Gloves - 350 pair (I don't like to get too dirty) $50
Fiberglass Cloth - 21 sq feet $20
Acetone - 83oz $15
Paper towel - 2 roll $5
Bondo (Body Filler w/cream hardener) - 412oz $80
Putty Knives (spreaders) 4" - 10 $5
9" x 11" Sandpaper - 3@60, 1@120 $4
5" Sanding Discs- 31@120g, 19@60g $14
Oscillating Discs - 4@40, 22@60g, 50@120g $25
Oscillating Backing Pad - 2 $8
4 1/2" Sanding Roll by yard - 16@320g 1@120g $20
Spot Putty - 7 tubes $40
Rustoleum grey primer - 3 can $12
Rustoleum silver gloss - 1 can $6
Rustoleum White Matte - 2 can $8
Rustoleum Orange Satin - 2 can $8
Rustoleum Black Satin - 1 can $6
Rustoleum Flat Clear Coat - 4 can $16
Craft Acrylic Black Paint - 2 tube $3
Painter's tape - 2 rolls $10
Paintbrushes - 1 small, 3 foam
Vaseline- 1/3 jar $2
Craft Acrylic Brown Paint - 1 tube $2
Sanding Sponge - 6 @ 1000 grit $12
Water slide paper- 3 sheets $6
.020" PETG Plastic - 3 sheets $5
Air Dry Clay - 3lb $3
On/off switch - 7 $6
9v connectors - 8 $5
12v fans - 1 $9
Wire and shrink wrap $5
5mm White LED with metal holders - 19 $3
Krylon Looking Glass Silver spray paint - 1 $15
Krazy Glue .5 tube - 1 $10
Epoxy Putty - 2 tubes $12
1" Nylon Webbing - 4 yards $8
Lighter - 1 $2
1" Buckles - 11 $8
1" Adjustable webbing slides - 2
Nut, Bolts, Washers, Lock Washers, Hinge - lots $75
Nylon spacers - 8 $4
Vinyl - 1.5 yards $15
.020 x 18" Plastic - 1.5 yards $15
Magnets - 2 rare earth $3
Sugryu - 2 pouches $6
Loctite Gel - 2 tubes $8
Guerilla Glue - 1 tube $5
Velcro Hook&Loop - 2 ft x 2" $4
EVA floor mat - 1sq foot $1
Box cutter knives - 2 $1
Over spending due to last minute panic purchases $40
Trash bags med and lrg- 8
Shirt - 2
Jacket- 1
Pants- 1
Pajamas - 2 (yup, I got lazy)
Work Shoes - 1
Rags- 5
Now 1055 may seem like a lot, but spread out over two years wasn't bad, start saving now!
Tools Used:
Pepakura Designer 3 (Free Version, for printing)
ArmorSmith (Paid Version, for scaling)
Xacto Knife Set $17
Self Healing Cutting board $10
Pens (1 blue, 1 black)
Low Temp mini Hot Glue Gun $8
Rasp File
Fine Files and File cleaning brush
5" Orbital Sander
Dremel MultiPro 395 (cut off, grinding and sanding attachments)
Sonicraft Oscillating Tool
Compressed air (for quick cleaning)
Painting Stand (home made)
Vacuum Form Table (home made for visor)
Soldering gun
Heat Gun (for visor and foam and paint)
Drill Index (1/16" to 1/2" by 64ths)
Tweezers
Box Cutter
Future Purchases:
Patches/Stickers 405th 2/$5
Last edited:
") Congratulations and happy building!
Congratulations and happy building!