Encouragement and Help Needed

Status
Not open for further replies.

scorch15

New Member
It has taken me so long to get to this point. Probably 4 years due to numerous hiatuses.

This is phase 1 pretty much complete I believe, no plastidip yet.

The hardest part was to let go of the imperfections because they stand out to me. Some things are not angled the same from right to left, some pieces missing,obvious holes/windows, etc. I finally decided to say "screw it" and just go ahead and I am surprised how far I have gotten.

I need help with how to best attach the lower end parts to the back with a buckle or magnet. I tried purse magnets once, and tried embedding them within the foam and it didn't work out well and they weren't strong enough. I am thinking of those rare magnets, and just gluing them on the surface to allow a visible seam. Any thoughts?

Thank you

Edit: Forgot to mention the part that connects the front to the back is not attached yet to the lower left and right of the back piece.

2010275445566122808%253Faccount_id%253D2.jpg
 
Last edited:
Hey scorch15, It really doesn't matter how long you take.....Take as much time as you want. As for the magnets, yes the rare earth magnets will do the trick. What you need to do is to embed the magnets in the foam and then use some craft foam over the area to A) prevent the magnet from tearing out and B) covering up any seams or visual signs of the magnet itself. If you do this on both sides.....you'll be fine and the pieces will stay firmly together.
 
Hey Scorch,

First of all, your work looks great! We are all very hard on ourselves when it comes to little imperfections but they really can be easily overcome.

Dirtdives has a great idea (I may try it myself as I did not have success using rare earth magnets - they tore out - but using craft foam over them sounds really good)

The alternative is to use buckles on the inside of the foam, but you get a gap on the top side. If you do use buckles, remember to sand the inside surface of the foam first so that the buckle will adhere. Also a good idea to use some serious glue (I use Gorilla glue to attach buckles).

Keep up the great work!
 
Dirtdives advice is sound. Also with the craft foam covering the magnets it dampens the magnetic strength so that the magnets are easier to pull apart when getting in and out of the suit. I had to do something similar with a MK VI build I did recently.
 
Also, if you use the REMs, you might not need to use one on either side......you could use a magnet on one side and a metal catch-plate on the other.

Okay thank you. I am not sure if I can even get REM at this point but I will search longer after work. They seem to not import where I am.

Is it okay to try velcro and then later do magnets? I'm trying not to be a perfectionist since I am still learning.

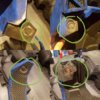
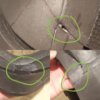
Also is it a problem that the interfaces do not line up perfectly?
20180323_115048.jpg


20180323_115048.jpg
20180323_115037.jpg
 
If you have a Michael's in your area check with them. Some locations carry REMs.
You can also check this place:
www.redmooncosplaysolutions.com
They are located in Edmonton AB and sell a few different sizes of REM. They ship across Canada.
Spots that don't line up properly can happen. I have had a few in my current ODST build. I think that happens cuz the files were probably converted from Pep file originally. If it was paper the parts would meet up nicely. Since it's foam that's being used, thickness of materials changes things. To fix that I would either use filler or add more foam depending on the severity of the gap.

Okay thank you...I do have a Michael's and then the website. I will check it out.

For the filler in those parts...would you suggest placing the magnets first and then after using the filler to make it flush? Does the plastidip step come next?

Also I was assuming that I should do the magnets after I spray with the plastic, should I do it first before I use plastidip?

Thank you kindly.
 
Sorry in advance for doing a photo dump on your thread. I wouldn't be able to explain this well without some visual aid.
I'm going to use a past and current build for examples. When figuring out where to place a magnet use a spot that can hide the magnet.
20180323_190416.jpg 20180323_190505.jpg
The MKVI has some nice spot to place a magnet for connecting (should work well for the Reach armour as well). On my ODST I just made up a spot to place magnets and hid them as tabs.
20180323_190840.jpg 20180323_190615.jpg
Placing the magnets I cut out little divots so the magnets are as flush as possible with the foam and used contact cement to adhere them to the foam. Then place a small disc of 2mm foam over one to conceal and to act as a barrier to weaken the strength of the magnetic pull between the magnets.
As for gaps and spots that don't come together right. You can either use more foam to fill in the gap or use some sort of filler to fill in small holes or level off other spots.
20180323_191937.jpg 20180323_185853.jpg 20180323_185838.jpg
When it comes to sealing the foam with Plasti Dip, I do that after all the fixes and magnets are in place. I don't spray over the magnets because they are hidden in areas that won't typically need sealing and I fear by covering them with more material it would weaken the strength of the pull more and then the magnets just won't hold.
Hopefully this helps. If not and I have confused you even more... Maybe another member will come along and explain things in a better fashion. :p
Good luck with your build. Hope to see some more progress soon.
 
Sorry in advance for doing a photo dump on your thread. I wouldn't be able to explain this well without some visual aid.
I'm going to use a past and current build for examples. When figuring out where to place a magnet use a spot that can hide the magnet.
View attachment 254137 View attachment 254138
The MKVI has some nice spot to place a magnet for connecting (should work well for the Reach armour as well). On my ODST I just made up a spot to place magnets and hid them as tabs.
View attachment 254139 View attachment 254140
Placing the magnets I cut out little divots so the magnets are as flush as possible with the foam and used contact cement to adhere them to the foam. Then place a small disc of 2mm foam over one to conceal and to act as a barrier to weaken the strength of the magnetic pull between the magnets.
As for gaps and spots that don't come together right. You can either use more foam to fill in the gap or use some sort of filler to fill in small holes or level off other spots.
View attachment 254141 View attachment 254142 View attachment 254143
When it comes to sealing the foam with Plasti Dip, I do that after all the fixes and magnets are in place. I don't spray over the magnets because they are hidden in areas that won't typically need sealing and I fear by covering them with more material it would weaken the strength of the pull more and then the magnets just won't hold.
Hopefully this helps. If not and I have confused you even more... Maybe another member will come along and explain things in a better fashion. :p
Good luck with your build. Hope to see some more progress soon.

This actually helps to see and give me a reference for what is possible. Thank you.
 
Status
Not open for further replies.
Back
Top