Chromosome
New Member
Hello all, new to the forums and new to pepakura, trying to make my armor from Halo Reach just like the OP says.
The build is going to be:
Helmet- Operator
Left And Right Shoulder- Recon
Chest- UA/Breacher
Along with some kitbashed accessories from both Reach and Infinite.
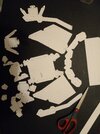
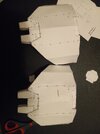
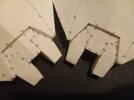
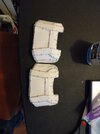
I decided to start with the shoulders since their size seemed more palatable than something really small or really large.
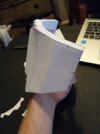
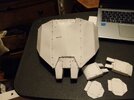
I feel like for my first pepakura build it could have turned out worse, but I'm not really satisfied with it.
I learned a lot from the process and I'm going to apply it to make the other shoulder, and then I might even remake this one.
When I was cutting these pieces out I tried to stay just outside of the line, figuring the extra space would be helpful but I feel like it crowded some of the more intricate pieces, and I was a bit heavy handed with my glue, warping the cardstock in a few spots.
Aside from those changes I'm also going to start using a ruler to get my folds sharper and straighter.
But here's to attempt #1 with many more to go.
The build is going to be:
Helmet- Operator
Left And Right Shoulder- Recon
Chest- UA/Breacher
Along with some kitbashed accessories from both Reach and Infinite.
I decided to start with the shoulders since their size seemed more palatable than something really small or really large.
I feel like for my first pepakura build it could have turned out worse, but I'm not really satisfied with it.
I learned a lot from the process and I'm going to apply it to make the other shoulder, and then I might even remake this one.
When I was cutting these pieces out I tried to stay just outside of the line, figuring the extra space would be helpful but I feel like it crowded some of the more intricate pieces, and I was a bit heavy handed with my glue, warping the cardstock in a few spots.
Aside from those changes I'm also going to start using a ruler to get my folds sharper and straighter.
But here's to attempt #1 with many more to go.