Halo 4 Master Chief Mk VI Helm Pep

Status
Not open for further replies.

drew159

New Member
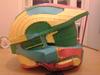
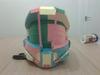
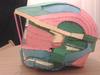
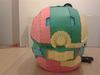
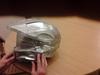
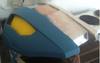
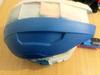
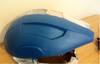
This is Hanor's SD H4 file I sized it at H319 W353 D612 as it was to small the first time :(
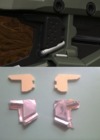
I never had any problems with the file other than it didn't come with any supports so I made my own
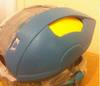
with the measuring tool in Pepakura I think it will work well I wont know till I add the resin.
1097968_10151581339631114_577639195_n.jpg

1017419_10151581340996114_1606024463_n.jpg

1238000_10151581340546114_1792697854_n.jpg

1240356_10151581340096114_694015487_n.jpg
 

Attachments

  • 1097968_10151581339631114_577639195_n.jpg
    1097968_10151581339631114_577639195_n.jpg
    65 KB · Views: 165
  • 1017419_10151581340996114_1606024463_n.jpg
    1017419_10151581340996114_1606024463_n.jpg
    50.6 KB · Views: 138
  • 1238000_10151581340546114_1792697854_n.jpg
    1238000_10151581340546114_1792697854_n.jpg
    59.1 KB · Views: 146
  • 1240356_10151581340096114_694015487_n.jpg
    1240356_10151581340096114_694015487_n.jpg
    55.9 KB · Views: 157
OK so I've done the resin on the inside and the outside then done rondo 75/25 on the inside all over I then took out the visor and now I've run out of body filler and resin :( what do u think good fit ? I think its spot on
1373078_10151583472371114_104873693_n.jpg

1379790_10151586413496114_1495924847_n.jpg

1380252_10151586413876114_2052503478_n.jpg
 

Attachments

  • 1380252_10151586413876114_2052503478_n.jpg
    1380252_10151586413876114_2052503478_n.jpg
    51.4 KB · Views: 145
  • 1379790_10151586413496114_1495924847_n.jpg
    1379790_10151586413496114_1495924847_n.jpg
    51.2 KB · Views: 156
  • 1373078_10151583472371114_104873693_n.jpg
    1373078_10151583472371114_104873693_n.jpg
    57 KB · Views: 146
Looks pretty decent! Now you've just got to get some filler and smooth out those fold/seam lines.
 
yes prob even more time consuming than the pep stage but more fun :) I cant wait till I get more body filler
 
Haha I too had the fun task of pepping this helmet twice :p at the moment I'm installing electronics and padding then ill be done!

Anyway looks like things are shaping up well with yours, be interesting to see how this turns out. Pepping looks grea by the way :)
 
Just a small update
I've yet to put the final layer of detail on the parts
kikik.png
thanks for the comments every 1
 

Attachments

  • kikik.png
    kikik.png
    734.4 KB · Views: 164
Nice man! detailing is looking good so far and it looks like a great fit.

By the way, Isn't this still technically Mark 6, not 7?
 
Ok guys thanks for pointing that out, I've amended the thread title :)

I got this grout rake as I thought it would be good for carving out small channels, Let me tell you its awesome and very versatile and durable as its made to remove grout from between tiles
906778-800.jpg
 

Attachments

  • 906778-800.jpg
    906778-800.jpg
    30.2 KB · Views: 156
That might make an awfully rough trench. Control could also be a factor. Personally, I find it easier to include the trench in the bondoing process (check my thread to see how I did it on my torso).
 
And I thought body filler would be easy :eek
IMG_0018.jpg
IMG_0022.jpg
IMG_0046.jpg
I never thought it would be so hard
 

Attachments

  • IMG_0018.jpg
    IMG_0018.jpg
    107.6 KB · Views: 144
  • IMG_0046.jpg
    IMG_0046.jpg
    56.3 KB · Views: 159
  • IMG_0022.jpg
    IMG_0022.jpg
    38.3 KB · Views: 145
Status
Not open for further replies.
Back
Top