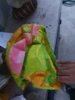
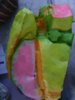
That didnt go too well . There are like one or two pieces that came apart like the middle top portion of the visor. I probably rushed some parts a bit cous my sister randomly called saying she crashed her car again ( four times in a month wtf ) , at least shes okay .
Some even look like they dont have resin on it despite having resin applied multiple times . But can feel the resin there. But other than the middle top portion of the visor , the bottom part have one to two pieces broke off and the top part being heavier than the other parts of the helmet . It looks kinda great .
But lol for a helmet I folded while in Indonesia and survived being badly squashed in check in luggage , it still looked rather decent .
Anyways , I got in contact with my old schoolmates that moved to Singapore to help me get the kansai putty
BeeBoy suggested to get . Should be here by next week hopefully.
View attachment 270209View attachment 270210View attachment 270211View attachment 270208