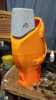
If you're printing on ABS, you might consider THIS technique.
I'm prohibited from using ABS here in the house (my wife's a chemical engineer, and she's openly threatened to shoot me if I started printing ABS in the house. Considering she's a better marksman than I am, I'm not going to take any chances

) but if I could, this would certainly be something I would look into.
Ah and your undersuit still looks 100x better than what I had first time around.