Introduction and build progression.

Status
Not open for further replies.

Nelauun

New Member
Hey guys, I've been lurking around on these forums for ages now, and can't get over how helpful and friendly the community is. It's really heartwarming to see!


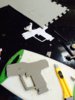
Anyhow, for the last few weeks I've been rushing through a cosplay for MCM London ComiCon, I decided to go with an ODST build, which is nearing completion now. I've just finished the pep work of the helmet, (which I had to make about 4 times due to paper weight and my strange shaped head)
But all in all, it's been a real learning curve, especially using pepakura, admittedly when I started out using it my work was, less than 'good', but after a few attempts I think I've managed a decent standard to go on and make more complex things.

So, introduction over - and onto build progress!
I've spend a while looking on the file archives, and generally over the majority of the Spartan armours, and I've decided I'm going to go with making the Halo 4's Rogue Specialisation armour, it always held a special place in my heart, and I personally thinks it looks pretty cool. It has also been stunningly modelled and unfolded up by AZTLAN! So if I do manage to see this build out to the very end, a massive amount of credit to him!

I'm -hoping- to have this build done by the end of October. If I don't reach that deadline, then it'll most likely be next May.
halo_4_rogue_armor_by_koryface-d6ddmzx.jpg

So this thread will probably start out with a few questions and so on, then it'll be more devoted to my doings and undoings as it goes.

Thanks guys, and I'll see you on the flip side!

- Nel
 
Ok so huge update -

I went down to Mcm Comic Con London and met up with a load of the HCUK guys, after meeting them I decided it was time to change my costume up a little.
11402944_384538598404814_7640980819419676133_n.jpg I was the one without a helmet, since it broke on the way down there :(
In regards to the previous post, in the time when I posted that to now - I decided to go for the Halo 4 Recruit armour, but as soon as I started making it I was running very low on foam. But I managed to put enough of it together before running out.
11216826_10205580657889260_2388268905155583453_n.jpg

Unfortunately, I don't have any build progression regarding it. Mainly since I don't like anyone to see the mess which I make :p
 
Mini-update!
The weather was cracking flags yesterday, so I managed to get a bit of progress on the chest.
With the very last of my craft foam I put the first bits of detailing onto the chest. I'm planning on putting some form of light on there somewhere. Halford have some great motoring lights which I'll be able to stick into the armour.

IMG_5498.JPG
 
Update time again.
After another few days of sun, I decided to finish off the chest. After trawling the internet, I decided to order some plastidip which I covered my chest with I made the back bits, (not sure what they're called. But my 3 year old sister called them wings) and also had a go at making the cod-piece
, halo.jpg
I'm planning on putting velcro on the back of the cod and material, then attaching it to the clothes which I'll be wearing on the day. I've got the legs, (Thigh, shin, and boot.) shoulders, and gauntlets to do in a month!
 
Awesome job on the suit so far man, I'm surprised no one else has commented yet!
 
Awesome job on the suit so far man, I'm surprised no one else has commented yet!
Thanks! I was starting to worry that I'd done something wrong!

Wow that level of detail is incredible!
Thank you!

With only a few weeks before ComiCon starts, I've got to really up my game, I bought the first layer of paint for the armour, along with some black silicon to fill in those pesky gaps.
pzfGTZX.jpg

Also, since all I have weapon wise are two plasma pistols I decided to try and make a magnum. I'm still undecided at the end results, though.
CukQADP.jpg
5keGZHC.jpg
The silencer at the end can be taken off. It's my first crack at making a weapon and I always have my trusty plasma pistols if all else fails!
 

Attachments

  • AcVlnqq.jpg
    AcVlnqq.jpg
    527.7 KB · Views: 124
Quick question! Has anyone made their helmet out of foam? I'm thinking of making the Halo 4 Recruit helmet out of foam, the templates are on the file archive but I'm not sure how well they work? For instance, is it warmed in the foam helmets, harder to work with, harder to scale? Any help would be great, looking to start it by Tuesday!
 
Quick question! Has anyone made their helmet out of foam? I'm thinking of making the Halo 4 Recruit helmet out of foam, the templates are on the file archive but I'm not sure how well they work? For instance, is it warmed in the foam helmets, harder to work with, harder to scale? Any help would be great, looking to start it by Tuesday!

Howdy! looks like you're off to a great start!
As far as your question on a foam helmet, I imagine it would get quite warm in there compared to the extra space in a conventional helmet and the corresponding allowance for airflow. Any design with fairly clean, gradual curves/edges can usually be recreated rather well using foam, and details are easy to add in thin layers. I would highly recommend using 1/4" EVA though, way easier to work with on something like a helmet with such tight curvatures. Scaling really shouldn't differ much, and because the templates for foam are so simplified its not even a huge pain to reprint if you notice the scale is off. Crudely assembling the jaw from the templates should give you a good idea of whether or not it looks right so you'll know before any foam gets wasted.

Thanks for this! I managed to use the Halo 4 Recruit foam file and managed to put it all together, (pics to come in time!) I'm just at the stage now where I want to add a visor, but I'm at a complete loss! I don't have a clue what I should use for it. I hear some people use Motorcycle visors?
 
I've made quite a bit of progress on the costume, I'm really trying to nail it as much as I can before the next McM. So I'm going to dive right in with some helmet progression pictures.
06vRjvT.jpg
XKOWJdJ.jpg
ZdTeRrS.jpg

So with the base of the helmet down, I put a little black silicon onto the gaps which were bugging me. At this point, the bottom front of the helmet was bugging me something chronic, and I couldn't for the life of me figure out why.
So after a quick look at the helmet again, I realised I'd not made the bottom bits of foam sit properly, so it sat strangely on my head. This was fixed!

FFacc2O.jpg

Before the fixing,

usARmu3.jpg

After the fixing! That that it's really clear to see, but hey ho. Also I put some paint everywhere to test a few looks, I was originally going for a sandy theme. But this was soon scrapped.
Also my gloves arrived!

lc4atIc.jpg

These little LED's were found in a motorshop. They are powered by fusion generators and have the intensity of two small suns. I think I'll be putting a concrete lining around them both to dull the light.

Anyway, after another coat of spray and me putting the first step of the visor in, (without the reflective bit) I did a full suit up, granted I've still got to spray paint the rest of the costume and detail the heck out of the legs and so on. I'm feeling pretty good about it!
rsU7As8.jpg

I'll try and post more pictures in time.
 
Finished! After a few more hours I managed to get all the things that were annoying me down. And first line of business was adding a pocket! I tore out an old one from a backpack of mine and stuck it under the armor, granted it poked through a little bit, but I used this and added the rest of my chest armor to it. This also gave it a little more maneuverability.
View attachment 15266
Another thing which was getting to me was the buttplate(?), I made a kind of belt that attached my buttplate to my codplate (If these things have proper names, please tell me!) but the buttplate kept on falling to one side, so with a bit of Velcro and some love, I got it stuck to my undersuit.
View attachment 15267
It's not the prettiest of buttplates, but it has a skeleton smiley face on it. Or that's what my sister tells me.
View attachment 15268

View attachment 15269

For the weathering, I used some liquid silver and drybrushed all the edges and anywhere I wanted there to be a bit more detail to be added. I also used black gilding wax to go over a few of the lines on the costume to make it look a little more embossed.
And finally, here it is all finished!
DGWVaaL.jpg

I made a little knife so that both my hands will be occupied. Also something that I picked up from the last comicon, I found that my helmet was in my hand more time than it was on my head, so I put a small clip at the back of the foam one, and another clip on my side, just out of sight. So when I don't want to have my hands full, I can put my gun and knife into the helmet, strap it onto my side, and be hands free!
I'll post more pictures after this weekend, MCM Manchester here I come!
 
The costume survived comicon with only a few minor breaks!!! It went down an absolute treat also, I had countless photos taken. The ones below are which I managed to snag
image.jpg
image.jpg
image.jpg
image.jpg

And finlly, I've decided that I'm going to give this armour to my girlfriend, who's going to pinkify it and make it more her style. For myself, I'm about to start a new build. That build being...

image.jpg
A male variant of Linda's armour! I'm going to have to dump a lot of time and effort to make it. (And even more foam!)
 
Status
Not open for further replies.
Back
Top