Ironman Armor Build for My 5yr-old's Halloween Costume 2011

Status
Not open for further replies.

indiefilmgeek

New Member
So, my 5yr old wants to be Ironman this Halloween. So like any good dad, I took on building him a scale model pep armor suit. :)

I did the pep helmet first. It's almost done now. Here are a copy early pictures...
5605187366_5eed4424d7.jpg

5605187480_dedf0a5a92.jpg


One of the issues I have is bothering my kid with constant size checking and fit tests. My solution was to build a full-size manikin so I could work with it during the build. I also figured my son could use the same manikin after Halloween to 'house' the armor suit for display in his room.

The problem with this plan is the fact that my son, Mikey, has Sensory Integration Disorder. This means he can really freak out when he has certain sensory experiences. While he handled the duct tape mummification like a champ, he really hated feeling the metal of the safety scissors I used to cut him out of the suit. :(

Anyway, we time lapsed the process - and I included some final product images at the end of the video.

As I mentioned, the helmet is almost completely finished and I've been working hard on material and paint testing as I plan to 'cheat' a lot with flexible and soft pieces where I can get away with it. After all... Mikey has to be able to safely trick-or-treat in this suit.


I'll try to update you as I work on more pieces...
 

Attachments

  • 5605187366_5eed4424d7.jpg
    5605187366_5eed4424d7.jpg
    205.8 KB · Views: 203
  • 5605187480_dedf0a5a92.jpg
    5605187480_dedf0a5a92.jpg
    184.6 KB · Views: 191
Here are two images of the helmet as it was at the end of March...

5604629617_bf922c96f6.jpg

5605215192_d2a6053bbb.jpg
 

Attachments

  • 5604629617_bf922c96f6.jpg
    5604629617_bf922c96f6.jpg
    166.3 KB · Views: 197
  • 5605215192_d2a6053bbb.jpg
    5605215192_d2a6053bbb.jpg
    119.6 KB · Views: 207
Here are a few update photos now that the main section of the helmet has been painted. The test fitting pictures show both Mikey and I holding the helmet in place. This is because I still don't have padding added inside the helmet yet (probably won't until we're closer to Halloween and I know his head isn't going to get any bigger!)

5622909927_73554bd1d6.jpg

5623496396_e7c0a0062d.jpg

5622909857_5199b17b52.jpg


He was able to play around with my camera app on my phone and watch TV while in the helmet (eyes lite - faceplate closed), so I'm comfortable with the design changes that widened the eyes (from the original 3D model) and the gap I allowed under the eye lights.

Next up is adding a bit of weathering and a final clear coat. I've also finished pepping his Cod Piece and started work on pep pieces for his gloves. More picture on those later this weekend (hopefully).

Thanks,
Jon
 

Attachments

  • 5622909857_5199b17b52.jpg
    5622909857_5199b17b52.jpg
    74.7 KB · Views: 196
  • 5623496396_e7c0a0062d.jpg
    5623496396_e7c0a0062d.jpg
    80.3 KB · Views: 198
  • 5622909927_73554bd1d6.jpg
    5622909927_73554bd1d6.jpg
    121.3 KB · Views: 196
Light weathering done with basic acrylic black paint (wiped off with a moist cloth).

5624461722_f4b46a89f1.jpg

5624461762_59c3c87ee6.jpg
 

Attachments

  • 5624461762_59c3c87ee6.jpg
    5624461762_59c3c87ee6.jpg
    101.8 KB · Views: 208
  • 5624461722_f4b46a89f1.jpg
    5624461722_f4b46a89f1.jpg
    86.7 KB · Views: 205
You are doing a really great job. Thanks for posting the pics and videos. Your ideas spur our ideas. Mikey is a lucky kid.
 
As I let some of the final painting dry on the helmet pieces, I started in on another piece I believe won't be too effected by another 6 months of grown (between now and Halloween). In this case, it's the pep file entitled 'Cod Piece.'

Just for reference, I'm individually scaling each pep file to fit (as it seems like a universal scale % isn't going to work for my a kid at 5-6yrs old). I also plan to modify the pieces I select to create via pep to make it easier for Mikey to move and wear the costume. In the end a very sharp looking armored suit that Mike will wear is more important to me than trying to stay true to the movie-accurate Mark III. :)

So, with that said, my working plan for the 'Cod Piece' is to modify this into more of a waist\belt-like unit without the rigid crotch piece connected between the legs (front to back). I've read a couple posts from people that have worked on kid Ironman builds and this piece seems to be a hard one to get 'right' for small bodies, so this seems like the best plan for my build.

However, we all know that plans always go out the window when you start to execute. lol

Here is the fully pepped piece after I've painted the inside with fiberglass resin. When this dries I'll paint the outside and then go back and use cloth fiberglassing on the inside before starting the bondo and sanding stages.

5626109318_735c4d294b.jpg

5626109300_ffc161e194.jpg
 

Attachments

  • 5626109318_735c4d294b.jpg
    5626109318_735c4d294b.jpg
    83.4 KB · Views: 211
  • 5626109300_ffc161e194.jpg
    5626109300_ffc161e194.jpg
    108.5 KB · Views: 203
A very busy day with the family, so I didn't do much on the Ironman project... I did manage to move the Cod piece along by Fiberglassing the outside of the Cod Piece (shown here hanging up to dry in my carport) and I touched up the gold 'chin' on the helmet.

I've also be playing around with glove options. I purchased two different kinds of gloves and I have a couple materials I think I'm going to test out; however, I haven't landed at the right scale yet (despite two different print outs). I think I'll make full post coming up on just the gloves... Until then here's two more pics.

5630063440_1fa7f171c0.jpg


5630063408_af20276fcb.jpg
 

Attachments

  • 5630063408_af20276fcb.jpg
    5630063408_af20276fcb.jpg
    87.8 KB · Views: 193
  • 5630063440_1fa7f171c0.jpg
    5630063440_1fa7f171c0.jpg
    62.6 KB · Views: 203
GENERAL MUSING ABOUT TINY GLOVES
The issue with creating a nearly half-scale Ironman suit, is that some pieces just don't scale well (and remain functional to wear). Ironman's gloves are proving to be one of those pieces for me. I definitely need fully functional gloves for Mikey with as close to 100% mobility as I can achieve; however, Mikey's hands and fingers are tiny - and not perfectly scaled down 'adult' hands.

PAA154000024.jpg
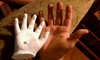
As this webpic shows, the finger length of kid hands is very much shorter than adult fingers. They are also shaped differently - more tapered toward the ends than adult fingers.

I actually remember Peter Jackson talking about the issue with using small people or kids for hobbits in LotR, and specifically stating that hand-size and shape didn't look 'right' unless they used camera tricks to 'shrink' full-sized adults. That's certainly the issue I'm currently running it with Mikey's armored gloves.

UNDER ARMOR BASE GLOVES - To Stretch, or Not to Stretch:

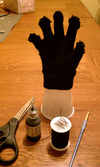
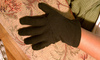
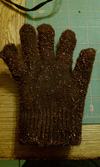
My first challenge was finding base-gloves that would properly fit Mikey's hands. I knew from last winter, the best fitting children gloves were Magic Stretch gloves.
magic-gloves.jpg
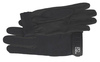
These are a very tight knit-looking glove made up of 95% acrylic / 5% spandex. They are tiny, but very stretchy. They also only cost $1-$2US each.

I picked up a couple of pairs of these and also purchased a couple of pairs of the smallest cotton dress gloves I could find online.

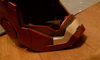
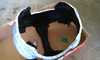
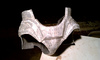
The non-stretchy cotton gloves didn't fit AT ALL, so I endeavored to modify the fingers to Mikey-Size (via hand-stitching). This fit his fingers perfectly, but left WAY too much material in the palm of the glove and a large (awkward) space between the thumb and pointer finger. The end result of this experiment was to convince me that the only way to get a pair of non-stretching material gloves will be to buy fabric and sew them myself.

So, I have the stretching gloves that fit and I have confidence that I can sew up a pair of non-stretching gloves that will fit. That leaves me with the following conundrum: Do I want stretchy or non-stretchy base gloves?

I think the stretch gloves fit very nicely, but will probably be harder to attach armor pieces to (especially the larger palm pieces) and might prove problematic when I begin painting detail between armor plates. The non-stretch gloves will be easier to attach armor pieces to, but will not fit as well or allow much for growth over the next few months.

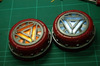
PEP vs SCRATCH BUILD
My other decision I'm wrestling with is in regard to using the pep files or just scratch building something relatively close to what the movie gloves look like.

Pepping these tiny pieces will be a pain the arse, and take considerable time. On the other hand (no pun intended), I have purchased some thin styrene sheets from a local hobby shop. I think I could fairly easily create some bands of armor along each finger even if they are just simple circular bands rather than the more movie-accurate squarish shape. I'm currently leaning toward the styrene method.

LIGHT IT UP!
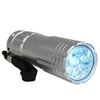
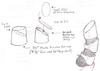
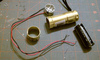
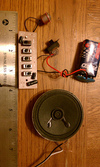
Scale plays another part of my choice of repulsor lights. Most of the simple prefab LED light units folks are using for their adult-size suits will be way too big for Mikey's hands. So, the other day I picked up two 9 LED mini-flashlights, that I will cut down to just the thickness of the LEDs and then wire it to the main battery power pack for the suit.
31GHP9BRAVL._SL500_AA300_.jpg
The circumference of the mini-flashlight housing is almost perfectly scale for my 5yr old's hand and the light is intensely bright.

Now, I'm no electrical engineer so this next part will have to trial and error... I'd like to add sound and a nice strobe effect on the LEDs; however, I'm no breadboard-geek, so I have to make due with crap I can wire together (anyone with EE experience that would like to build me up something for this - please feel free!).

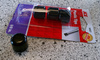
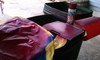
I ran across this cheap toy at Wal-Mart last night for $6.
ARC+054.jpg

One of it's two sound effects seems to resemble a repulsor sound. My first thought was to pick it up and see if (after I ripped out the lights and other crap) I could connect it to the same circuit that the repulsor glove lights would be connected to so the light and sound would happen at the same time. I would (theoretically) only need one of these toys, as I could house the toy anywhere within the suite. Then I could either let the sound come from the toy (if it was housed in the chest let's say), or I could get REALLY fancy and run speaker wires back to the gloves (where tiny speakers could produce the sound right there at the glove). I might still play with that idea if I have some spare time.

GETTING STARTED...
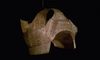
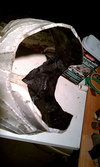
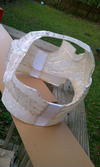
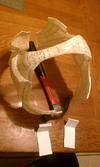
Finally, I guess I need to get started on the glove project (even if I haven't made all my design decisions yet). The first step is to get a rough mold of Mikey's hands (or at least ONE of them).

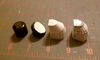
I just purchased two kits designed to make plaster casts of an infant's foot and hand. These kits actually use Alginate and were only $10. I figured a package designed to do an infant foot & hand, might do one of Mikey's hands... If I'm lucky the TWO kits I bought will get me BOTH of his hands... If not, I'll have plenty of material for a very good mold of at least one hand.

I doubt I'll use the kit's plaster for the final cast, however. I think I'd rather have a cast done in resin than plaster. I think it will handle the abusive use I plan to put it through while creating the glove pieces and attaching them to whichever type of glove I finally go with.


I'll take some pictures tonight and let you know how it goes. Until then, any thoughts, comments or ideas on the gloves for Mikey would be greatly helpful!

Thanks,
Jon
 

Attachments

  • ARC+054.jpg
    ARC+054.jpg
    23.9 KB · Views: 195
  • 31GHP9BRAVL._SL500_AA300_.jpg
    31GHP9BRAVL._SL500_AA300_.jpg
    13.5 KB · Views: 205
  • PAA154000024.jpg
    PAA154000024.jpg
    3.2 KB · Views: 201
It took all the alginate in both kits to get on full hand mold for my son, but after some resin pouring help from a friend, I've now got a full-size Mikey-hand that I can begin building the repulsor and glove armor on.

5634084349_cf44473e01.jpg


This is only his right hand... I'll probably need to do the same thing for his left hand, but we'll see.
 

Attachments

  • 5634084349_cf44473e01.jpg
    5634084349_cf44473e01.jpg
    102.2 KB · Views: 178
Just when i am amazed at what you have done so far you go and one up on the build. I wish I lived next door to you so I could watch you work. i need advice on how to measure my self and get the proper scaling I need for my body. Any Ideas??
 
Tim2206;bt3938 said:
i need advice on how to measure my self and get the proper scaling I need for my body. Any Ideas??

Unfortunately, I haven't found a 'silver bullet' solution for this problem either.

You're question sparked a pep request I had thought about posting on the forums, but haven't yet... I think I'll do that next! :)

Anyway, for the parts I've done so far I have simply measured the easiest and most logical body part dimension and then scaled the pep model by entering my new dimension. The problem is, I usually miss it the first go around. :(

So, I try to identify the easiest-to-assemble paper parts that will give me a fairly good idea of whether the whole piece will fit. For example, on the gloves I'll only print off the back of the hand piece (after my first scaling guess), and then compare it to my son. This almost never is perfectly correct, so then I have to use my High School algebra to figure out what the scale should be.

  • HELMET: I used my son's head width (but ended up pepping three helmets before I locked on a size.
  • HAND: I used the back of my son's hand width... Don't know if I'll even use the pep files, but I had to print twice to get the right scale.
  • COD PIECE: I used width at my son's hips. That actually worked very well, so I got one out of three so far in the first try!

One tip I will pass along... WRITE DOWN THE FINAL SCALE NUMBER FOR EACH PIECE!!!

Every one of these first three items I've built required me to go back and figure out the working scale from scratch when I discovered I was missing a single paper piece, or when I needed one or two small pep pieces of the helmet so I could create a template which helped me place the bolts in the same position on both sides of the helmet for example.

I now write down each piece and its final working scale percentage, so I can easily go back, open the object, scale it from my list and then print out what I need to proceed.

I'm really sorry I don't have a better solution than that, but maybe I'll get some traction from my upcoming forum post regarding pep file creators adding a 'dummy' piece to each file that will easily let you know if you've scaled the item correctly.

/fingers crossed

Thanks,
Jonathan Douglas
 
So, I was wandering through Ace Hardware this week - as I tend to do when I have some free time after lunch. As I zig-zagged through the isles, I found these 5/8" dia plastic furniture feet. They seemed about the right size for the end of the finger tips for Mikey's Ironman glove armor, so I picked them up ($1.75 - 4 pack). I also picked up a pack of 1/2" ones too (thinking they might work better for Mikey's tiny pinky finger tips).

5643788376_4576bed22f.jpg


I know that the movie-accurate finger armor is more squarish and these would be round, but I was already leaning toward creating styrene bands for his tiny fingers anyway - rather than trying to create teeny-tiny pep fingers that would require fiberglassing and probably bondo to make them smooth and ready to paint.

I do want to modify them slightly. Here's what I'm currently planning to try...

5643788368_5485de69b9.jpg


I'll post the result of this little test whether it works or not - just for reference.
 

Attachments

  • 5643788368_5485de69b9.jpg
    5643788368_5485de69b9.jpg
    58.8 KB · Views: 190
  • 5643788376_4576bed22f.jpg
    5643788376_4576bed22f.jpg
    143.8 KB · Views: 178
Ok, Furniture Foot update...

I did a very quick mod test with just an exacto knife, some model glue and a touch of hot glue (did I mention I was addicted to that stuff). I have not sanded or painted the piece yet.

For comparison to other options I have it placed here with an unaltered furniture foot, a pep finger tip build with styrene and a pep finger tip build with card-stock.

5644563621_73c8cd8c41.jpg


While not embarrassed by the attempt, I'm not overjoyed with it either. The reason I'm trying to work something out is a problem with how tiny his fingers get. This finger would be the BIGGEST of all the finger armor I'd be working on for Mikey, so whatever works here will only get harder to reproduce as things get smaller... Hence the desire to use something almost off-the-shelf.

Anyway, I also through together a couple mockup bands out of card-stock so I could show you what this modified tip would sorta look like on the glove.

5645129052_c8bf7247b4.jpg


I think I will pursue this a bit further. I might sand and paint this just to see what it looks like with a couple round styrene finger armor bands before giving up on this method. I also might make the angle less steep. This cut left every little of the cylindrical shape at the bottom of the piece.

OH, and speaking of gloves... I was able to take some time today to modify the Magic Gloves (or at least one of them). As crazy as it seems, even though these tiny gloves fit nearly everyone, they're still too big for Mikey. So, I put the glove on the Mikey-Hand I have cast in resin and then snipped off the extra material at the end of each finger and the pinkie side of his palm. I then hand-stitched the open ends re-closed. I was still afraid that the woven nature of this material would still unwind, so I also hit the new stitched edges with some fabric paint just to lock it down and prevent any 'unwinding'.

5645128822_cd64e3b863.jpg


And, YES, this glove is inside-out as the stitching covered in fabric paint dries. Also... Black gloves with black stitching and black fabric paint don't always show up well in pictures... sorry.


Lastly, here is a look at the 'guts' of what will become Mikey's repulsors. The nine LED flashlight has been cut and gutted, so now I have JUST the parts I need to begin working this into the glove design. The only modification so far (besides cutting the flashlight apart) is the connection of two wires to the back of the LED circuit board.

5645128980_55e6e21831.jpg
 

Attachments

  • 5644563621_73c8cd8c41.jpg
    5644563621_73c8cd8c41.jpg
    158.5 KB · Views: 209
  • 5645129052_c8bf7247b4.jpg
    5645129052_c8bf7247b4.jpg
    156 KB · Views: 190
  • 5645128980_55e6e21831.jpg
    5645128980_55e6e21831.jpg
    208.9 KB · Views: 183
  • 5645128822_cd64e3b863.jpg
    5645128822_cd64e3b863.jpg
    183.4 KB · Views: 184
Cod Piece update...

So, I said I had the scale perfectly on the first try for this piece... and that was exactly true. After hardening the pep with figerglass it was pretty tight to get on and off. If Mikey grows over the next 6 months, it would need to be a bit larger.

Instead of re-pepping a full piece, I decided to just graft in two 1" expansion bands (one on each side of the cod piece unit).

5645270744_04245a1932.jpg


I hot glued these pieces into place (after slicing the sides open) and then began the inside fiberglassing with re-enforcing material (in this case cut up old t-shirts). I'll have to do the other half of the inside tomorrow when this dries, but then I should be ready to start the bondo and sanding process.

5645270588_ac6623188c.jpg


5645284634_2c3650d2c7.jpg


Nite all! :)
 

Attachments

  • 5645284634_2c3650d2c7.jpg
    5645284634_2c3650d2c7.jpg
    131.8 KB · Views: 185
  • 5645270588_ac6623188c.jpg
    5645270588_ac6623188c.jpg
    167.9 KB · Views: 195
  • 5645270744_04245a1932.jpg
    5645270744_04245a1932.jpg
    132 KB · Views: 198
I'm TOTALLY checking out a lead on some kid-size leather gloves this week, but while I had some time today around the house, I did a bit of experimenting with the glove materials I have on-hand. I started with a simple test of a spray vinyl paint I had some success with in an earlier test. Here is a pic of that earlier test where I sprayed thin rubber, hard plastic and flexible foam with this spray paint for fabric and vinyl. Probably hard to see in this picture, but I also tested the clear-coat of the same brand - just to see if it brought a little more gloss to the final look. It didn't blow me away, but it definitely made it more glossing than without the clear-coat.

5648369326_96775f27b5.jpg


Now, for the almost embarrassing results when I sprayed the woven Magic Gloves....

5647807103_05bfdf3e0e.jpg


Ok, I'll give you a second... go ahead, laugh... it's pretty funny.

So, with that tragic test ruled a 100% epic failure, I thought I'd try some hand-painted fabric paint on both the woven Magic gloves as well as the cloth gloves I had purchased. I'm not happy with either results so far, but pictures will have to wait until tomorrow when I get the final coat of paint on both gloves.

For now, I can provide you with pics of the 'heavily' modified cloth glove I have (pre-paint) and a shot of the Cod piece -- which is now fully fiberglassed.

5647431653_1f0d090f89.jpg


5647430277_70511b39df.jpg


I hope you all have a Happy Easter!
Jonathan
 

Attachments

  • 5648369326_96775f27b5.jpg
    5648369326_96775f27b5.jpg
    126.3 KB · Views: 190
  • 5647431653_1f0d090f89.jpg
    5647431653_1f0d090f89.jpg
    229.2 KB · Views: 191
  • 5647807103_05bfdf3e0e.jpg
    5647807103_05bfdf3e0e.jpg
    202.9 KB · Views: 203
  • 5647430277_70511b39df.jpg
    5647430277_70511b39df.jpg
    152.5 KB · Views: 195
Minor update... I spend an hour this evening with my handy-dandy dremel sanding all the rough edges and smoothing those thick areas of fiberglassed card-stock. It probably doesn't show in these pics, but it is MUCH smoother than before and that should make applying the bondo easier on the next step.

Don't get too freaked out with the black internal fiberglassing. Two of my old movie promotion shirts got 'retired' so I could have some material to strength the resin. There certainly, a couple symmetry issues I'll need to deal with, but I think it's coming along.

5655842547_6d0e7548a0.jpg


5656439210_9bb682e25c.jpg


And, lastly this fine Monday evening... I will share this cute picture of Mikey sporting a little Ironman reactor toy (2x $3.50). And while I'm sure he's having fun with it now, that little unit is destine to be pulled apart for it's electronics.

Hope everyone had a wonderful weekend! :)

5655855661_eb27d3f647.jpg
 

Attachments

  • 5656439210_9bb682e25c.jpg
    5656439210_9bb682e25c.jpg
    97.1 KB · Views: 184
  • 5655842547_6d0e7548a0.jpg
    5655842547_6d0e7548a0.jpg
    86.2 KB · Views: 196
  • 5655855661_eb27d3f647.jpg
    5655855661_eb27d3f647.jpg
    112.9 KB · Views: 197
As promised here is a step-by-step look at how the cloth glove test looks as I am painting ridge-details that will appear between the armored glove pieces.

NOTE: These are VERY close-up pictures. For reference, the index finger I'm painting is just under 2 inches long. At a distance, the faux-ridges look pretty decent.

5661436576_52fbe59d6b.jpg


Disclaimer: I know I listed that last pic in the series as a 'Photoshop test', but just to clarify, that's the actual painted finger with an image of the movie-prop Ironman glove armor laid on top of it, so you can see what parts of the ridge lines will actually show up after I have the armor pieces added.

I also ran Mikey over to a Horse & Tact shop in town and picked up a pair of SSG gloves that I will probably use as the final glove build.

5661476700_92ff8622a4.jpg


Thank, again, TK171 for the heads-up on the gloves - these might cost $20, but they are extremely well made, and fit very small hands much better than anything I've seen to date. The fingers on these particular gloves are a touch too long, but the fit is SO good around the palm and notch of his fingers that I will happily do a little hand-stitching to shorten those fingers up!

I've been fighting a nasty sinus infection, so I haven't done much else... hopefully, I can get back to some serious armor building this weekend!
 

Attachments

  • 5661476700_92ff8622a4.jpg
    5661476700_92ff8622a4.jpg
    24 KB · Views: 184
  • 5661436576_52fbe59d6b.jpg
    5661436576_52fbe59d6b.jpg
    86.5 KB · Views: 196
Just got a new toy! I ordered this from Amazon for ~$12.

61ub0q7jtrl._aa300_.jpg


Of course, my plan is to tear this apart and install it in Mikey's Ironman Helmet. The reason I selected this unit was not only for the crazy-low price tag, but also because it does several things I wanted.
  1. It has a setting to LOWER the source's voice - important as Michael has a 5yr-old voice and it's not very 'Ironman-like' naturally.
  2. It actually amplifies the source voice - I wanted to make sure folks didn't hear Mikey's voice... only the modified 'Ironman' voice and that requires some amplification.
  3. It's battery operated and compact enough to be installed in the costume's helmet.

After some testing (in my office with co-workers), I have to say I'm pretty impressed. For a $12 unit the thing works well. It should definitely add something cool to the costume (and something FUN for Mikey).

The only issue I initially see would be the fact that the output speaker is roughly 3 inches diameter. I could easily connect the system to a smaller speaker I have on-hand (and then install the full unit into the helmet). However, I think the bass responsible for much of the lower voice effect will be reduced if I use a smaller speaker. I might have to find a space in the Chest or Body of the Ironman armor to mount the larger speaker so I don't lose the low bass sound fx.

I'll definitely post more video (with audio examples) as I play with this install...
 
Here's an update on the toy voice-changer and how I'm planning on using it within Mikey's helmet. First off, here is a picture of just the electronics (once all the important parts are removed from the bullhorn plastic casing).

5668230930_e8c278d631.jpg


The components are small enough to fit nicely inside the chin of the Ironman helmet.

5667662581_befce146f5.jpg


And then I made a quick video of the system working... but between the unmounted speaker and the crappy audio pick up on my phone, the audio sucks... Sorry, I couldn't do a better job of capturing it. Maybe after I get it installed, I'll have Mikey do a little talking through the system so you can hear the difference it makes -- it is pretty impressive considering the cheap nature of this kids toy.


Attachments

  • 5668230930_e8c278d631.jpg
    5668230930_e8c278d631.jpg
    204.4 KB · Views: 183
  • 5667662581_befce146f5.jpg
    5667662581_befce146f5.jpg
    174.6 KB · Views: 198
Status
Not open for further replies.
Back
Top