My First Halo ODST Armor Build

Status
Not open for further replies.

Hockeygoalie92

New Member
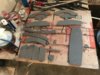
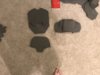
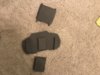
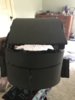
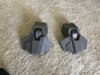
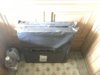
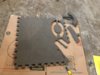
I am excited to announce that my EVA Foam arrived in the mail today and that I will be beginning my first ever EVA Foam Armor build! I will be following thé online tutorials and templates of Andrew DFT’s ODST Armor. For the next few days I will only be able to transfer and cut as I do not yet have a heat gun. I should be getting paid later this week, so hopefully all things will go well. My ODST will be painted White and Blue once i’m finished, and the only picture I could find of what I wanted was of a Mega Bloks ODST figure xD.
 

Attachments

  • 7072ABB3-EBB4-4B1C-8EED-56F6E9034AFB.jpeg
    7072ABB3-EBB4-4B1C-8EED-56F6E9034AFB.jpeg
    1.7 MB · Views: 380
  • C5EEAB7B-250F-452F-BA71-2D25F0B35AD0.png
    C5EEAB7B-250F-452F-BA71-2D25F0B35AD0.png
    203.4 KB · Views: 338
Good luck my man, DFT can look good, just make clean cuts and keep that blade sharp :)
What great timing as I literally just finished cutting out all the pieces! However I cannot assemble it cause I don’t have a heat gun and I don’t get paid until later this week :/ I’m very happy with how it turned out, and I learned a few things while doing it and that’s what counts!
 

Attachments

  • 38552874-B7D0-41BC-AACC-ACEADF548EC3.jpeg
    38552874-B7D0-41BC-AACC-ACEADF548EC3.jpeg
    2.5 MB · Views: 318
Each piece of mine got better after the last one whether it was the cuts or the assembly or the kwik sealing. Can't wait to see more progress! remember you can always bevel pieces(if you straight cut) afterwards if they are mountain folds, but valley bevel/folds usually need to be done on the first cut. (though I only had 2 valley folds/bevels on my odst)
 
Last edited:
Each piece of mine got better after the last one whether it was the cuts or the assembly or the kwik sealing. Can't wait to see more progress! remember you can always bevel pieces afterwards if they are mountain folds, but valley bevel/folds usually need to be done on the first cut. (though I only had 2 valley folds/bevels on my odst)
I’ll remember that, thanks!
 
What great timing as I literally just finished cutting out all the pieces! However I cannot assemble it cause I don’t have a heat gun and I don’t get paid until later this week :/ I’m very happy with how it turned out, and I learned a few things while doing it and that’s what counts!
You dont really need a heatgun to glue your parts. If you are using a contact adhesive, it will hold it so well the peices will take shape automatically, but hotglue or something of the sort probably won't hold as well. A heatgun can be used to shape your armor so it is less stress on the seams, but I really only use it to seal the armor so paint will go on much cleaner and easier
 
You can also work the foam with your fingers to give it some slight curvature. Not as good as a heat gun, but you should be able to get at least a small amount of fitting/rounding.

The only part that has always threw me with DFT's templates is the main rear bottom piece. The one with the little ears on it upon which everything else is built. That piece can be made as one piece as well, thus reducing a seem at the back of the helmet. Just a thought if you ever give it another go. You'll be fine for your helmet, but the less seems, the better IMO.

Good luck on your build!
 
You dont really need a heatgun to glue your parts. If you are using a contact adhesive, it will hold it so well the peices will take shape automatically, but hotglue or something of the sort probably won't hold as well. A heatgun can be used to shape your armor so it is less stress on the seams, but I really only use it to seal the armor so paint will go on much cleaner and easier
You can also work the foam with your fingers to give it some slight curvature. Not as good as a heat gun, but you should be able to get at least a small amount of fitting/rounding.

The only part that has always threw me with DFT's templates is the main rear bottom piece. The one with the little ears on it upon which everything else is built. That piece can be made as one piece as well, thus reducing a seem at the back of the helmet. Just a thought if you ever give it another go. You'll be fine for your helmet, but the less seems, the better IMO.

Good luck on your build!

Thanks a bunch! I’ll remember those tips for future work!
 
Right, I got a lot of work done today. I finished cutting out all the pieces for the helmet, the Chest and chest plate, and the Ab and Butt plates. However like I said earlier, I don’t have a heat gun and I really would like to follow along with Andrew DFT’s build as best I can, so i’m going to wait until I get paid to fully assemble things. I am very happy with how much I got done today, and hopefully i’ll have all the shoulder pieces cut and ready to be glued by tomorrow night.
 

Attachments

  • 0B7A3280-26D6-4E01-AF00-39934594551D.jpeg
    0B7A3280-26D6-4E01-AF00-39934594551D.jpeg
    2.6 MB · Views: 346
  • EC70B4CD-449F-47D2-A4E3-E092290742A6.jpeg
    EC70B4CD-449F-47D2-A4E3-E092290742A6.jpeg
    2.5 MB · Views: 322
  • image.jpg
    image.jpg
    2 MB · Views: 327
  • 96A97F90-A811-4571-A053-BA078BD0257E.jpeg
    96A97F90-A811-4571-A053-BA078BD0257E.jpeg
    3.2 MB · Views: 362
Nice job! the only suggestion I have is take a high grit sand paper to the bevels on that chest piece that sits on top of the chest plate to give it a smoother appearance, other then that it's looking good!
 
Nice job! the only suggestion I have is take a high grit sand paper to the bevels on that chest piece that sits on top of the chest plate to give it a smoother appearance, other then that it's looking good!
That’s exactly what I plan on doing once I get home from class and work today!
 
It’s been a few days since my last post but I got quite a bit done. I completely finished building the chest armor, chest plate, Ab plate, butt plate, and I have almost finished the helmet. However I messed up on the helmet, and I will be remaking it assuming I have enough foam afterwards. As you can see, there is a gap between the pieces, I believe what I did was connect the two long curved pieces of the opposite side of what it should have been.
 

Attachments

  • 439B2D80-E68E-423E-B1D3-695ACF335753.jpeg
    439B2D80-E68E-423E-B1D3-695ACF335753.jpeg
    330.4 KB · Views: 363
  • image.jpg
    image.jpg
    1.1 MB · Views: 322
What I found works really well for closing up the back of the helmet on a DFT pattern is to cut it to size before gluing it in. If you are building the adult template, I have found that the end space is approximately 2.5 inches +/- in width where the top meets the back of the helmet. By cutting off the excess material that he leaves on the pattern then measuring 2.5 inches it should help significantly in tying in to the side pieces. From there I usually measure about 3.5 inches on either side of the top piece then try to match up the curves. Once measurements are in place, one smooth cut front front to rear, a little bit of shaping, and the piece should "slot" right in. Of course, this all depends on using the templates as is and it they haven't been scaled at all.

Hope this helps.

A9E8CDEC-E802-45C5-B5E8-306411B7A977.jpgimage.jpg
 
What I found works really well for closing up the back of the helmet on a DFT pattern is to cut it to size before gluing it in. If you are building the adult template, I have found that the end space is approximately 2.5 inches +/- in width where the top meets the back of the helmet. By cutting off the excess material that he leaves on the pattern then measuring 2.5 inches it should help significantly in tying in to the side pieces. From there I usually measure about 3.5 inches on either side of the top piece then try to match up the curves. Once measurements are in place, one smooth cut front front to rear, a little bit of shaping, and the piece should "slot" right in. Of course, this all depends on using the templates as is and it they haven't been scaled at all.

Hope this helps.

View attachment 279336View attachment 279335
Good to know, i’ll Remember this for next time!
 
I am nearly finished with my armor and i am almost to the point of painting. I have decided to change the color of my Armor. Instead of painting it white with blue details, I decided to change it to black with blue details. My reasoning behind this is simple. I am a very strong supporter of the Police, and I wanted to paint my suit in memorial of a fallen officer and friend that took their own life almost a year ago. I bring this up because I want to know how to properly paint the armor. When I paint it black, *insert Rolling Stones here,* will the black paint cover up the scored details in my armor? If so how can I make the scored lines pop out? I will be using white plasti-dip to seal the foam (all they had available), and will be using black and blue spray paint.
 
I am nearly finished with my armor and i am almost to the point of painting. I have decided to change the color of my Armor. Instead of painting it white with blue details, I decided to change it to black with blue details. My reasoning behind this is simple. I am a very strong supporter of the Police, and I wanted to paint my suit in memorial of a fallen officer and friend that took their own life almost a year ago. I bring this up because I want to know how to properly paint the armor. When I paint it black, *insert Rolling Stones here,* will the black paint cover up the scored details in my armor? If so how can I make the scored lines pop out? I will be using white plasti-dip to seal the foam (all they had available), and will be using black and blue spray paint.
Plasti dip and paint, although it is said it is supposed to fill in minor lines, when it comes to the foam suits, EVERYTHING comes out. It does not cover any seams or details. Sometimes it can soften them out but they wont be filled
 
I am nearly finished with my armor and i am almost to the point of painting. I have decided to change the color of my Armor. Instead of painting it white with blue details, I decided to change it to black with blue details. My reasoning behind this is simple. I am a very strong supporter of the Police, and I wanted to paint my suit in memorial of a fallen officer and friend that took their own life almost a year ago. I bring this up because I want to know how to properly paint the armor. When I paint it black, *insert Rolling Stones here,* will the black paint cover up the scored details in my armor? If so how can I make the scored lines pop out? I will be using white plasti-dip to seal the foam (all they had available), and will be using black and blue spray paint.

As a former police officer myself and still very closely tied to the LE community, my condolences to you and a sincere thank you for honoring your fallen friend.

With final paint and to make your score lines really "pop", you could heavily thin out silver acrylic paint w/ water and let it "flow" through the score lines. I did this with my youngest son's Black/Red armor and the silver throughout the score lines constrasting against the black & red really gave the armor a whole other level of detail. You would just need a fine tipped detailing brush and some patience.
 
Last edited:
Status
Not open for further replies.
Back
Top