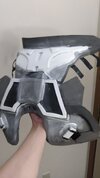
ODST MKIII. I'M BACK, BABY

OTSDerpy

Active Member
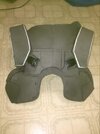
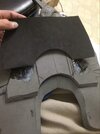
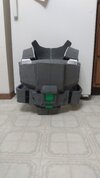
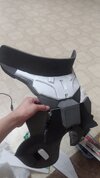
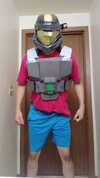
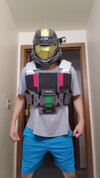
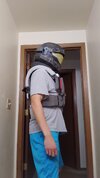
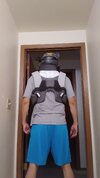
It has been quite some time since I last posted anything here. Even longer since I showed any progress toward anything. But right now I'm going to do my best once more to compile and show my logs and data of what I'm doing to build my next ODST suit. This time I'm going for the one in the Halo 4 game. Haven't seen much love for this type of armor.
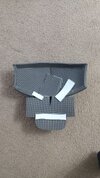
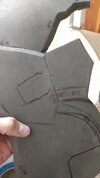
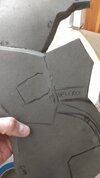
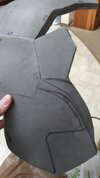
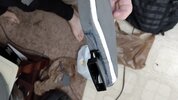
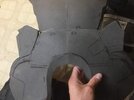
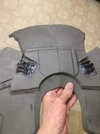
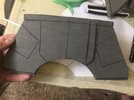
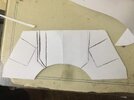
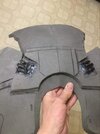
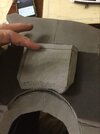
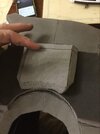
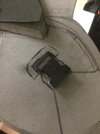
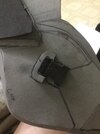
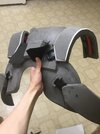
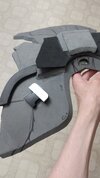
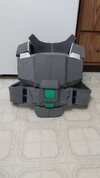
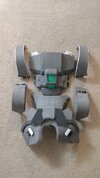
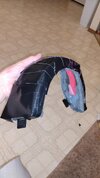
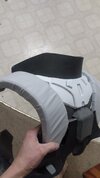
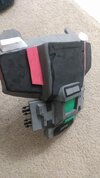
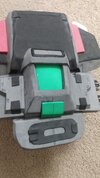
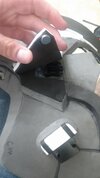
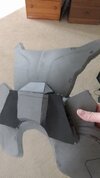
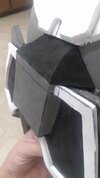
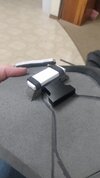
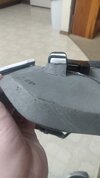
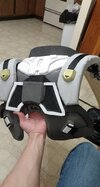
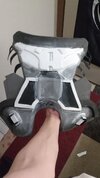
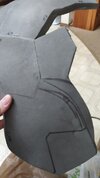
Not to mention that since I built it last time it was fragile and weak as can be. But this front torso piece not only has some actual weight to it but is also sturdy as a rock. MUCH better than my MKII. Here's what I got so far for the rest of the suit:
IMG_20220605_160758061.jpg IMG_20220605_160814562.jpg IMG_20220605_160836217.jpg IMG_20220613_212600491.jpg IMG_20220613_213210535.jpg

For the overall concept:
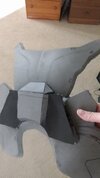
Since armor builds like this require a lot of space to pack and transport, I've decided to try and break this build into several different parts:

- Front Torso.
- Shoulder Straps.
- Side Straps.
- Back Torso.

The collar that is usually worn by them WILL be an optional thing to include. Though and AM doing some planning to implement it for the build. Maybe I'll separate it into half's: one for the front, one for the back, and create a locking device for them to meet at the sides. As for the build so far, it's going along super smoothly. Kinda wishing that the chest piece was a bit smaller so I can reach my arm forward but I've noticed this problem with any cosplayer who does an ODST build, so I'm not alone there.
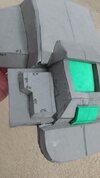
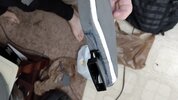
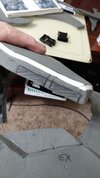
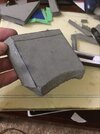
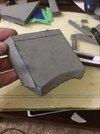
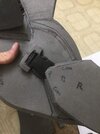
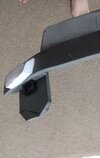
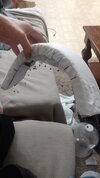
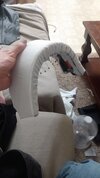
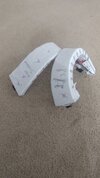
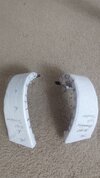
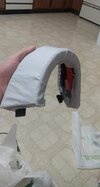
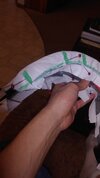
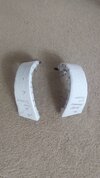
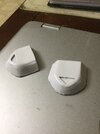
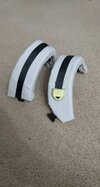
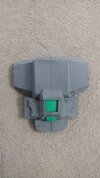
I've made the shoulder strap solid because I'll be covering it in a fabric of sorts and gluing on a black nylon strap to the top. Make it a bit more authentic. The white strips you see along the shoulder strap is of 5mm foam I got from Hobby Lobby. I've noticed that in most builds that these are crucial and VERY important in understanding the placement of a part. Especially if they have an edge ID on them.
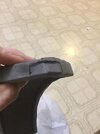
So I cut them in 5mm strips for that spacial purpose. I cut the larger pieces in an inward cut so the strips can be easily cut and glued on since they were very small. I DID mess up on the buckle placement on the shoulder placement and strap though.

I didn't have enough surface space to place the shoulder strap on and only had the cut edges. If I had continued with this then the shoulder area would've been weak to withstand the tension. So I cut out a piece of scrap foam that would be covered by the strap and glued on the extra surface. This made it much easier to plan on more ways for the strap to not only use the buckle to be attached, but also use other means for a more secure placement.
IMG_20220613_210601364.jpg IMG_20220613_213210535.jpg IMG_20220613_213118503.jpg

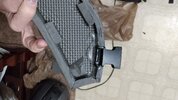
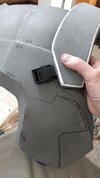
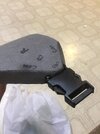
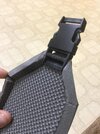
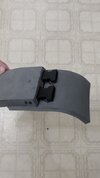
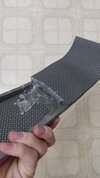
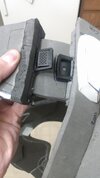
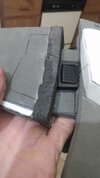
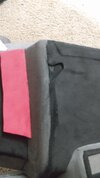
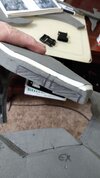
The buckle placement on the strap was another failure but was recovered with quick thinking. I honestly thought that two buckles would do the job for a more secure fit but failed to realize that there would be no room for my fingers to detach them. So I had to use scrap foam and reglue the sides. And instead only hot glued one buckle instead of two.
IMG_20220613_210611627.jpg IMG_20220613_212556051.jpgIMG_20220613_212600491.jpg

Note: I used a LOT more hot glue to make sure this piece was not going anywhere.

I'll post more pics of the what I'm aiming to achieve, what my plans are, and how the progress is going in the future.
 

Attachments

  • IMG_20220613_213118503.jpg
    IMG_20220613_213118503.jpg
    1.5 MB · Views: 160
  • IMG_20220613_210611627.jpg
    IMG_20220613_210611627.jpg
    1.6 MB · Views: 154
  • IMG_20220613_210601364.jpg
    IMG_20220613_210601364.jpg
    1.4 MB · Views: 173
  • IMG_20220613_212556051.jpg
    IMG_20220613_212556051.jpg
    1.4 MB · Views: 184
yyyyeeeeeesssssss, wisconsin homie back on the grind!! you gonna get this done in time for collasal north? (previously daisho con in wisconsin dells)
 
yyyyeeeeeesssssss, wisconsin homie back on the grind!! you gonna get this done in time for collasal north? (previously daisho con in wisconsin dells)
Oof, that's a negative on that front. I've got plans upon plans on making this be able to break down for easy transportation. Which means more time to draw out plans, test and apply. Not to mention I want this to look more clean and detailed than my MKII. Not to mention life kinda getting in the way with my job's hours and several other hobbies on my mind. It gets kinda busy. Lol
 
Nice build so far. I'm brand new and thinking about doing an ODST myself. Where'd you get the foam files for yours?
I got mine in the 405th's armory in the "Halo 4" section. I just had to mess around with the file a bit to have it be shaped to my size in both "Armorsmith" and "Pepakura."
 
Got more progress done to the shoulder straps and the back piece over the past few days.
received_698008131497159.jpeg received_808724910078855.jpeg received_1116803655851838.jpeg

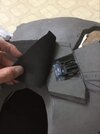
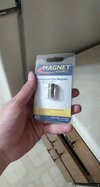
Next I'm going to attach 2mm over the back to cover the large gaps. Near the bottom of the piece I'll counter sink some magnets so I can lift up the flaps and detach the shoulders and leave the middle piece glued on. As for the middle piece, I'll use some Velcro and make it detachable as well since it very close to the buckle's gap, leading it to cause some tearing if I were to open the flap. Will show the plans later in the following days.
 

Attachments

  • received_1818432621834970.jpeg
    received_1818432621834970.jpeg
    28.3 KB · Views: 134
  • received_821305348805404.jpeg
    received_821305348805404.jpeg
    22.4 KB · Views: 142
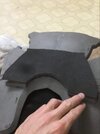
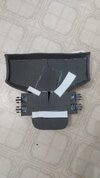
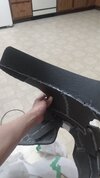
Got some more building done to the back piece. The black piece is made of 2mm foam that is PARTIALLY glued. Only the middle is permanently stuck together. The end pieces are left open to add on magnetics, leaving an access to the buckles.

received_808724910078855.jpegreceived_3267554100187204.jpeg received_555584566104503.jpeg received_1450455118730078.jpeg


The back piece was made by a template from scratch just like the 2mm foam, but this still held onto larger foams thickness. I originally thought this piece to become removable for more of an easy access with the flaps. But after the testing, it turns out this piece didn't impair that action. So I just glued it on.
received_552294336478831.jpeg received_1081456752447640.jpeg

The suit so far.
IMG_20220624_064109276.jpg

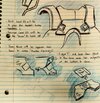
The original plans.
IMG_20220624_131011587_HDR.jpg
 

Attachments

  • received_552294336478831.jpeg
    received_552294336478831.jpeg
    46.6 KB · Views: 133
  • received_1081456752447640.jpeg
    received_1081456752447640.jpeg
    35 KB · Views: 126
  • IMG_20220624_064109276.jpg
    IMG_20220624_064109276.jpg
    1.4 MB · Views: 139
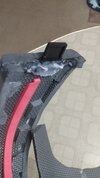
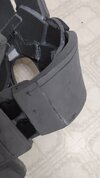
Much progress has been done last week. Managed to get the side pieces all nestled and glued onto the back. And it's holds up pretty well! Yeah it may look a bit like an open wound with the buckle there. But I put some 5mm foam on top of it to make it more like it belongs there. Just need to round it off and make it more like a futuristic piece of armor.
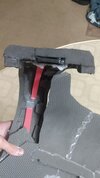
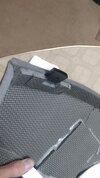
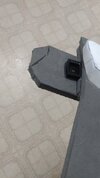
Edit: For Pic.3 I DID add a TON of hot glue to make sure that piece didn't have a CHANCE of moving out. Just wanted to make that clear.
received_1384659595385875.jpeg received_5133148986739831.jpeg received_5218821778225240.jpeg received_1247641222728598.jpeg received_5215697515176311.jpeg received_3356074691295816.jpeg IMG_20220704_012324708.jpg
 

Attachments

  • received_545847530565910.jpeg
    received_545847530565910.jpeg
    227.3 KB · Views: 128
Last edited:
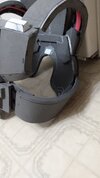
Oh boy, we got some problems here. Biggest being the side straps. Apparently, with the hot gorilla glue, alongside with the buckles, has made the connection area VERY stiff. The torso WILL NOT BEND a great deal, if at all. This what I want, no? Eh, Kinda. The area of connection is so stiff that the flow does not go smoothly from front to back.
Instead it just kinda... bows out. Making the straps go wider and not fitting correctly. Second is the buckles. Thought I'd get smart and figure "Hey, this will lighten the tension being put onto one buckle for the front!" What I didn't take into consideration was the fact that... These parachute clips are VERY VERY sturdy when connected! It takes a great deal of finagling to get them BOTH unlocked at the same time since they push away from each other during the process.
And if basic logic is coming back to me, if you have a sturdy locking system that pushes away from each other, it's gonna be real difficult if you have another in the same area and locked near the other. I'm sure I'll get this problem fixed in a day or two. So I'm going to spend one weekend trying to revert this back while focusing on the shoulder straps on weekdays. I'll update more as it comes.
IMG_20220707_225442965.jpg IMG_20220707_225454354.jpg IMG_20220707_225510579.jpg IMG_20220707_225517575.jpg IMG_20220707_230248714.jpg IMG_20220707_230254319.jpg
 
Last edited:
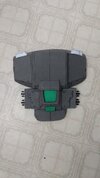
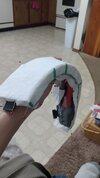
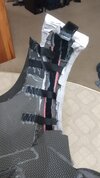
This was weekend was a good workday! Not only have I managed to build a locking system for the shoulder straps, but I also managed to fix a bit of the sizing issue as well! For the shoulders, I used center button clips instead of the parachute ones and the results were... mixed. What I mean is that even though I can easily put on and take off the straps while wearing it, the process of detachment is a bit more finicky to separate. Not in terms of double clip sense because even then I can separate those more easily.
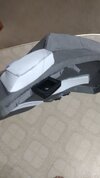
What I'm saying is that to separate the center button clips I have to ACTUALLY wear the piece. I think it has to do with the weight of the armor helping the entire process and making it slide off more smoothly than doing it on the ground. Either way these things ARE helpful, but I STILL feel as though the parachute clips work in a more simple sense. The black foam you see is for more of a structural integrity of the straps and front torso piece and more material to glue the clips on. The slab of foam under the "female clip" is there to not only decrease the time of guessing where the connection is, but also structural integrity so the clips and foam don't bend out of whack.
And the hole in the shoulder straps is to accompany the foam slab.
IMG_20220717_182230018.jpg IMG_20220717_182235029.jpg
IMG_20220717_182213413.jpg IMG_20220717_190951674.jpg
IMG_20220717_191022424.jpg IMG_20220717_191008785.jpg

As for the side Straps, I cut the pieces after marking where it would feel tighter and hold onto the body as well where the clips would reach. After that, it was only a matter of cutting them out and gluing to make shorter. All's of this would be mostly covered with some 2mm foam when I start to add details. It fits more snuggly but I STILL want to shorten it because I still feel them touching my arms. And if they touch my arms, what are they gonna do when I add my bicep armor, or my gauntlets for that matter?
More research needs to be done on this. I STILL regret having to put on 2 clips on the sides; one would've been enough. But lesson learned for my MKIV.
IMG_20220717_211238536.jpg

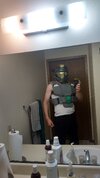
Here are the pieces disassembled, reassembled, and me wearing it. All in all, a good discovery for my skills.
IMG_20220717_222108836 (1).jpg IMG_20220717_211213129.jpg
IMG_20220717_210410943_HDR.jpg
 

Attachments

  • IMG_20220717_190945425~2.jpg
    IMG_20220717_190945425~2.jpg
    989 KB · Views: 139
  • IMG_20220717_182206610.jpg
    IMG_20220717_182206610.jpg
    1.3 MB · Views: 136
Love the helmet! Wish I was good at foam haha
Would make having printer issues not a problem
Loving how its looking!
 
No updates this week, I'm afraid. Been busy with an event that came up and life's been keeping steady at my heels for the past week. Might even be for a couple, but I'll post an update here and there when I can on weekends to show that I AM still doing this build. Need a Halo suit and this is the only way to do it.
 
Last edited:
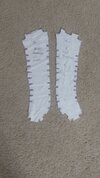
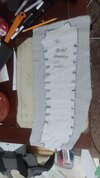
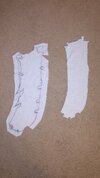
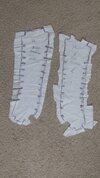
After much time, planning, and testing, I've come to a good point to give an update. To start, I've made some test pieces with the good ol' "Duct Tape Dummy Method" to get a general feel of how to get some cloth on the shoulder straps. And the results turned out better than expected. Don't call it "Good Ol'" for nothing.
IMG_20220816_200527796.jpg

After that, it helped me make the first prototype. Helping create and learn about "darts" and what not. Soon I went through about 3-4 prototypes and landed in some good cloth templates. Helping me learn that more darts on a complex, curved, cloth creations equal smoother and sleek looking sides.
IMG_20220820_204754998.jpg IMG_20220820_204811734.jpg
IMG_20220820_204803079.jpg IMG_20220821_124921850.jpg
IMG_20220821_124936408.jpg

After the final test fitting, it was off to do
the real deal. The difficult thing about this was trying to find a GOOD FABRIC PEN/PENCIL in my tool kit to show up on the fabric! But no! The pen? Dried out. The pencil? Too light to be shown.
So I just moved onto a regular pencil and just went over the same area a couple times for it to be shown. That worked and I went forward from there. Wasn't really sure how to glue on the fabric onto foam, so I just went with the old fashioned hot glue to have it stick to the foam AND itself and seemed to work in the fast paced manner I wanted.
IMG_20220821_133254954.jpg IMG_20220821_201541202.jpg

Not my best work, but it LOOKS pretty good for a process so new to me.
received_412522564317582.jpeg

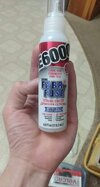
It was only then I managed to find THIS to help with some gluing for the fabric to stick to itself. Well, hindsight is 20/20.
received_440701791320956.jpeg

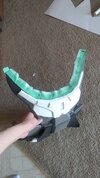
Since there was still daylight I wanted to give some more detail on the back of the neck. Looked so empty and dull. So I added a back neck guard to give it more detail. I started by watching a Evil Ted video to figure out how to get a measurement on a part for a piece that would go against the flow. And that video helped me make this contraption to get a flattened design on the neck.
But this was only for the elongated side towards the bottom, not the top side where it will be seen.
IMG_20220821_173811750.jpg

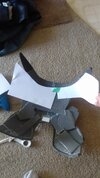
So I focused topside and couldn't get a good mark with the white pieces blocking my path. So I ripped some painters tape up and stuck the individual pieces on the edge to get a good measurement. It worked, but only to help me make the piece more extended with it's flow of direction rather having it go out perpendicular style.
IMG_20220821_173918516.jpg

I then came across a stupid idea to just have a flat piece of foam just measure the length and go from there. I mean, the area was in the right conditions that mirrored the desired effect. So I did this simple measuring and and am now finding a way to try and take back 1.5hrs worth of planning and replanning on this piece.
IMG_20220821_195434668.jpg

Granted it looks like a long slab, but I'll be adding more detail soon. So this is what I managed to get done within about a week and a good majority of today. Gonna need to make a trip to Joann's to get some fabric markers to help with the second shoulder strap.
 

Attachments

  • IMG_20220818_193708086.jpg
    IMG_20220818_193708086.jpg
    1.7 MB · Views: 118
  • IMG_20220815_224518729.jpg
    IMG_20220815_224518729.jpg
    2 MB · Views: 115
  • IMG_20220821_195442300.jpg
    IMG_20220821_195442300.jpg
    1.7 MB · Views: 119
  • IMG_20220821_124940126.jpg
    IMG_20220821_124940126.jpg
    2.2 MB · Views: 111
  • IMG_20220821_125915113.jpg
    IMG_20220821_125915113.jpg
    1.5 MB · Views: 107
  • IMG_20220818_193728645.jpg
    IMG_20220818_193728645.jpg
    1.5 MB · Views: 118
Last edited:
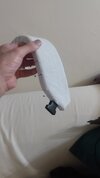
After much time thinking on how to attach the back to the shoulder pieces, I came to an answer. Well, I came to this answer long ago, but this was the first on getting the appropriate supplies needed. I took some Velcro A, doesn't matter which, one or the other would work, and glued some along the inside of the shoulder pieces. And then glued Velcro B to the back. So then I'd get the multi-velcro concoction. Looks a bit rough, but with the clips in the front and back holding it in place the stress for the velcros was lessened.

-
Not to mention that these things have a bit of strength when you have multiple being attached to some long pieces.
IMG_20220828_205854654.jpg IMG_20220828_205830987.jpg

After that successful placement, I went on to adding the detail to the entire torso first. Main reason was that this will be greatly seen by a lot of people. So I need to make sure to get the details looking good. I decided to use a technique I picked up from Impact Props in which they used a term called "Layering". A process in which you use 2mm foam to cover up an area with some unwanted scratches and burns so it will look more fresh and pristine. And because it was thin I managed to sand it in some areas, cover with caulk, and have it looking more smooth on the edges.
IMG_20220828_205145077.jpg IMG_20220828_205148792.jpg
IMG_20220828_205153790.jpg IMG_20220828_150044482.jpg
IMG_20220828_205639381.jpg IMG_20220828_205654917.jpg

Did the same process with some belt buckles on the shoulders. Though that had me adding caulk over them after it was Plasti dipped, then sanded afterwards, then finally Plasti dipped again. From the last I saw of them, the looked pretty smooth. As soon as I get them painted and glued to the shoulders then that part of the body will be done.
 

Attachments

  • IMG_20220828_205710235.jpg
    IMG_20220828_205710235.jpg
    537.7 KB · Views: 126
Got the little belt buckles painted and just gonna do some weathering this week to give them more character before gluing them on the shoulder straps. Also got some nylon straps to glue on them as well. Will post pics soon later on the week.
 
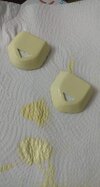
So this isn't MUCH progress, but progress is still progress. I made the buckles with some .5 inch Eva foam and then layered that with some 2mm eva foam. Not sure what the reason was for layering when I could've just cut the triangle out and just pushed it in a bit more to give more depth, but hindsight is 20/20. After that I heat treated it, caulked it, sanded it, plasti-dipped it, caulked it again, sanded it again, and plasti-dipped again to get the smooth finish.

-
After that, it was just a matter of painting it and weathering it. I also got some nylon straps I got from work and just hot glued everything onto the shoulder straps. Last thing to do is do some airbrushing this weekend to get a more shadowy appearance on the buckles edges before this piece can be labeled done.
AF4FA3E4-E403-4CBA-8EE3-D053034DE87C (1).jpg received_2893714784105460.jpeg
received_425578703004730.jpeg
 
Had some more luck on the back in terms of detailing and Caulking.


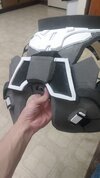
For detailing, the 2mm foam was VERY thin and could not hold the weight of these magnets. Best use them for layering and details rather than a functional holding use. Though I'm surprised they lasted as long as they did since these magnets are STRONG and downright difficult to separate. Had to add another 2mm of the the flap to not only hide a rip when I opened it, but also add more structure and stability. Added 5mm on the edges for detailing purposes. Then added 2mm between the magnets since it was still strong and difficult when they physically connected. This helped damped the magnets strength.
IMG_20220919_214241218.jpg IMG_20220919_214252259.jpg
received_1557025861421819.jpeg

-

I also added some more layers to some areas since they were mismatched and needed either a cleaner look or leveled. Biggest being that center piece.
IMG_20220624_064109276.jpg IMG_20220919_214245452.jpg

-

The buckles looked a little too plain fory taste so I added some detail to make them not look so... pathetic. Cut a flat edge of some half inch foam, cut diagonally and just glued it on to the buckles foam piece to get that slope. Then I just added 2mm strips to bring more detail for the top. Overall, decent enough.
IMG_20220919_214259354.jpg IMG_20220919_214309147.jpg

And with these small additions and changes, I added the shoulder straps to see what the bigger picture had. And I was genuinely impressed.
received_606191474300770.jpeg

I then caulked it after some sanding in some areas.
IMG_20220922_224348907.jpg IMG_20220922_224337899.jpg

-

On another note, might not have enough room to make the bicep armor pieces. The side straps bowed a LITTLE too outward and are physically touching my biceps. Not sure what the paint job/finished project would look like with the two armor pieces continuously rubbing against each other. I don't know, but I do know that I had to modify the side straps quite a bit for them to fit a good deal to eat they are. Might take a page from Impact Props and try and "Scratch Build" my Mk.IV with Stealth's idea of only having the SOME straps permanently connected and others detachable for ease of getting in and out. Lots of ideas SO little time.
 
It's looking great! You've made a ton of progress since I last saw it. I can't wait to see the finished product!
 
This thread is more than 6 months old.

Your message may be considered spam for the following reasons:

  1. This thread hasn't been active in some time. A new post in this thread might not contribute constructively to this discussion after so long.
If you wish to reply despite these issues, check the box below before replying.
Be aware that malicious compliance may result in more severe penalties.
Back
Top