Pepakura Assembly?

Status
Not open for further replies.

Aiden26

Active Member
Hey guys, so I just wanted to quickly reach out and get some help for Pepakura assembly because I have been facing some problems threw out my attempts. I understand that what I'm asking about might be covered somewhere else but I havn't had much time lately to search. So I thought I would quickly ask and wait.

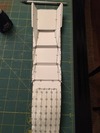
First off, folding. Is there a tool you guys would recommend to fold all the pep tabs and such? When I bend it by hand, it sometimes gets a little messed up. The bend line is sometimes behind or ahead of the solid line. Or it's not matched along the solid line. Folded horizontally or something like that.

Then assembling. Is there a certain section that's best to start off for helmet? Side, top, etc? And what of parts that are hollow on the inside? How would I glue in the tabs on the inside? Is gluing them on the outside fine?

And Glue it'self. What sort of glue is best? White, stick etc?

Thanks!

-Aiden
 
what i use is the actual box cutter itself, and light is a great way to get a nice fold. Screenshot_2016-02-17-19-51-39_resized.pngScreenshot_2016-02-17-19-52-06_resized.pngScreenshot_2016-02-17-19-51-57_resized.pnguse your thumb nail to make a pre-crease, then finish the fold.i hope this helps you. for longer folds i use the edge of the self healing mat.
 
I put the edge of my X-Acto knife underneath and it makes a pretty good fold line and i would personally start from the bottom of a helmet
 
i would personally start from the bottom of a helmet

I'd advise against this, honestly. Starting from the bottom means you'll struggle at the end with sealing up the crown of the helmet - I'd advise starting at the top, and working down and around to the faceplate, then the ears and the back, before looping down and around the jaw area to finish at the chin, with maximum space left for your hands to seal up the final few pieces more easily.
 
I found with a helmet I made a few years ago, that filling the helmet with expanding foam, waiting for it to harden, THEN doing fibreglassing worked for me. Then once the fibreglassing/bondoing is done, carve the expanding foam out and fibreglass and bondo the inside. But that's just from my experience, it may be different for other people. That is how I do most armour parts though too. Helps as reinforcement.

EDIT: Realised this was regarding Assembly, not fibreglassing... My bad! But as Chernobyl said, start from the top, and then work your way down! It is the easiest method, and achieves the best results!
 
I'd advise against this, honestly. Starting from the bottom means you'll struggle at the end with sealing up the crown of the helmet - I'd advise starting at the top, and working down and around to the faceplate, then the ears and the back, before looping down and around the jaw area to finish at the chin, with maximum space left for your hands to seal up the final few pieces more easily.

Just finished my first helmet and this was the route I went. Still had some trouble when it came to the mouth area but overall the top and sides look killer. The only thing is I think I scaled it wrong as it is too small... What is the average size in MM that everyone scales to? I feel like I either put in too small or too big. Is around 260mm average?

*edit* I think the inside is close to right but the bottom for sure there is no way I can stick my head through. Do you all have any advice against not being able to fit your noggin through the bottom?

Which helmet did you build, and at what scale? I may be able to advise based upon the helmet file.
 
Very helpful incite to everyone....I used the test model at 280 mm ( have a 21" circumference head). Although this did fit pretty good, I am going 285 mm for my actual. Hope this helps.

Now I have a quick question. I began the legitimate version of my Halo 3 MK VI with the top center area, traversing back as the folds seemed intimidating to me. Anyhow, it came out pretty descent but was wondering what individuals do when a section gets just a tad course? do you work the paper with your hands or let the rest of the sections dictate the symmetry as you go? Hope this makes sense? Here is an images...I am referring to the bottom section where you can see the slight "lumpiness"....is this even something I should worry about? Thanks in a advance guys. And I apologize for piggy backing on this thread as I am going to start my WIP fairly soon but wanted to make some head way....
B

Halo1.jpg
 

Attachments

  • Halo1.jpg
    Halo1.jpg
    75.6 KB · Views: 204
Also, as far as the sizing may I add that the inner rim needs to be trimmed out which you can do after you resin coat. You can go larger if you don't want to trim that section however, I think you risk the proportion being off....


Sent from my iPhone using Tapatalk
 
Very helpful incite to everyone....I used the test model at 280 mm ( have a 21" circumference head). Although this did fit pretty good, I am going 285 mm for my actual. Hope this helps.

Now I have a quick question. I began the legitimate version of my Halo 3 MK VI with the top center area, traversing back as the folds seemed intimidating to me. Anyhow, it came out pretty descent but was wondering what individuals do when a section gets just a tad course? do you work the paper with your hands or let the rest of the sections dictate the symmetry as you go? Hope this makes sense? Here is an images...I am referring to the bottom section where you can see the slight "lumpiness"....is this even something I should worry about? Thanks in a advance guys. And I apologize for piggy backing on this thread as I am going to start my WIP fairly soon but wanted to make some head way....
B

[url]http://i1080.photobucket.com/albums/j323/bodybuildingbrian/HALO%203%20MK%20VI/Halo1.jpg[/URL]

Looks like your off to a great start! For the lumpyness it can be covered up with bondo/body filler later down the road. Or, once you have applied your first coat of resin. Use a heatgun(dont apply max heat with heatgun) or a hair blow dryer with the max heat turnt up. Apply some heat, after that place your hand through the neck opening of the helm to smooth out the area with your fingers. Basically, you would be popping out the dents, like doing body work to a car. Back to the photo, can't quite see the rest of your pep. Gonna try to explain this the best as I can. Imagine that you have two rectangles.(This example would be similar to the four strips that you have connected, and looks like they slide into the upside down letter U piece/#lumpy area#) Back to the rectangles, if you were looking at the recstangles at face value. Both pieces are standing vertically length wise, parallel to each other. The two edges in the middle between the two rectangles would connect. One side would have all the tabs, and the other side blank. These are the two edges that we would be connecting. For right now, the one piece with the tabs, we want to focus on the top and bottom tabs first. Those are the tabs you would want to glue first to your adjacent piece. Why? That's because you wanna make sure the end points on the corners of the rectangles line up perfectly. Or as close as possible. Then we would focus on gluing the tabs in between the top and bottom tab. Once the top and bottom tabs are connected the rest should fall in place, or line up as they should. My guess for the lumpyness is 2 things. 1.) by not allowing the pieces to take there shape once more pieces or added. 2.) or maybe being to rough with the cardstock to try to make edges line up properly. If you follow the example provided, edge IDs are not needed. I can see that the numbers aren't lining up perfectly. Trying to make the numbers line up, may be the root cause for the pieces not to line up properly. Also, I use hot glue gun in case I have re-adjust a tab. Sorry so long, pics would of been better, but I don't have a computer in front me hope this helps?
 
The best thing i have found to do when folding tabs is by placing a ruler flat along the line and taking a pencil and going over the line a few times with a little force. I know you wont be able to see the line but before I do this process I draw a V for valley or M for mountain by each line. It is time consuming but I get some incredible folds.
 
My personal process goes something like this. I grab two different colored ballpoint pens, usually red and black. Try not to get ones with too pointy of a tip, for reasons I'll explain. Now, I personally don't have a good cutting surface, so I use scissors to cut mine out instead of an X-Acto blade, but if you're good with an X-Acto, definitely use that. So I start by going through all of my pieces, before I cut them out, and scoring the fold lines with my pens and a ruler. Depending on what kind of pen you're using, you may need to put the pen on the beginning of the line then slide the ruler up to the pen afterward to make sure you're actually on the fold line and not a millimeter or so off to the side. Then just run the pen down the fold line one or two times using mild pressure. If your pen is too pointy, you'll cut right through your cardstock instead of just scoring it, so be careful not to apply too much pressure. I use black for valley folds and red for mountain folds, so that way you know which fold is which after the ink covers the line up. Then just cut your cut lines and it's ready to fold. You'll find that your folds are nice and crisp when you score them with a pen first. You can really use any kind of semi-pointy object to score the lines, but I like using pens because I score all of my pieces first, so it's easier to see which ones I've done and which ones I haven't when they're inked.
 
Status
Not open for further replies.
Back
Top