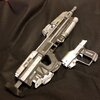
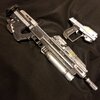
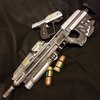
1st Build The Red ODST Halo: Reach build log.

Status
Not open for further replies.
awesome What kind of 3d printer do you have can you send the name or a link to where i can buy it
I also have a CR-10. From what I've heard the CR-10S runs better out of the box, but that also means you may learn less about what each of the parts do, because you'll never be taking them off or replacing them as much. A CR-10S isn't a free ticket to easy street though, they still need plenty of care. Usually the parts that need upgrading are cheap and easy to fix though. As usual, the new models will tend to work better, but what it really comes down to is how well you take care of the machine.

I've had my CR-10 just over a year and it still runs great! only had to make a few small upgrades.
 
Looking great so far! Are there any issues getting the shins to fit right? I'm having trouble getting mine to the right scale so they can be slid on in one part.
 
Looking great so far! Are there any issues getting the shins to fit right? I'm having trouble getting mine to the right scale so they can be slid on in one part.
Hey thanks!

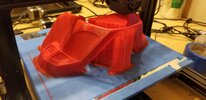
First issue to solve would be how large your printer is, I am 6ft 3in and my CR-10s has a large enough build volume that I was able to print a whole shin piece in one go.
Second issue is measuring your calf, shin, and feet in the shape of an ovaloid cylinder, like trying to imagine pointing your feet and sliding into an oddly rounded tube. The tolerance for how tight this fit will be is up to you.
Third problem to solve is how much of a printed part you can cut away without ruining the look of the part. The 3d models I used had a curled lip that bent inwards on the shin armor, so I was able to cut alot of material off post-print to make it more comfortable.

Of course making the whole set is a per-person problem to solve, I am still running into issues every time I get to work on it. Like I have been working out more and more since I started working on this project, and my thighs and biceps have become larger than they were when I measured and printed those parts.... gotta be lean not huge!

Good luck!
 
Last edited:
The build is looking really good so far. I love the color scheme and the fact you got the magnum to sit on the hip. what did you use to get it to stay?
 
The build is looking really good so far. I love the color scheme and the fact you got the magnum to sit on the hip. what did you use to get it to stay?
Magnets my dude! Edited the magnum 3d model so I could embed a magnet inside the model, did the same to the thigh armor. It works well enough for walking around, but it needs to be stronger if I plan to move a bit more aggressively
 
Magnets my dude! Edited the magnum 3d model so I could embed a magnet inside the model, did the same to the thigh armor. It works well enough for walking around, but it needs to be stronger if I plan to move a bit more aggressively
Oh sick, I haven't seen very many magnets that are able to hold props on thighs. glad to know it works for you for the most part.
 
Oh sick, I haven't seen very many magnets that are able to hold props on thighs. glad to know it works for you for the most part.
with a printed magnum you can get it fairly light. for magnets i have a supplier that shows the holding force. for my own magnum's magazine i used 3 magnets with each capable of holding up to 2 kg. so 6 kg of force keeping the mag in place XD
 
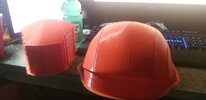
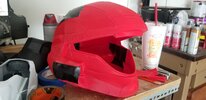
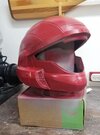
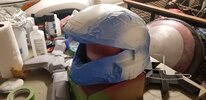
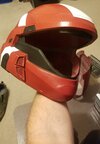
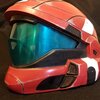
Still need some work and detailing(don't they all), here's a look at my helmet so far. I have a visor nearly ready, but I have to add some tint to it.
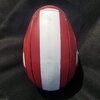
I plan to install the same microphone speaker system from {this thread by Moesizzlac}, I already have all the parts and pieces, just not quite the patience to put it all together. The hardest part of the helmet was just all of the sanding and bonding needed to try and hide lines from all the seperate parts. I think I pulled it off really well, but there are still some lines visible. Oh well. I will also need to add padding to the inside for comfort. The big white stripe up top(It helps me go faster I already tested it) came out perfectly I am so happy with it. Anyways, take a look at some progress, let me know what you think, suggestions are always welcome.


GaG9g2U.jpgAYUzVu8.jpgmRgUfCi.jpg

RnWCtDt1.jpg20210228_180632.jpg20210301_2200471.jpg
20210302_122040.jpg
20210302_122050.jpg
20210302_122102.jpg

20210302_124318.jpg
 
Last edited:
Finally got around to installing this helmet speaker setup. Will post video later when I have visor installed too. Inspiration for this(or more like, direct instructions to follow) came from this thread >Here<.

I wanted to install a microphone+speaker setup so it would be easier for people to understand me at conventions and stuff without taking off the helmet, and luckily someone on the forums already had a setup in mind exactly like this.


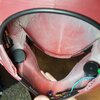
Its difficult to get photos this close inside of a helmet, but I think these came out alright.
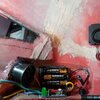
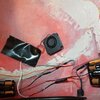
20210309_181933.jpgRight side of helmet, amp, speaker, fan
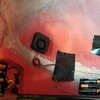
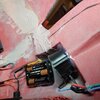
20210309_181946.jpgBack right, battery packs and fan
20210309_181955.jpgBack left, battery packs and fan
20210309_182002.jpgLeft side, battery, Speaker
20210309_182021.jpgFront of helmet, speakers and microphone.

Duct tape is meant to be temporary, I used some pin connections in case I need to replace things in the future, the tape just covers those connections. I still need to print an echo chamber setup for the microphone.
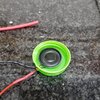
20210306_180343.jpgI originally used a bottle cap to try and help make the speakers louder, but found that I could use the caps from spray paint cans, they are larger and it was easy to cut away excess material. Seems to work really well.
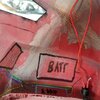
20210306_180539.jpgExtra photo of my early attempts to plan where I would put each part.

So far I think it works really well. The fans help keep my head cool, and I am sure that will be really useful in the Texas heat. Next I need to install the visor and some padding to keep this bucket from moving around too much.
 
May I ask why you decided to use wood glue?
I used hot glue to adhere the mix of foam padding, but I noticed that the edges of the foam were still lifting a litte. To prevent them from peeling off in the future I ran some wood glue along the edges where it was easy just to prevent the edges from plying back. Also it was close and I needed something that wouldn't melt foam.
 
Finished detailing and visor stuff. Really pleased with how the weathering turned out, the visor looks better in person and I can't seem to get a good photo of it, it has a nice color gradient change.

BTW I didn't mention before, I commissioned the Visor from Brian Johnson @JohnsonArmsProps, mostly because I don't have the equipment to make a substantially good looking visor. He sent a visor, I did the color.
20210316_115627.jpg

20210316_115819.jpg20210316_014009.jpg
 
Last edited:
Not as exciting as the Helmet, but another substantial(and essential) part of the build is near completion. I feel like I am going to go back and touch up this stuff, so what I'm showing now is good enough to show the final design without all of the extremely minute details I will add in later.

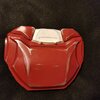
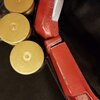
Here is the codpiece/belt, with the butt plate. I have a belt that loops through the interior and keeps it tight. The cod piece is split into three pieces with some material that allows it to flex a little bit, I didn't want it to be super rigid. The black part of the.... groin has some small diameter irrigation tubing spliced onto it. I have found this material to work really well at making a comfortable smooth surface that wont rub me the wrong way or get caught on clothing. I have used this tubing on a few other parts of the build so far, it is really helpful. Otherwise I would have to spend a ton of time sanding each and every edge of the plastic to make it less abrassive on clothing. TBH I kinda rushed the grenades, but luckily they are not permanently attached to the belt so I could go back and polish those off later.

20210323_161154.jpg

20210323_161227.jpg20210323_161253.jpg20210323_161309.jpg20210323_161328.jpg20210323_195526.jpg20210323_195554.jpg20210323_195617.jpg
 
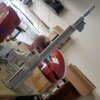
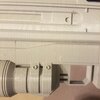
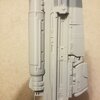
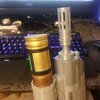
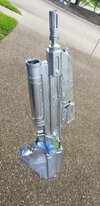
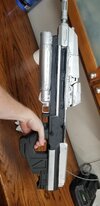
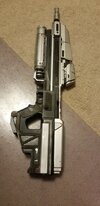
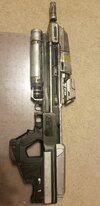
Short addition. Working on my Assault rifle. Put the whole thing together, the size feels great. The grip/trigger might be a bit too tight, but the rest of the scale works really well.

20210325_135234.jpg20210325_150313.jpg20210325_150338.jpg
20210325_142335.jpg


And no, in case you're curious the grenades don't fit. I made them close enough to look like they could, but not quite.
20210325_150256.jpg
 
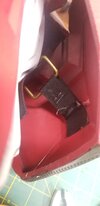
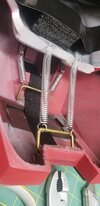
Made a hinge mechanism for my shoulder to add more mobility, especially while wearing chest piece(which is currently printing).
20210514_160208.jpg20210514_160156.jpg
Literally just foam, straps, springs, metal loops, and hot glue. Even the staples I used are like "You're kidding right?"
 
Last edited:
Update on the Assault Rifle build. It's been a long time.

After priming with flat black and taping it off, I painted it with a silver paint.
20210521_163513.jpg20210521_173613.jpg
First run of detailing
20210524_182052.jpg
Second run of detailing with black paint wash.
20210525_160418.jpg
Painted the magazine and buttstock, epoxied them in place. Got a hot new piece!
20210528_163216.jpg20210528_163335.jpg20210528_163901.jpg

And with that, the MA37-GL(Or MA37-GLHF) is nearly complete! Need to do decals as well, but I'm not quite to the point with the rest my armor to get started on that.
 
Ok so it's been a while. I have progressed quite a lot since the last post. I wouldn't say my armor is "done" but it is convention ready for sure. Here's some photos to tide you over while I compile more photos and organize my thoughts from the last couple of months to show what has been done.


First here is a photo while I was test fitting the whole suit. In this photo I had not yet added the Knife to the chest piece. I was not sure if I really wanted to go that far with it, but eventually decided to do it anyways.
20210901_2237281.jpg


Here's me on the Cosplay Red Carpet and Fax Expo Dallas. Credit to Justin O'Keith
OKeithCosplayRedCarpetDFE2021.jpg


And here I was walking around the convention space, someone had setup a small photo area. Credit to Scott Fischer
ScottFischerDFE2021.jpg


Alright just wanted to tease that I've got more stuff coming. See you again in a bit.
 
Status
Not open for further replies.
Back
Top