- Member DIN
- S037
Hello everyone,
We were recently asked to describe our finishing process for 3D printed parts so we thought I'd share the write up with the team. I don't know everything about this subject, nor do I think our process is the best. But it works for us, so here ya go. Hope it helps!
Just recently we created a new version of our Spartan Recluse suit using Polylite PLA. To create this suit, we started with files from Halo 5 Guardians. From there we extensively reworked the models for 3D printing and added details. Once we were ready to print, we selected Polylite PLA due to the positive results we have had with it in the past. To describe the process, I will talk you through how we finished the chest armor. Picture 1 (Attached) is a picture of the raw 3D print fresh off the printer and assembled.
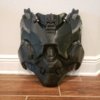
The first problem that we tackled was hiding the seams. This is accomplished by filling each seam with a mixture of baby powder and super glue (CA). Once the seam is filled, an accelerant is added to solidify the bond. We then sand down these seams to make the area flush. Picture 2 (Attached) shows the seams after they have been filled. And Picture 3 (attached) shows them after they have been sanded down.
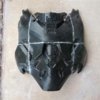
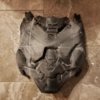
We then cover the whole piece with a product from Smooth-On called XTC3D (any 2 part epoxy will do). This is a two-part epoxy that fills a large amount of the layer lines while also adding a degree of strength. Once the epoxy has cured, we begin the extensive process of sanding. This process is three parts. First, we apply Bondo spot putty to the piece in any areas that need filling. Once it is dry, we sand the piece down with a high to medium grit sandpaper. Then, lastly, we apply filler primer to the whole piece. This process is repeated until the piece is smoothed to our satisfaction. Picture 4 (Attached) shows the piece after one of the rounds of filler primer.
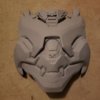
Once the print lines and any other imperfections are filled to our liking, we then wet sand the whole piece up to 1500 grit sandpaper. This ensures an extremely smooth surface. Once wet sanding is complete the fun really begins. Time for color. We first put down a metallic base coat on the piece. This base coat is then covered with a clear coat. This way when the main color is scrapped off the metal will show for a desired ‘weathered’ look. Picture 5 (Attached) is the piece with the basecoat applied.
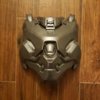
After this has dried completely, we then apply the base color and any other desired details. The final result is the piece ready for cosplay! Picture 6 (attached) shows the completed piece.
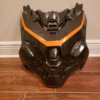
It can be a process. But our goal is to garner the smoothest finish possible on our costumes and this process has worked great for us so far. Hope this is useful to those tackling the 3D printing process. Happy to help with any questions and take suggestions.
-S037
We were recently asked to describe our finishing process for 3D printed parts so we thought I'd share the write up with the team. I don't know everything about this subject, nor do I think our process is the best. But it works for us, so here ya go. Hope it helps!
Just recently we created a new version of our Spartan Recluse suit using Polylite PLA. To create this suit, we started with files from Halo 5 Guardians. From there we extensively reworked the models for 3D printing and added details. Once we were ready to print, we selected Polylite PLA due to the positive results we have had with it in the past. To describe the process, I will talk you through how we finished the chest armor. Picture 1 (Attached) is a picture of the raw 3D print fresh off the printer and assembled.

The first problem that we tackled was hiding the seams. This is accomplished by filling each seam with a mixture of baby powder and super glue (CA). Once the seam is filled, an accelerant is added to solidify the bond. We then sand down these seams to make the area flush. Picture 2 (Attached) shows the seams after they have been filled. And Picture 3 (attached) shows them after they have been sanded down.


We then cover the whole piece with a product from Smooth-On called XTC3D (any 2 part epoxy will do). This is a two-part epoxy that fills a large amount of the layer lines while also adding a degree of strength. Once the epoxy has cured, we begin the extensive process of sanding. This process is three parts. First, we apply Bondo spot putty to the piece in any areas that need filling. Once it is dry, we sand the piece down with a high to medium grit sandpaper. Then, lastly, we apply filler primer to the whole piece. This process is repeated until the piece is smoothed to our satisfaction. Picture 4 (Attached) shows the piece after one of the rounds of filler primer.

Once the print lines and any other imperfections are filled to our liking, we then wet sand the whole piece up to 1500 grit sandpaper. This ensures an extremely smooth surface. Once wet sanding is complete the fun really begins. Time for color. We first put down a metallic base coat on the piece. This base coat is then covered with a clear coat. This way when the main color is scrapped off the metal will show for a desired ‘weathered’ look. Picture 5 (Attached) is the piece with the basecoat applied.

After this has dried completely, we then apply the base color and any other desired details. The final result is the piece ready for cosplay! Picture 6 (attached) shows the completed piece.

It can be a process. But our goal is to garner the smoothest finish possible on our costumes and this process has worked great for us so far. Hope this is useful to those tackling the 3D printing process. Happy to help with any questions and take suggestions.
-S037
Last edited:
