- Member DIN
- S111
Nerf Assault Rifle Repaint
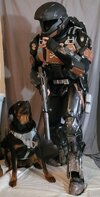
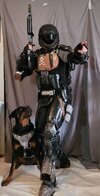
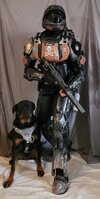
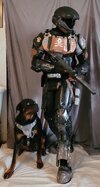
Like many other members I was able to get a great deal on the Nerf Assault Rifle on Amazon. At the time I got it back in July it was a "Deal of the Day" for around $30. It's Manufacture's Suggested Retail Price (if you ever wondered what MSRP stood for) is around $80, but it usually hovers around $50 on Amazon, and frankly, it is well worth the $50. Plenty of other folks have done reviews, but I will just reiterate that it is scaled great for an ODST or Marine costume, the details are there, it feels good in hand, and makes an excellent prop that you aren't afraid of dropping. If you can keep an eye on it and get a deal, it's great, but even if you get it for around $50 it's still worth that price, in my mind.
I sanded off the Nerf logos with a belt sander, followed by a palm sander, and finally by hand with sanding sponges.
The whole thing was given a coat of Krylon Brushed Aluminium as a base and for weathering purposes. Then I masked off where I intended to have some scratches showing through with liquid latex, and set about hand painting the whole thing. I hand painted it for two reasons. One, the best gun metal and metallic dark gray to achieve the sort of two tone paint job on the majority of UNSC weapons was an acrylic paint I stumbled on, and two, I didn't want to mask off all those small areas for rattle can painting and found hand painting it to be the easiest way to maintain control without masking off.
The detail lights/buttons were also painted with acrylics including a Neon green for the green areas. I made a quick and dirty barrel plug with a wooden dowl of the correct diameter wrapped in orange electrical tape. Finally in place of the default yellow stripe, I added a brown stripe of the same paint as my armor's mahogany secondary color so they match.


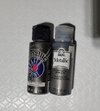
These are paints used for the majority of the rifle.
As can be seen in the above images, the primary modification I made to this was to shorten the magazine. In the unmodified version it extends very far out to accommodate 10 nerf darts, making it the only real out of proportion part of the rifle.
There are several folks here and on places like Thingiverse that have made files to print a replacement magazine that sits more flush like the game rifle. I don't own a 3D printer, so, I went the improvisational way. I measured how far out the magazine extended from the rest of the rifle and then cut a section of the magazine out of that length, then rejoined the two halves back together with some scrap sytrene glued inside the magazine. Not very pretty on its own, but the cut is hidden once inserted.


Last piece is the Infinite style weapon charm.
I took inspiration from the battle rifle build done by RadMax117 and got some of the quick release key chains from Amazon:
And cut down the narrower end piece.

Then I drilled a hole in the approximate same location as the mounting point seen in game and glued the post in.

Like many other members I was able to get a great deal on the Nerf Assault Rifle on Amazon. At the time I got it back in July it was a "Deal of the Day" for around $30. It's Manufacture's Suggested Retail Price (if you ever wondered what MSRP stood for) is around $80, but it usually hovers around $50 on Amazon, and frankly, it is well worth the $50. Plenty of other folks have done reviews, but I will just reiterate that it is scaled great for an ODST or Marine costume, the details are there, it feels good in hand, and makes an excellent prop that you aren't afraid of dropping. If you can keep an eye on it and get a deal, it's great, but even if you get it for around $50 it's still worth that price, in my mind.
I sanded off the Nerf logos with a belt sander, followed by a palm sander, and finally by hand with sanding sponges.
The whole thing was given a coat of Krylon Brushed Aluminium as a base and for weathering purposes. Then I masked off where I intended to have some scratches showing through with liquid latex, and set about hand painting the whole thing. I hand painted it for two reasons. One, the best gun metal and metallic dark gray to achieve the sort of two tone paint job on the majority of UNSC weapons was an acrylic paint I stumbled on, and two, I didn't want to mask off all those small areas for rattle can painting and found hand painting it to be the easiest way to maintain control without masking off.
The detail lights/buttons were also painted with acrylics including a Neon green for the green areas. I made a quick and dirty barrel plug with a wooden dowl of the correct diameter wrapped in orange electrical tape. Finally in place of the default yellow stripe, I added a brown stripe of the same paint as my armor's mahogany secondary color so they match.
These are paints used for the majority of the rifle.

As can be seen in the above images, the primary modification I made to this was to shorten the magazine. In the unmodified version it extends very far out to accommodate 10 nerf darts, making it the only real out of proportion part of the rifle.
There are several folks here and on places like Thingiverse that have made files to print a replacement magazine that sits more flush like the game rifle. I don't own a 3D printer, so, I went the improvisational way. I measured how far out the magazine extended from the rest of the rifle and then cut a section of the magazine out of that length, then rejoined the two halves back together with some scrap sytrene glued inside the magazine. Not very pretty on its own, but the cut is hidden once inserted.
Last piece is the Infinite style weapon charm.
I took inspiration from the battle rifle build done by RadMax117 and got some of the quick release key chains from Amazon:
And cut down the narrower end piece.
Then I drilled a hole in the approximate same location as the mounting point seen in game and glued the post in.

