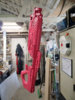
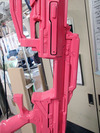
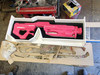
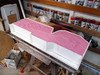
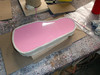
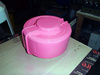
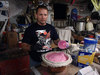
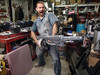
SAW UPDATE: A while back I painted the main body a nice lightish red:
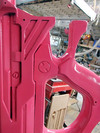
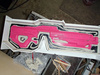
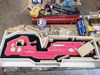
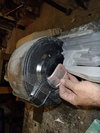
Here's a close-up showing some of the details:
And a closer close-up:
For those of you who've followed my builds before, you'll remember that the gloss paint coat is usually the last step before moldmaking.
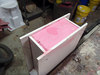
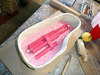
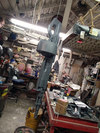
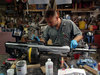
Once the paint was dry, I began making the mold for the main body of the SAW. Here's how it started:
I'm using 3/8" thick foamed PVC board for the mold box. My friend Greg ripped a few pieces down and put it together:
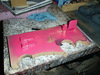
Then we cut an outline out of a thinner sheet and made the beginnings of a parting wall:
Then oil-based clay was used to seal up the edges as well as building up registration keys to keep the pieces of the mold properly aligned:
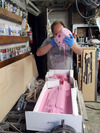
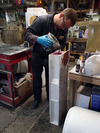
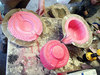
Then it was time to pour on the silicone print coat:
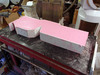
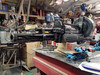
Once the print coat had set up, chunks of silicone were cut from old, dead molds and used to fill in the areas around the prototype. Then more rubber was poured in:
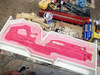
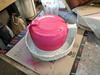
The mold box was filled almost to the top:
It wasn't filled all the way so that any chunks of dead rubber that might want to float won't end up sticking out above the top of the box. I still needed to pour one more batch in order to make it flat on top.
Once the first half of the mold was filled. Then I screwed a top onto the box, flipped the whole thing over, and removed the bottom of the box:
Then the parting wall was removed:
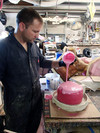
After spraying a lot of release agent to keep the silicone from bonding to the cured first half of the mold, it was time to start pouring the second half:
The last thing to do on the main body was to pour a silicone plug so that the castings will have a cutout to fit the separately cast barrel piece:
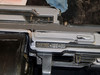
Once that was cured, the next thing to do was to disassemble the mold box. Here it is with the top and bottom removed:

And with the sides removed:
Then I just had to pull the two mold halves apart:
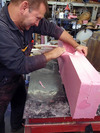
And remove the prototype:
Once the prototype is out of the mold, it's time to rebuild the mold box. I started by taking the wall parts and shaving about a quarter of an inch off of them with the table saw. Once that was done, I screwed them back onto the bottom piece of the mold. Then I fitted the top edge with hanger bolts so I could use wing nuts to hold down the top of the box.
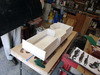
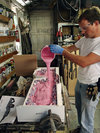
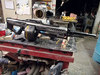
With that done, it was time to pour the first casting. Since the finished casting is going to be huge, I decided to reduce the weight a bit by adding in a couple of foam blocks. To keep them in place, I started by pouring a small batch of resin into one half of the mold and setting the foam blocks on top of it while it was still not quite cured:
Then I set the other half of the mold into place, screwed down the lid, and stood the whole thing up on end:
Filling the mold took just under a gallon of resin, even with the foam blocks in place:
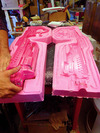
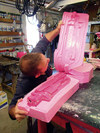
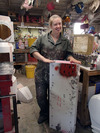
Once the resin had cured, it was time to open up the mold again:
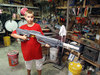
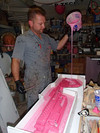
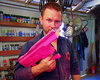
And then goof around for a minute:

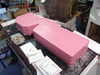
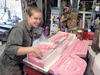
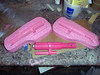
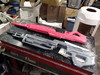
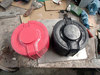
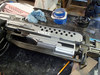
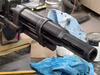
So that's the first casting of the main body. I've still got molds to make for the small parts. Here's the finished prototype for the barrel:
Here it is under the rubber for the first half of the mold:

First half of the barrel mold is done. Here it is set up for pouring the second half:
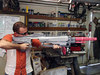
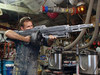
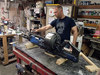
Here I am pouring the second half (after spraying on a copious amount of release agent):
Once the second half had cured, it was time to pull the mold apart and remove the prototype:

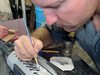
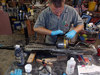
Once that was done, I used a sharp knife to cut pouring sprues and vents into the back end of the mold:

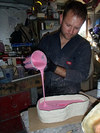
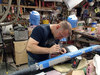
Then I clamped the mold gently between a couple of scraps of wood and filled it with grey-tinted resin. While it was curing, I did some more goofing around with the prototype barrel:

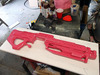
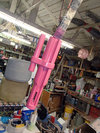
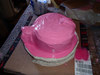
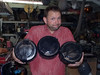
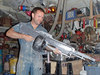
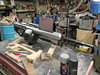
The first barrel cast came out great:

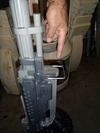
Here it is installed on the first casting of the main body (next to the lightish red prototype):

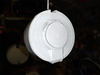
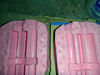
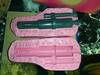
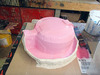
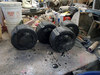
With that done, I've finally smoothed out the drum magazine enough to mold:
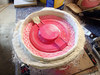
I'll be making a two-part mold and then rotocasting it. Here it is set up with the clay parting wall:
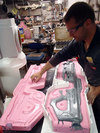
Pouring silicone:
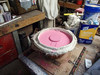
Print coat done:
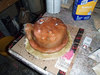
The next morning I layered on some thickened silicone to build up the rubber jacket a bit more. Here's what it looks like right now:

I still need to add registration keys and a bit more thickness. Then I can build up a fiberglass mothermold, flip the whole thing over, remove the clay parting wall, and make up the mold for the other side.
It's getting close. Stay tuned...