Build: Yoroi Armor Dragonborn Noble

Sol Merchant

New Member
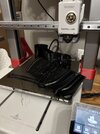
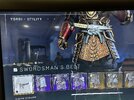
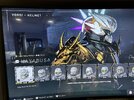
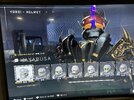
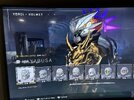
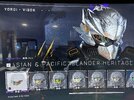
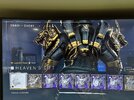
I’ve decided to build the armor used by my Halo: Infinite spartan. I’m planning to 3D print the majority of it and I’ll figure out the rest as I go.

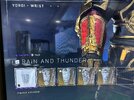
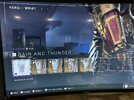
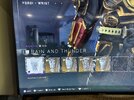
Yoroi armor 3D files are available on Thingiverse by MoeSizzlac. Hayabusa helmet 3D files are available for purchase on Galactic Armory.
 

Attachments

  • IMG_1302.jpeg
    IMG_1302.jpeg
    6.4 MB · Views: 11
  • IMG_1291.jpeg
    IMG_1291.jpeg
    6.2 MB · Views: 10
  • IMG_1292.jpeg
    IMG_1292.jpeg
    7.5 MB · Views: 9
  • IMG_1293.jpeg
    IMG_1293.jpeg
    6.8 MB · Views: 9
  • IMG_1294.jpeg
    IMG_1294.jpeg
    5.4 MB · Views: 8
  • IMG_1295.jpeg
    IMG_1295.jpeg
    5.8 MB · Views: 6
  • IMG_1296.jpeg
    IMG_1296.jpeg
    6.5 MB · Views: 6
  • IMG_1298.jpeg
    IMG_1298.jpeg
    6.3 MB · Views: 8
  • IMG_1299.jpeg
    IMG_1299.jpeg
    5.9 MB · Views: 7
  • IMG_1300.jpeg
    IMG_1300.jpeg
    6.2 MB · Views: 8
  • IMG_1301.jpeg
    IMG_1301.jpeg
    6.1 MB · Views: 7
  • IMG_1290.jpeg
    IMG_1290.jpeg
    6.2 MB · Views: 7
  • IMG_1289.jpeg
    IMG_1289.jpeg
    5.9 MB · Views: 9
  • IMG_1279.jpeg
    IMG_1279.jpeg
    5.5 MB · Views: 6
  • IMG_1280.jpeg
    IMG_1280.jpeg
    6.1 MB · Views: 8
  • IMG_1281.jpeg
    IMG_1281.jpeg
    6.3 MB · Views: 7
  • IMG_1282.jpeg
    IMG_1282.jpeg
    6.3 MB · Views: 5
  • IMG_1283.jpeg
    IMG_1283.jpeg
    7.7 MB · Views: 6
  • IMG_1284.jpeg
    IMG_1284.jpeg
    8.1 MB · Views: 7
  • IMG_1285.jpeg
    IMG_1285.jpeg
    7 MB · Views: 4
  • IMG_1286.jpeg
    IMG_1286.jpeg
    5.9 MB · Views: 8
  • IMG_1287.jpeg
    IMG_1287.jpeg
    5.2 MB · Views: 7
  • IMG_1288.jpeg
    IMG_1288.jpeg
    5.5 MB · Views: 10
I’m using a Bambu A1 printer. I decided to use basic black PETG to make it. I’ll sand out the lines and finish each piece once I determine if it’s all going to fit. The models I’m using are designed for a 5’10” person. Conveniently, that’s how tall I am! Hopefully I don’t need to do many modifications…
 

Attachments

  • IMG_1328.jpeg
    IMG_1328.jpeg
    2.4 MB · Views: 5
I’m already a ways into it so I’m updating after the fact. I used default settings for the first few pieces. Had a few print failures and parts that came out 95% good enough. I’m going to try to use modeling putty and bondo to build up the parts that failed.
 

Attachments

  • IMG_1720.jpeg
    IMG_1720.jpeg
    3.4 MB · Views: 8
  • IMG_1705.jpeg
    IMG_1705.jpeg
    2.3 MB · Views: 6
  • IMG_1682.jpeg
    IMG_1682.jpeg
    3.2 MB · Views: 6
  • IMG_1447.jpeg
    IMG_1447.jpeg
    2.1 MB · Views: 8
  • IMG_1448.jpeg
    IMG_1448.jpeg
    1.9 MB · Views: 10
  • IMG_1449.jpeg
    IMG_1449.jpeg
    2.1 MB · Views: 7
  • IMG_1276.jpeg
    IMG_1276.jpeg
    2.4 MB · Views: 8
The helmet was a blast to make. It came out great but finishing it will take some time.

Around this time into the build, I read about other people’s experiences. I changed the settings to be 5 wall loops instead of the default 2. So I’m now running with 5 wall loops, 15% infill, honeycomb pattern infill (not that there’s much infill to be seen with that many loops). The prints are coming out heavier but sturdier.

I found that slowing down the printer made for fewer print failures but it now takes 16-20 hours for most prints. Overture black PETG has a recommended speed of 30-50 mm/s speed. I’ve adjusted my settings as follows:

Initial layer: 30 mm/s
Initial layer infill: 45 mm/s
Outer walls: 45 mm/s
Inner walls: 50 mm/s
Sparse infill: 50 mm/s
Internal solid infill: 50 mm/s
Top surface: 45 mm/s
Bridge: 45 mm/s
Gap infill: 50 mm/s
Support: 50 mm/s
Support interface: 45 mm/s


I also found that some of the long, thin supports were breaking due to the printer shaking too much. I capped the acceleration of the printer at 1,000 mm/s/s rather than the default that ranged from 2,000-10,000 mm/s/s. New speed settings:

Travel: 700 mm/s
Acceleration:
Normal printing: 1,000 mm/s/s
Travel: 1,000 mm/s/s
Initial layer travel: 1,000 mm/s/s
Initial layer: 500 mm/s/s
Outer wall: 1,000 mm/s/s
Top surface: 1,000 mm/s/s


Finally, I almost always run supports at their default settings. Tree supports with a threshold angle of 30 degrees. If that fails then I have bumped up the threshold angle to 40 degrees in some cases.
 

Attachments

  • IMG_1998.jpeg
    IMG_1998.jpeg
    1.4 MB · Views: 6
  • IMG_1999.jpeg
    IMG_1999.jpeg
    1.5 MB · Views: 7
Through more experimenting, I realized that using auto-orient on the pieces isn’t always the best option. Since I’ll be doing a lot of post-processing anyways, I can save a lot of plastic and printing time by playing with the orientation. I still don’t want too many supports on the front of the model and I don’t want it to lie so flat that it needs dozens of supports to make it.

This first picture was attempting to print the dragon head on top of the helmet. the default orientation failed despite my new print settings. It was not supported very much at first. It wouldn’t have support until it got fairly high up.

I went overboard on the re-orientation. It made a dome and these take a lot of extra material in supports to make it work. It came out well enough but took longer and used more material than it probably needed to.
 

Attachments

  • IMG_1978.jpeg
    IMG_1978.jpeg
    2 MB · Views: 7
  • IMG_1979.jpeg
    IMG_1979.jpeg
    1.5 MB · Views: 6
Here’s where I’m at as of yesterday. One arm is mostly printed (just need finger guards), helmet is printed, and the main part of the chest and back have been printed. The bottom of the two back pieces failed partially due to support problems. That’s going to be the hardest part to remodel out of modeling putty. If worst comes to worst then I can reprint those pieces. However it was 4 individual pieces that each took about 16 hours of print time so I needed 4 days to print it out.

Once again, thankfully everything has fit me almost perfectly without rescaling. I’ll see how it goes with the remainder of the pieces.

I’m starting to wonder how to strap all of these pieces of armor onto myself so they stay where they belong and still let me move around. I’ll look for more tutorials on that later.

For the visor, I intend to build a vacuum forming frame and form it out of PETG. The files from Galactic Armory came with a visor buck to be used with vacuum forming. That will be helpful when the time comes.
 

Attachments

  • IMG_2093.jpeg
    IMG_2093.jpeg
    4 MB · Views: 9

Your message may be considered spam for the following reasons:

If you wish to reply despite these issues, check the box below before replying.
Be aware that malicious compliance may result in more severe penalties.
Back
Top