pinoyfiasco
New Member
I’ve embarked on my first ever cosplay build, which I’ve only dreamed about doing for the last 17 years.
This is going to be mostly 3D printed, since that’s more my wheelhouse and I’m trying to keep my first outing as frustration-free as possible (though realistically you can’t avoid it sometimes). There will be some select parts that will be made from EVA foam, particularly parts of the undersuit. Nothing complex though, as I haven’t found a good solution for unfolding high poly geometries on macOS.
I’m using an Anycubic Kobra Max for all the large pieces, and an Anycubic Vyper and Sovol SV01 for the smaller stuff. Hoping I can finish upgrading my Ender 3v2 so it can take some of the workload.
The armor is from TitleWave Designs and the helmet is from Galactic Armory.
My primary goal is really getting the proportions looking good. I’m 5’10” and far from SPARTAN physique. I’m willing to take artistic liberties in pursuit of that as well as practicality/wearability.
Image/Text Wall incoming. Apologies if it’s an eyesore - I’m still learning the formatting here.

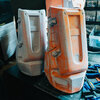
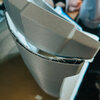
All the printed parts so far. At the time of this photo I was waiting on the left half of the chestpiece.
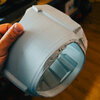
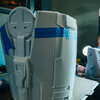
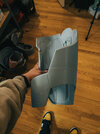
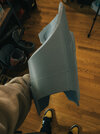
The teal/grey croptop acts as a core for the torso armor. The designer recommended making it out of EVA foam but that’s well out of my range right now. I tried printing half of it with the intent of using it to make a pattern, but that failed miserably. Instead I decided to just print the whole thing and open it up to make it easier to put on and take off. Works pretty well, just have to clean up the edges.


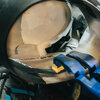
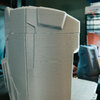
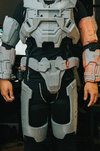
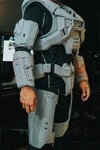
Everything primed. There’s still plenty of surfacing work to do but it helps me visualize the proportions of the entire suit when it’s all the same color. The visor in the helmet isn’t real, just a mockup for funsies. Can’t see through it. I will be vacuum forming my own visor but that’s down the road yet.
And a test fit:
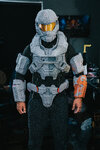
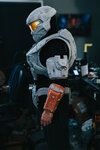
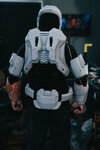

The belt is secured with a harness underneath the torso armor (which will be better hidden). The biceps are secured using 1” elastic strap on the inside. I’m definitely going to beef up the exposed shoulders with some padding, which I can also use to keep the biceps from drifting while I move.
That’s it so far. I’ll try to remember to take plenty of progress photos. I easily get hyperfixated on working.
Fun fact - I was completely blind wearing the helmet for these photos and just had to guess where the camera was.
This is going to be mostly 3D printed, since that’s more my wheelhouse and I’m trying to keep my first outing as frustration-free as possible (though realistically you can’t avoid it sometimes). There will be some select parts that will be made from EVA foam, particularly parts of the undersuit. Nothing complex though, as I haven’t found a good solution for unfolding high poly geometries on macOS.
I’m using an Anycubic Kobra Max for all the large pieces, and an Anycubic Vyper and Sovol SV01 for the smaller stuff. Hoping I can finish upgrading my Ender 3v2 so it can take some of the workload.
The armor is from TitleWave Designs and the helmet is from Galactic Armory.
My primary goal is really getting the proportions looking good. I’m 5’10” and far from SPARTAN physique. I’m willing to take artistic liberties in pursuit of that as well as practicality/wearability.
Image/Text Wall incoming. Apologies if it’s an eyesore - I’m still learning the formatting here.
All the printed parts so far. At the time of this photo I was waiting on the left half of the chestpiece.
The teal/grey croptop acts as a core for the torso armor. The designer recommended making it out of EVA foam but that’s well out of my range right now. I tried printing half of it with the intent of using it to make a pattern, but that failed miserably. Instead I decided to just print the whole thing and open it up to make it easier to put on and take off. Works pretty well, just have to clean up the edges.
Everything primed. There’s still plenty of surfacing work to do but it helps me visualize the proportions of the entire suit when it’s all the same color. The visor in the helmet isn’t real, just a mockup for funsies. Can’t see through it. I will be vacuum forming my own visor but that’s down the road yet.
And a test fit:


The belt is secured with a harness underneath the torso armor (which will be better hidden). The biceps are secured using 1” elastic strap on the inside. I’m definitely going to beef up the exposed shoulders with some padding, which I can also use to keep the biceps from drifting while I move.
That’s it so far. I’ll try to remember to take plenty of progress photos. I easily get hyperfixated on working.
Fun fact - I was completely blind wearing the helmet for these photos and just had to guess where the camera was.

