Farris 3D Print Infinite Build log

Farris

Active Member
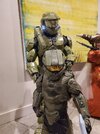
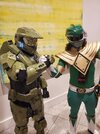
Alright... So.. My first MC build was back in 2009. In the time before times... When dinosaurs ruled the earth and pepakura was the new hotness. So much cutting and scoring. Had fun marching with the group at Dragon Con 2009. Even still have my 405th lanyard. Link here if you want to take a look: The olden times

Since then, I've been doing other costumes. Mostly 300 spartan. Along with sharknado and a few other fun things. Got a 3D printer, then another, and another, gave them all away, and then saw a guy from here called Draxes that made an awesome build on a Bambu Lab printer. And then I got the bug. So, really, I'm blaming this all on him. Bought a BBL P1S and am back at it. I've also ordered a relatively inexpensive vacuform table because I REALLY don't want to do the 2 layer motorcycle visor again.

I'm working off of Galactic Armory files for the armor and the Aguilar Workshop sidekick MK50. Still undecided on my undersuit pieces (I really don't want to print TPU if I can avoid it).

Everything is being printed in PETG (had too many experiences with warping PLA in GA heat) at .08mm layer height, because I obviously hate myself.

Current progress:
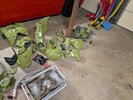
Pistol: Mostly printed. Just need bits and bobs added (got too itchy to print my bucket). Testing out springs for the slide mechanism. Plotting out where I can stick magnets for attaching to thigh armor. Small parts will be printed once the last helmet panel is done.
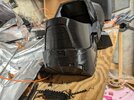
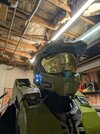
Helmet: All printed, except for back panel and detail pieces.

On deck:
Chest/back pieces: I've got the scale set in Armorsmith (also wish this was available back during my first build)

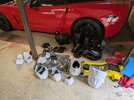
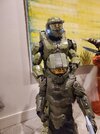
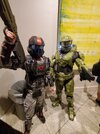
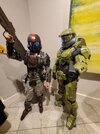
Current pictures:
PXL_20231217_134145972.jpg
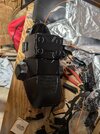
PXL_20231228_174831567.jpg
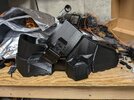
PXL_20231228_174835772.jpg
 
Looks great! And I admire your courage in printing in PETG. I'd love to know what glue compound you end up going with. Let me know if you are having any issues with the Galactic Armory files. I don't know if they have fixed the chest piece not fitting together correctly. The backpiece is a different scale from the front piece. It is VERY irritating to fix. And definitely do not rely on the armors locking mechanism. They suck.
 
Looks great! And I admire your courage in printing in PETG. I'd love to know what glue compound you end up going with. Let me know if you are having any issues with the Galactic Armory files. I don't know if they have fixed the chest piece not fitting together correctly. The backpiece is a different scale from the front piece. It is VERY irritating to fix. And definitely do not rely on the armors locking mechanism. They suck.
I have been printing in PETG for years with lesser printers so this is a piece of cake for me. Literally the first printer I've never had to tinker with.

Thanks to you, I knew to check the scaling and they definitely haven't fixed it. I brought the parts into the 3D Builder program in Windows and lined them up. I scaled the chest down to 98% and they lined up pretty close, so I think that's about the sweet spot. Might need to grind down where the arm hole edges don't seem to line up.

I'm definitely going to attempt magnets for lining parts up the chest and back. I never trust 3d printed interlocking to hold permanently.

For attaching the panels, I'm going all out. CA, then welding with a 3d printing pen at the seams and/or soldering iron, then using a hot stapler for a physical bond.
 
Oh man, I forgot about the arm holes. Make sure you make them ALOT bigger if you can. I edited mine digitally and made them alot bigger and it is still tight. I couldnt imagine if I hadn't done that how much more uncomfortable my armor would have been.
 
Its cool to see you come back to Halo cosplay! What made you come back and work on some Halo stuff?
It was my first costume project back when I was broke and I still show people the YouTube video of me showing it off literally 10 minutes after I finished it and people are still moderately impressed. Granted it doesn't hold up to today's standards, but I did ok. Video link below.


Just wondered what I could do now that I have more money, toys, and experience to throw at it.
 
Alright... update time.

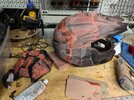
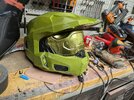
Last helmet panel printed after about a week of trial and error. Long story short, it is a minimum 30 hour print when using PLA for a support interface layer for my PETG prints. And I spent a lot of time working on settings for supports since they kept failing. But success. And it fits. Detail pieces printing now.

I hope to start printing the first chest panel tonight. Armorsmith shows that it'll fit, but I don't fully trust that yet. We'll see.

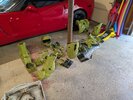
Fresh off printer, pre-cleanup photos below.

1000001400.jpg
1000001399.jpg

1000001398.jpg

1000001397.jpg
 
Torso pieces are printing now. I'm printing the top parts to make sure the scaling looks right (not too wide for my shoulders) before I print the lower parts. The first chest piece printed successfully. It has some surface blemishes, but nothing a little sandpaper and filler won't fix.

I have been seeing these surface blemishes on all the pieces and they've been bugging me, but not enough to do anything about since most will be cured with a light skimming of spot putty, which I would have to do anyway. But this morning I decided to do a filament calibration just to see...

AND OH MY GOD the immediate difference is huge. Blemishes are completely gone and I can barely feel the layer lines with my thumbnail. I might not need to do any sanding/filling at all. Or at least minimal. Now I'm debating if I just want to go back and re-print what I've already done. I probably won't re-print unless something goes horribly wrong and the finishing is too time consuming, but the option is there.

I should have the upper torso pieces done in the next few days. I'll post pictures for scale sanity check if I have any doubts.
 
Logging an initial decision before I forget:
I want to print the boot soles in TPU, or some other similar rubbery filament. I have time and the printer can handle it. It should be easier to walk on/have better traction/be more durable than just straight petg. On my last suit, I just cut a rubber horse mat with a box cutter. It was a giant pain in the butt, but it worked. The only "bad" decision I made on the boots of my old suit was using combat boots inside the costume boot. Those made it difficult to get the suit on/off.

Otherwise, prints are still going. No catastrophes with the last 2 pieces. Should have the last section for piecing the top of one side of the chest to top of one side of the back off the printer this afternoon.
 
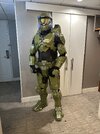
Alright... Need opinions on sizing. Pieces are literally being held together by scotch tape and a prayer right now. So jankier than I'd like.

The chest piece comes to the center of my chest (lined up on the star). The "ring" around the arm hole comes to the very edge of my shoulders.

I feel like this means I should scale down? Thoughts?
1000001427.jpg
1000001426.jpg
 
Looking at it from the front, it does look a bit wide. Judging from reference photos, (of a super soldier mech man whom I am positive is anatomically proportional) it looks like the edge of the chest pectoral plate should just at or inside the start of your arm pit. I bet if you can get the gasket ring to fall right in the crook of your arm pit, it should be pretty comfy and allow for some good mobility.

Excited to see it come together.
Thanks. I agree. I scaled it down to cut about 1.7 inches off of the overall width, which should bring it in much closer to reference photos, giving my shoulders about 3/4 of an inch out of the armor. First panel is printing now.
 
It’s a bit hard to tell if one piece’s scaling is off without the rest of the pieces. I like to make all the pieces before going back to remake any that may be scaled incorrectly.
 
I'm still building. Had a couple of setbacks. Mostly from being dumb. Computer restarted over night and I had forgotten to save and software didn't retain my state properly so I lost all of my cuts. Restarting the chest and back again, but had some spaghetti failures when tree supports break so just going to standard supports. Lesson learned.

On top of that, work has been nuts so I have been too exhausted to focus on this at the end of the day. But I think that is slowing down. Maybe. Hopefully.
 
This thread is more than 3 months old.

Your message may be considered spam for the following reasons:

  1. This thread hasn't been active in some time. A new post in this thread might not contribute constructively to this discussion after so long.
If you wish to reply despite these issues, check the box below before replying.
Be aware that malicious compliance may result in more severe penalties.
Back
Top