That visor came out awesome! Did you follow someone's tutorial or just do it yourself? If you did it on your own, I would love to see you post more details on how you did it since I have a visor just laying around waiting for a helmet to call home
That visor came out awesome! Did you follow someone's tutorial or just do it yourself? If you did it on your own, I would love to see you post more details on how you did it since I have a visor just laying around waiting for a helmet to call home
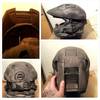
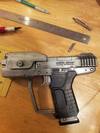
I didn't take any photos of the process. I kept thinking about it, but just was too excited to get moving on it. I followed http://www.405th.com/showthread.php/31352-Tutorial-Install-amp-Detail-your-visor to install it. I have two visors and covered the outer visor with painters taper and traced the opening of the helmet and then free-hand drew on the design. I based it off of pictures and my MC figure that is in a few of my pictures. I cut out the visor with a reinforced plastic cutting dremel wheel and used a multi purposed drill bit to get the holes. Then I used needle file to clean up the cuts.
I wish I took pictures, but like I said, I was too excited to move forward.
Bummer that you didn't. But just the same, you did a fantastic job on it. I too get really excited with my builds and in the past I didn't take photos of progress and later wished I did. Now I take many photos and just pick which ones to post... sometimes over-doing it a bit I guess, but hey... nobody has complained yet
Here is a super dumb noob question. What # card stock did you use? I've read people say to use 110# card stock to pep form, but isn't that too thick to go through a printer?
Here is a super dumb noob question. What # card stock did you use? I've read people say to use 110# card stock to pep form, but isn't that too thick to go through a printer?
I'm just throwing this out there. But for all the pictures that I have taken regarding this build are all on my Facebook page of my same name. Fell free to check them out there as well.
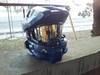
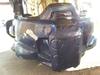
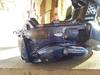
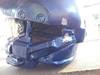
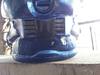
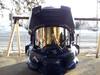
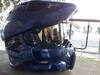
So I finished my helmet (short of the lights because RadioShack only had two of the four I need) and am quite pleased. I'm very happy with how the damage turned out and how it looks all dinged and dented (with all my years working in a metal shop and on mine sites I had certain expectation) and am just overjoyed. Now onto the rest of my suit.
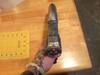
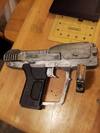
I promise I didn't stop working on my armor. Still working on my arms and juggling school and being a stay at home dad.
But I have gotten this done..............
")