Halo 2 Helmet (HD-WIP)

Status
Not open for further replies.

Nuts4Accuracy

Active Member
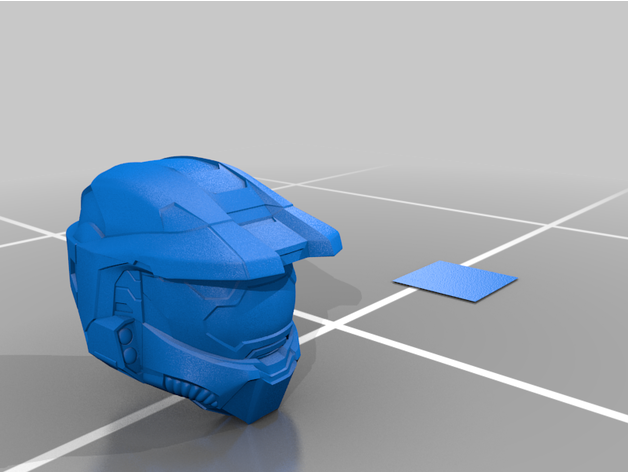
Hey guys, just a little project I'm working on to develop my blender skills (It actually gets surprisingly easy to work with, if you watch the right videos)

I was wondering if anyone could provide some straight, side, top and bottom reference photos of the OG Halo 2 Mk VI helmet? (Not the anniversary one)

Anyways, here's my progress atm. I used the original Halo 2 low poly game asset, although I couldn't find a texture that was good enough to use as a reference for the details.

269056

Side.PNG

profile.PNG


I'm not sure what to do with this model (If I finish it) I plan to make it 3d printable and free if I manage to finish it.
 
I don't have any reference material for you but I do have quite a bit of experience to lend you. If you're working in millimeters and have not scaled the model, most of the details found on the textures (seam lines primarily) have dimensions of either whole numbers or "nice" decimals, .75, .5, .25, .125, etc. This is what I've found with Halo 3 at least. Depth of cuts tend to either be the same as the width, or 2/3rds the width.
 
Front new model.PNG
profile new.PNG


finally got the nose piece to where I want it to feel accurate the game texture. Only took me $20 because I had the buy the halo 2 mk vi action figure to give me some better insight on how to achieve it.


Sadly- This... Like my other models. Does not match my OCD for perfection. So I will try my best to complete the model and then post it on thingiverse and work on a more accurate one. Prob from scratch.
 
Sadly- This... Like my other models. Does not match my OCD for perfection. So I will try my best to complete the model and then post it on thingiverse and work on a more accurate one. Prob from scratch.
It's not like Bungie made it easy to be a perfectionist either. A number of proportions/dimensions for parts are either totally unrealistic or physically impossible, despite not looking like it to a casual glance.

For what it's worth though, I think it's lookin' great!
 
It's done and published!

Once again, I don't usually test print these things so please tell me if you have any issues printing or just accuracy issues overall!


CRITICISM WELCOME! (It helps me improve)
271726
271727
271728
 
I've edited the helmet a little bit since I last made the model public. The helmet looks a little meaner now.

1580226532474.png


Some notable changes
  • Faces were able to be made flush with other spaced out faces using Looptool-flatten
  • Under-cap area was edited to add the ridge seen on the textured game model
  • the visor was pushed out a little bit further as originally, smoothing the visor caused it to lose its bulbous shape.
  • tweaks to nose area again
  • some U-channels were converted into V-channels
  • Replaced smoothing from crease-based smoothing to bevel weight smoothing (Little bit neater)
  • Changed angles of some trench details based on reference photos
  • Changed raised side plates (by the visor) into inset or sunk details which is more accurate by the looks of it.

Yeah. I have OCD. If I find an issue with accuracy, I have to remedy it.
 
Last edited:
bahaha I can't believe it's been a year and I'm still torturing myself to get this thing to perfection. When you find clearer reference pictures your stress levels go off the chart realising just how wrongly you interpreted a certain area xD

1608256074827.png

1608256105418.png

1608256179363.png


Vents were fixed to be much sharper.
Visor area was modified extensively.
That damn nose area was tweaked again, but now I'm happy at where it is.
Rear "chip" area is deeper and more pronounced.
Back of helmet where it meets the cap was given a groove.
The brow was made a little more "angular" and sharper.


This train is not going to stop until I have summoned the demon itself.
 
Status
Not open for further replies.
Back
Top