Gibson Slayer
New Member
Hi there! Hope you are doing well. On this thread I´m discussing onto how I made my MK50 Sidekick from Halo Infinite. I had seen some in 3d printing, but not a lot on EVA Foam. I hope this is useful for anyone getting into EVA foam, and of course: feedback is welcome. It´s my first weapon prop from EVA after all...
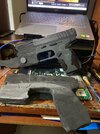
First off, I used a combination of 8mm foam and 5mm foam. I used my main reference/guideline Andrew DFT´s work. I saw his Youtube vid on the 2020 sidekick, but I liked more the 2021 sidekick, so I decided to print his template and modify it putting on the lantern on the downside.
Since there, I started drawing on the template 4 times on the 8mm and putting them one above another, trying to be as precise as possible. I used contact cement as glue, and since there: draw all the details with a pencil.
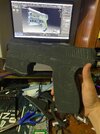
After that, I made on even more details, and used 5mm foam for the lantern, as it´s on a high relieve compared to the rest of the arm, I also checked out the in-game 3d model to keep on all the details.
After I finished making the base model, I sealed it up with a heat gun (for around 5 minutes, and used it on different layers of the paint), and used black paint and Hunter Green paint as a base paint.
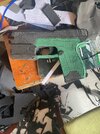
Next up, spray painted some parts. I checked out some videos and found how to apply different weathering tecniques depending on the material of the actual gun, but more on that later.
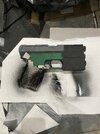 Taping is important for when you go up to spray paint. Make sure you cover all the things you don´t want painted. Use painters tape.
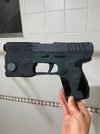
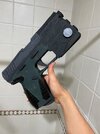
From on here, all the work was just finding out the right set of colors, and keeping all the detail. I mixed the hunter green paint with black paint, in order to give it a more realistic look. And mixed gray paint with black paint on the upper part. Also: for weathering I used sand paper and went on hard for the borders and parts where the dirt joins up, and soft in general parts. Even then: the metal parts of the gun have a different weathering than the plastic parts.
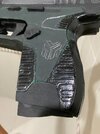
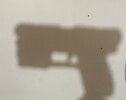
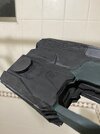
And that was basically all the process, it wasn´t as rocket science as I thought, but I still have some areas to upgrade, like hiding better the magnets. I hope to upgrade that for the MA40 Ar. And also: I failed during the process, here´s a look between the two versions. The change was astronomical.
And that was basically it, if you have any questions onto how I made certain parts, put them down. And of course: feedback is more than welcome for the future.
Last edited:
