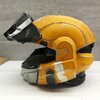
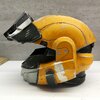
Foam ODST build 2.0

Status
Not open for further replies.

bajk02

Member
Eventhough I already have an ODST cosplay but that doesn't mean there isn't anything I would like to be improved or tweaked. And that's what this thread is all about... Making new and improved version of the existing cosplay parts.

First I'm gonna focus on the helmet. What I want to be changed in the new one are the vents that are unfortunately missing on my current helmet. As well as the look of the ear pieces.

20220903_133257.jpg

As you can see I didn't connected the dome with the rest of the helmet. That's because I'm currently waiting for the magnets to arrive. This way I will have an easier time figuring out and placing them in the correct spots.

And with those magnets I can have many attachments that I can mix and match.
20220903_182453.jpg
And here is the first one done. The Hardened UpLink. But there will be more on the way.
 
Love the helmet coming together.
But on the uplink didn't you think of using a dremel to make those bevels smooth?
 
Love the helmet coming together.
But on the uplink didn't you think of using a dremel to make those bevels smooth?
The picture of the UpLink was taken before I smoothed the bevels down. I wish I had a dremel but the trusty old sand paper also does the job.
 
The picture of the UpLink was taken before I smoothed the bevels down. I wish I had a dremel but the trusty old sand paper also does the job.
I hope one day you'll try to get a multi-tool cuz it's such an amazing tool while working with foam. Respect then for doing such great things without it so far.
 
I have bad and good news.
Unfortunately the magnets I ordered weren't able to keep the UA attachment the way I wanted. That means I'm gonna have to glue it in place permanently... but for the HUL attachment they work like a charm.

20220910_184308.jpg
20220910_184318.jpg


There are two more attachments that I would like to make: another HUL one and one with a flashlight so I can see when it's dark.
 
Another update.
Here's another HUL attachment done. Not my best work but it turned out Ok.

20220911_182116.jpg
20220911_182301.jpg
20220911_182148.jpg


I think I will wear this one less often because it's just a little bit more unstable than the other one. Don't get me wrong it sticks to the helmet nicely but it can be detached easier.
 
It's this time again. Update time.

To start things off I finally completed the helmet in terms of building it. I know it took me a while but I finally added those protruding parts on the side of the vents as well as parts around the back of the neck and around the chin.
20220914_182010.jpg


The next thing I did was to grab adhesive caulk and fill all the seems and smooth them out. Additionally I also smoothed some of the rough surfaces created from the cutting.
20220917_135436.jpg


I also want to mention that I primed everything and the painting process will begin soon.
 
When in doubt double the magnets up! Having a "2 stack" of magnets on either side (or both) can help to improve the adhesion by quite a lot!
 
Great improvements so far. New helmet looks great with those new details and attachments.
As for magnets I can only suggest magnetic SNAP attachments by FIdlock. They come in different sizes and shapes and I'll want to try them myself on the costume as they feature both magnetic locks and additional mechanical locks like U-shape that can add more security. They aren't as insivisible as normal magnets however but from what I've seen so far, they are really small if you won't mind them being more visible.
 
It's about time that I should make another update.
So the helmet is finished but before getting into the final result let's see how I get to it.

Picking up where I left before, after I got most of the seems smoothed I primed everything with spray rubber. I don't have any pictures of this process so let's continue.
Next I started painting the helmet along side with attachments. The UA and one one of the HUL attachment got the base paint job finished earlier than the rest.
20220918_190047.jpg

Then I continued painting. And here's how the helmet looked before weathering.
20220921_202842.jpg
About those dark spots on the sides... Those are the unpainted areas that I left for the gluing of the UA attachment. I did not wanted to glue directly on the paint itself because I was afraid that the attachment could, with enough fore, fall of and chip away the layer of paint.

But moving on. Now is the time for the weathering. And here's how's it turned out.
20220923_185419.jpg
20220923_185429.jpg
20220923_185437.jpg
20220923_185448.jpg
And honestly that's gotta be one of my finest weathering jobs I did so far.

Then I added the visor and padding inside the helmet. And here's the final result compared to my old helmet.
20220923_212641.jpg


This is the end of this thread for now... unless I start working on a different part of the cosplay. So see you in this thread in a not so distant future.
 

Attachments

  • 20220923_185429.jpg
    20220923_185429.jpg
    6 MB · Views: 120
  • 20220923_185429.jpg
    20220923_185429.jpg
    6 MB · Views: 122
Very big improvement with the new helmet over the old one. Not only the details but everything. Very nicely looking helmet.
 
That paint job is absolutely gorgeous. Orange is my favorite color; that plays heavily into it, but I also enjoy (and want to make my own) ODST builds (and builds in general) with non-game-standard paint jobs. It's wonderful, and you did a very good job.
 
Eventhough I already have an ODST cosplay but that doesn't mean there isn't anything I would like to be improved or tweaked. And that's what this thread is all about... Making new and improved version of the existing cosplay parts.

First I'm gonna focus on the helmet. What I want to be changed in the new one are the vents that are unfortunately missing on my current helmet. As well as the look of the ear pieces.

View attachment 322832
As you can see I didn't connected the dome with the rest of the helmet. That's because I'm currently waiting for the magnets to arrive. This way I will have an easier time figuring out and placing them in the correct spots.

And with those magnets I can have many attachments that I can mix and match. View attachment 322834 And here is the first one done. The Hardened UpLink. But there will be more on the way.'
Coming along great!
 
What do you use for the visor? I am currently working on a mando helmet and want a different kind of visor than what I have for it currently
 
Status
Not open for further replies.
Back
Top