The Great Journey Has Begun!

Status
Not open for further replies.

Spartan 0022

New Member
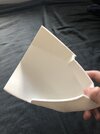
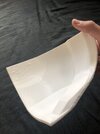
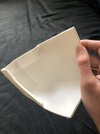
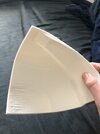
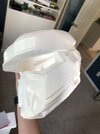
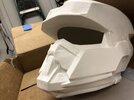
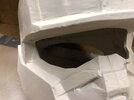
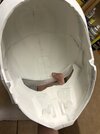
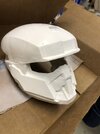
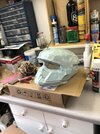
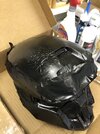
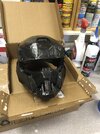
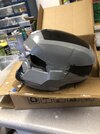
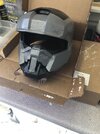
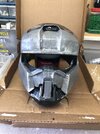
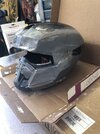
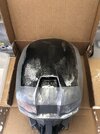
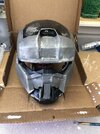
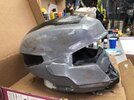
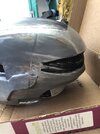
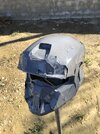
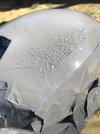
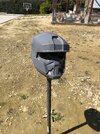
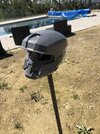
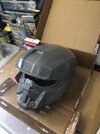
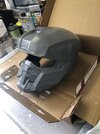
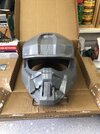
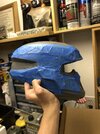
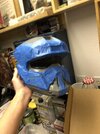
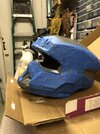
So I finally started to print my EOD helmet, and other than one crack that was remedied with a dab of super glue, the thing is turning out pretty well as far as I can tell. While I’m still a rookie with this whole 3d printing thing, I came to ask a few questions about later on.


First off, what’s the best type of glue to use, and should I sand it after I glue? For paint, is acrylic and spray paint fine? Should I also paint the inside? And I have an airsoft shop near me that sells visors, could I get one of those and cut them? (Not safety related, just asking if it is possible and could work). Should I use only pads to hold it on my head, or a rope system like what firefighters and military helmets use, so it won’t bounce around?

Thank you!
 

Attachments

  • image.jpg
    image.jpg
    1.5 MB · Views: 106
  • image.jpg
    image.jpg
    1.5 MB · Views: 118
  • image.jpg
    image.jpg
    1.6 MB · Views: 99
  • image.jpg
    image.jpg
    1.6 MB · Views: 115
  • image.jpg
    image.jpg
    1.3 MB · Views: 109
So I finally started to print my EOD helmet, and other than one crack that was remedied with a dab of super glue, the thing is turning out pretty well as far as I can tell. While I’m still a rookie with this whole 3d printing thing, I came to ask a few questions about later on.


First off, what’s the best type of glue to use, and should I sand it after I glue? For paint, is acrylic and spray paint fine? Should I also paint the inside? And I have an airsoft shop near me that sells visors, could I get one of those and cut them? (Not safety related, just asking if it is possible and could work). Should I use only pads to hold it on my head, or a rope system like what firefighters and military helmets use, so it won’t bounce around?

Thank you!
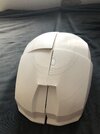
I recommend super glue for tacking the helmet together and an epoxy to back the seams after that. I have a full 3d printed helmet build tutorial if you'd like a bit of a walk through to help you out on your build. I use an ODST helmet but all the concepts are the same. Let me know if you'd like a link!
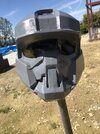
The tutorial goes over the entire exterior of the helmet minus the visor, each helmet is a bit different in that regard. I don't go over any of the internal components, but you can use pretty much any kind of foam for the interior or you can buy helmet padding. I don't recommend using a chin strap, I put one on my last helmet and never ended up using it so it was wasted effort.
Cool! I’ll gladly watch it, could I get that link?
 
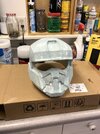
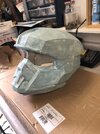
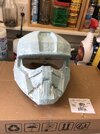
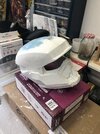
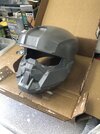
Well sorry guys, forgot to upload the last two days, helmet is turning out amazing, and Delta, the video is incredibly helpful.

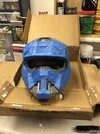
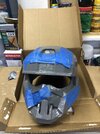
Blue is the putty, white is after primer, still need to wet sand with 800 grit, then dry with 2000, and finally the paint. I know it is a tad rough, but this is also my first helmet.
 

Attachments

  • IMG_5859.jpeg
    IMG_5859.jpeg
    1 MB · Views: 91
  • IMG_5860.jpeg
    IMG_5860.jpeg
    1,003.3 KB · Views: 119
  • IMG_5861.jpeg
    IMG_5861.jpeg
    1 MB · Views: 94
  • IMG_5862.jpeg
    IMG_5862.jpeg
    1.1 MB · Views: 118
  • IMG_5841.jpeg
    IMG_5841.jpeg
    1.5 MB · Views: 96
  • IMG_5836.jpeg
    IMG_5836.jpeg
    1.4 MB · Views: 88
  • IMG_5835.jpeg
    IMG_5835.jpeg
    1.7 MB · Views: 107
  • 4D0C7CC0-D4CE-429A-913B-FDD174AC46FA_1_105_c.jpeg
    4D0C7CC0-D4CE-429A-913B-FDD174AC46FA_1_105_c.jpeg
    201.7 KB · Views: 97
Well sorry guys, forgot to upload the last two days, helmet is turning out amazing, and Delta, the video is incredibly helpful.

Blue is the putty, white is after primer, still need to wet sand with 800 grit, then dry with 2000, and finally the paint. I know it is a tad rough, but this is also my first helmet.
Your helmet is looking great! I'm glad I could help!
 
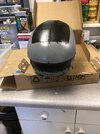
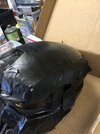
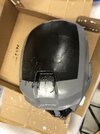
Another week, another batch of photos, me re puttying the top because of the lines still being visible a bit, then grey paint. Then came the taping, which i re did. Then black. Weird markings that appeared when the spray paint was on it. That side disappeared but it appeared on the other side (look at the photos with black and tape)

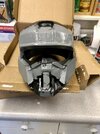
Then came the tape off, color reveal (yaaay) and me fixing it up pre weathering, then after weathering. Prob gonna repaint (hand brush) some of the weathered areas because I went a bit overboard. Good news is i find this pretty great. Bad news is I’m still missing my visor.
 

Attachments

  • D1381A65-C540-4358-8A61-5295A9C179A0.jpeg
    D1381A65-C540-4358-8A61-5295A9C179A0.jpeg
    1.3 MB · Views: 94
  • BACF62AA-F280-4638-8EBF-009BED642BCD.jpeg
    BACF62AA-F280-4638-8EBF-009BED642BCD.jpeg
    1.7 MB · Views: 108
  • E351C737-BAE5-4D3E-9A54-D0C7F945E014.jpeg
    E351C737-BAE5-4D3E-9A54-D0C7F945E014.jpeg
    657.2 KB · Views: 78
  • 121C8E0D-81E3-4A86-8BDC-A87194DAE123.jpeg
    121C8E0D-81E3-4A86-8BDC-A87194DAE123.jpeg
    1.4 MB · Views: 131
  • 4459A7CA-7BAC-4D39-921B-53B75BC1FE75.jpeg
    4459A7CA-7BAC-4D39-921B-53B75BC1FE75.jpeg
    1.5 MB · Views: 83
  • C6A68673-78FD-412B-992C-E4A4CDBD6A2D.jpeg
    C6A68673-78FD-412B-992C-E4A4CDBD6A2D.jpeg
    1.1 MB · Views: 97
  • F06ECE40-217A-4BB4-9AEF-4097B75EAA98.jpeg
    F06ECE40-217A-4BB4-9AEF-4097B75EAA98.jpeg
    1.1 MB · Views: 98
  • 8B0219FB-DC33-4C80-BFBF-1764C79B6381.jpeg
    8B0219FB-DC33-4C80-BFBF-1764C79B6381.jpeg
    1.3 MB · Views: 88
  • AEE7F57E-D9A8-4830-82ED-3D8574D8C8AC.jpeg
    AEE7F57E-D9A8-4830-82ED-3D8574D8C8AC.jpeg
    1.4 MB · Views: 89
  • D20DC0E6-1681-4C4F-89EA-AD6745DB4034.jpeg
    D20DC0E6-1681-4C4F-89EA-AD6745DB4034.jpeg
    1.5 MB · Views: 105
  • C068ABD6-9C35-4B20-8C11-4728B35F2F7C.jpeg
    C068ABD6-9C35-4B20-8C11-4728B35F2F7C.jpeg
    1.4 MB · Views: 101
  • CDF55B2D-6E9B-4E44-AF4F-D0453B8CEF36.jpeg
    CDF55B2D-6E9B-4E44-AF4F-D0453B8CEF36.jpeg
    1.4 MB · Views: 96
  • 298A5747-FFC0-4B4F-96D6-BD07046747D3.jpeg
    298A5747-FFC0-4B4F-96D6-BD07046747D3.jpeg
    1.5 MB · Views: 99
  • 60F6B6A4-CEA7-40D4-A963-B7DB0E9CDB54.jpeg
    60F6B6A4-CEA7-40D4-A963-B7DB0E9CDB54.jpeg
    2.6 MB · Views: 97
  • 9478FFF6-4BF4-4CA5-912B-D50D5D4E12D6.jpeg
    9478FFF6-4BF4-4CA5-912B-D50D5D4E12D6.jpeg
    1.2 MB · Views: 76
  • 4CDB3442-2423-4BAE-8871-58E9D4693755.jpeg
    4CDB3442-2423-4BAE-8871-58E9D4693755.jpeg
    1.7 MB · Views: 109
  • B306DD37-2FD8-4B88-9A7C-ADB756062F6D.jpeg
    B306DD37-2FD8-4B88-9A7C-ADB756062F6D.jpeg
    1.1 MB · Views: 87
  • A373AC53-EF3D-48AB-B567-49E985832D98.jpeg
    A373AC53-EF3D-48AB-B567-49E985832D98.jpeg
    1.4 MB · Views: 93
  • AF44DA34-4FFD-4991-9724-A29935A53A69.jpeg
    AF44DA34-4FFD-4991-9724-A29935A53A69.jpeg
    180.7 KB · Views: 86
  • 374483CA-5E1D-4E73-BC2B-46D8739EACD2.jpeg
    374483CA-5E1D-4E73-BC2B-46D8739EACD2.jpeg
    2.4 MB · Views: 99
  • 5509DABC-3B18-42CF-A6AF-050DA432C624.jpeg
    5509DABC-3B18-42CF-A6AF-050DA432C624.jpeg
    1.4 MB · Views: 80
  • 0FBFC4DD-D4AA-4F83-B447-4795D7C9B0CF.jpeg
    0FBFC4DD-D4AA-4F83-B447-4795D7C9B0CF.jpeg
    3 MB · Views: 94
  • 8FD93E73-F9E8-4EBD-BDD8-176D7225020F.jpeg
    8FD93E73-F9E8-4EBD-BDD8-176D7225020F.jpeg
    1.6 MB · Views: 99
  • 86414D1D-1749-4CD9-B80F-9ABEAD509DAC.jpeg
    86414D1D-1749-4CD9-B80F-9ABEAD509DAC.jpeg
    1.4 MB · Views: 89
  • 3F294381-DD40-4E30-9D9A-B4F7D0692652.jpeg
    3F294381-DD40-4E30-9D9A-B4F7D0692652.jpeg
    1.2 MB · Views: 84
  • 6D4F2C7F-A489-461A-844B-70B07912E206.jpeg
    6D4F2C7F-A489-461A-844B-70B07912E206.jpeg
    1.5 MB · Views: 98
  • 18C0C9C7-12C3-4865-809F-DDB4039ECE19.jpeg
    18C0C9C7-12C3-4865-809F-DDB4039ECE19.jpeg
    1.5 MB · Views: 128
  • FEBAA9A8-B9AC-4CC1-B2B6-101E3804808E.jpeg
    FEBAA9A8-B9AC-4CC1-B2B6-101E3804808E.jpeg
    1.3 MB · Views: 99
  • 2C31319F-DE7C-4D37-8244-552551F097BA.jpeg
    2C31319F-DE7C-4D37-8244-552551F097BA.jpeg
    1.3 MB · Views: 83
  • AD50F49B-E544-49A1-BCCA-73B6D2FE59AB.jpeg
    AD50F49B-E544-49A1-BCCA-73B6D2FE59AB.jpeg
    1.2 MB · Views: 85
  • 80071F8C-C1E7-4CCC-9913-1FF310E5348F.jpeg
    80071F8C-C1E7-4CCC-9913-1FF310E5348F.jpeg
    1.4 MB · Views: 93
  • 53A09438-9E1A-4A75-9676-05E917742C29.jpeg
    53A09438-9E1A-4A75-9676-05E917742C29.jpeg
    1.4 MB · Views: 93
  • CE07C256-DA53-4E85-A7C1-3AB0787D23B5.png
    CE07C256-DA53-4E85-A7C1-3AB0787D23B5.png
    2.9 MB · Views: 90
Oh yeah, so couple of questions, how do you get the really defined edge lines on the helmet. I was able to get some decent ones on some areas (cheek) but is there a better way?
 
Oh yeah, so couple of questions, how do you get the really defined edge lines on the helmet. I was able to get some decent ones on some areas (cheek) but is there a better way?
Great work so far! If you're looking to get a sharp edge, basically it's just more sanding at the right angles with increasing grit to get it sharp. However, real metal doesn't come like this (because of the fine tip it would come to, it'd get damaged quite easily and be dangerously sharp), so if you got part way there and slightly rounded it off, not only would it look more realistic, it helps reflect the light on those edges and looks more appealing.
 
Oh yeah, so couple of questions, how do you get the really defined edge lines on the helmet. I was able to get some decent ones on some areas (cheek) but is there a better way?
I use dry brushed edge weathering during the end processes of making armor to give more natural worn edge definition.
 
Ok, do you dab it on then smear, or drag it around? I have watched your vid (thank you) at least 12 times trying to get the right ways.
Basically you get the silver spray paint on a piece of cardboard or something like that, brush into it, then very lightly brush it against the edge of the prop or armor piece. The stiffer the brush the easier this is to do. You just barely want to make contact with the part to keep control of the weathering. Also I appreciate it!
 
Status
Not open for further replies.
Back
Top