BinaryHe1ix
Jr Member
Hey there all! New poster and first time builder, so comments and advice is definitely welcome.
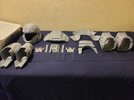
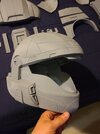
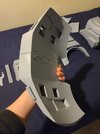
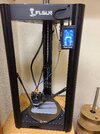
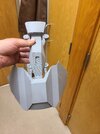
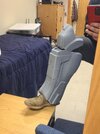
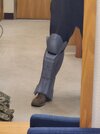
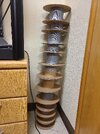
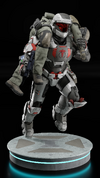
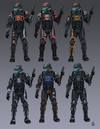
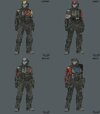
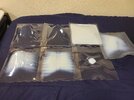
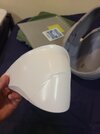
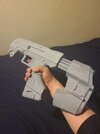
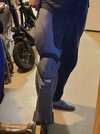
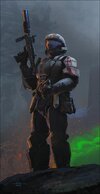
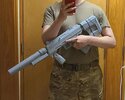
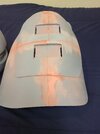
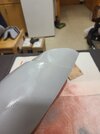
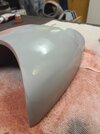
So a bit of backstory, my first cosplay experience was Dragoncon 2022. I had an absolutely fantastic time, but my costume was basically all purchased pieces (went as Ghost from CoD Modern Warfare). While home visiting family I messed around with my dad's 3D printer and was hooked almost instantly. Not long after I got myself an FLsun Super Racer and started working on random props, just teaching myself how everything worked. Decided not long after that to get started on a full suit that I'd always wanted - Rookie's ODST armor from Halo 3: ODST. I didn't document the beginning stages of the build, but here's where everything is at for now. Ran into issues here and there (obviously, it's a 3D printer!) but so far nothing too major. The last bug I had was driving me insane for about a week, couldn't get anything to stick to the bed without instantly curling back onto the nozzle, but finally have it figured out and part production is back on track. The majority of the larger, longer prints are done minus the upper calves and thighs. Getting close enough to assembly and finishing that I've ordered the webbing and buckles for strapping and done some concept work on how everything is going to buckle together. After all the effort of getting things to print properly and the headaches, it's starting to feel like part one of the whole journey is coming to a close. Really excited to be able to start wearing pieces!
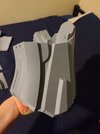
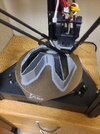
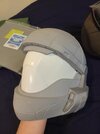
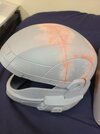
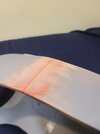
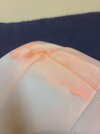
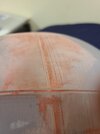
For those interested, the files are from FromTheBrink's store on Etsy. I've been extremely impressed with the quality of the models and the attachment methods he uses, and I've had no issues with them. The only thing I would say is that the models are DENSE. You can see in the chest plate picture just how thick these pieces are. You're going to use a lot of filament and they're going to be heavy, but I haven't seen anything that comes close to how solid these things are. Which works for me because I wanted something that felt/looked heavy duty and was willing to deal with extra weight, but might not work for everyone.
Thanks for reading, hopefully have some assembly updates before too long!
So a bit of backstory, my first cosplay experience was Dragoncon 2022. I had an absolutely fantastic time, but my costume was basically all purchased pieces (went as Ghost from CoD Modern Warfare). While home visiting family I messed around with my dad's 3D printer and was hooked almost instantly. Not long after I got myself an FLsun Super Racer and started working on random props, just teaching myself how everything worked. Decided not long after that to get started on a full suit that I'd always wanted - Rookie's ODST armor from Halo 3: ODST. I didn't document the beginning stages of the build, but here's where everything is at for now. Ran into issues here and there (obviously, it's a 3D printer!) but so far nothing too major. The last bug I had was driving me insane for about a week, couldn't get anything to stick to the bed without instantly curling back onto the nozzle, but finally have it figured out and part production is back on track. The majority of the larger, longer prints are done minus the upper calves and thighs. Getting close enough to assembly and finishing that I've ordered the webbing and buckles for strapping and done some concept work on how everything is going to buckle together. After all the effort of getting things to print properly and the headaches, it's starting to feel like part one of the whole journey is coming to a close. Really excited to be able to start wearing pieces!
For those interested, the files are from FromTheBrink's store on Etsy. I've been extremely impressed with the quality of the models and the attachment methods he uses, and I've had no issues with them. The only thing I would say is that the models are DENSE. You can see in the chest plate picture just how thick these pieces are. You're going to use a lot of filament and they're going to be heavy, but I haven't seen anything that comes close to how solid these things are. Which works for me because I wanted something that felt/looked heavy duty and was willing to deal with extra weight, but might not work for everyone.
Thanks for reading, hopefully have some assembly updates before too long!